Welcome to Nikon School. The official Nikon education experts to help you learn how to get the best from your Nikon Camera and Lenses

Your Essential Guide to Landscape Photography with Nikon School

Want to start shooting landscapes or improve the ones you’re already taking? Then check out these expert tips from Nikon School Training Manager Neil Freeman and transform your landscapes from quick snaps you want to consign to the big cloud in the sky into accomplished images you want to hang on your wall.

Want to start shooting landscapes or improve the ones you're already taking? Then check out these expert tips from Nikon School Training Manager Neil Freeman and transform your landscapes from quick snaps you want to consign to the big cloud in the sky into accomplished images you want to hang on your wall.

Gear up

Before you can get started with landscape photography, you'll need to make sure you have suitable kit in order to get the best results. Have a look at our ideas below to work out what you'll need to get started...

DX camera choices…

Any of our DX range of DSLRs are great for landscapes, but I particularly love the D7500 as it's so lightweight, making it easy to carry around when you're exploring the great outdoors, and the image quality is superb.

…and lenses

As for lenses, the new 10-20mm f/4.5-5.6 DX lens is perfect for sweeping landscapes, with a lightweight, compact build and an ultra-wide field of view. I used it recently in Norway to capture the grandeur of the fjords and the stunning locations along the coastline. The new 8-15mm f/3.5-4.5 – our first fisheye zoom – will give you a similar result on a DX camera. A great 'go-to' lens when you want to travel light is the mid-range 18-300mm telephoto , giving you lots of flexibility – use it at the 300mm end to compress perspective, isolate subjects and bring far details forward, while the 18mm end is ideal for panoramic shots.

FX camera choices…

If you're in the full-frame market, the new brand flagship D850 packs 45.7MP resolution to provide superb picture quality for landscapes, while being fast enough to capture any wildlife images while you're out and about. The 36.3MP, FX-format D810 is also specifically designed for landscape shooting, while the D750 is another great option, with a compact design that's perfect for all-round travel photography.

....and lenses

With an FX body, go for the 16-35mm f/4 VR or the 14-24mm f/2.8 , which has near legendary status among pro landscape photographers for its astonishing sharpness, while the 8-15mm fisheye gives you scope to be a little more experimental with your imaging.

For an all-round hero lens, go for something like the 24-70mm f/2.8 VR , the most widely used pro lens in our line-up for its image and build quality, and the flexibility of that wideangle to medium-telephoto range. The 24-120mm f/4 VR offers similar pro-style flexibility at an enthusiast's price.

If you really want to get into fine control of depth of field – determining how sharp the image is from front to back – then take a look at the new 19mm PC-E lens, which gets rid of converging verticals before you even press the shutter, giving you infinite depth of field from where you're standing to the horizon. You need time to set it up, but that's a good thing, as it means you'll take a more considered shot. It also rotates and shifts, while our other PC-E lenses in the series are shift-only, so using it is as close as you get to replicating the movements of a large-format camera, but without the heft and hassle. Another great option for landscapes is the 24mm PC-E .

The one-stop shop solution

If I had to take just one body and lens on a trip, I'd go for the D750 and 28-300mm f/3.5-5.6 VR . Yes, I'm sacrificing some sharpness compared to the 24-70mm, but with this set-up I've got a relatively lightweight kit that can do everything I could want it to – even shooting sharp shots handheld at the telephoto end, thanks to the VR feature.

Tripod

For any landscape work it's a good idea to shoot with the camera mounted on a tripod to keep your camera and lens steady and reduce the risk of camera shake, particularly at slower shutter speeds; it also gives you time to really think about your composition.

When you're choosing a tripod, remember to look at the weight loading on the head as well as on the legs, and make sure it's capable of taking both your camera and your heaviest lens. It's always going to be a trade-off between weight and versatility – lightweight models are easier to carry but won't be as stable in high winds or in flowing water, and might struggle to take the head you want, while heavier tripods are more stable in wind and water but more awkward to carry around.

Carbon fibre gives the best of both worlds – sturdy, with a high load rating, and lightweight too, although you will pay more for this convenience. If your budget doesn't allow for carbon fibre, use aluminium – but never plastic. Manfrotto and Gitzo are good, sturdy brands we are happy to recommend at Nikon School.

L bracket

An L bracket is also a good idea with a tripod. The usual mount position for the camera is horizontally on the tripod head, but if you want a vertical shot and flick the head into a vertical position, its screw mount may not be strong enough to take the weight of your DSLR and lens. An L bracket fits underneath the camera and is fixed directly to the tripod plate, so that when you go from horizontal to vertical the weight is still going through the tripod. Most pro photographers use L brackets; there are a variety on the market from manufacturers such as Kirk Industries, Really Right Stuff (RRS) and Three-Legged Things.

Remote release

With tripod shooting you'll also need some kind of remote release to minimise the risk of camera shake. Go for the ML-L3 infrared remote controller, or the WR-T10 wireless system if your camera has a 10-pin socket, or a plug-in remote like the MC-30 or the MC-36A , which is ideal for more complex timing needs.

Filters

Most magazine-standard shots aren't achievable without filters, and of the many types on the market, neutral density (ND) and neutral density graduated (ND grad) filters are the landscape photographer's best friends.

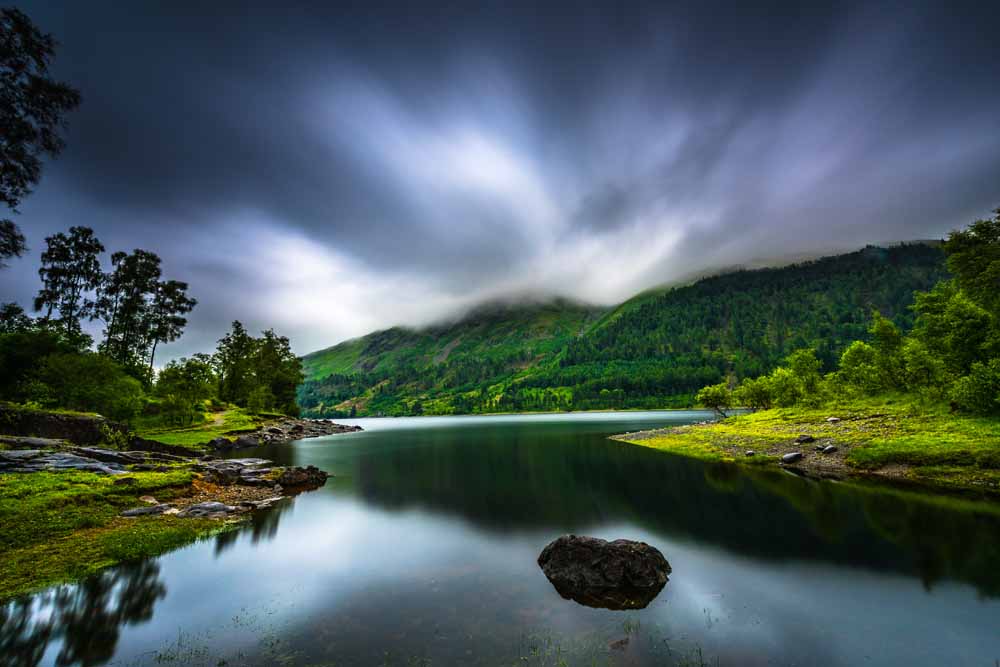
An ND grad evens out exposure when the sky is brighter than the landscape – so it's especially useful for sunrises and sunsets. Dark at the top and clear at the bottom, it darkens down the sky while retaining detail and preserving highlights, which brings out any cloud, too. You can get ND grads in different strengths (e.g. 0.6, 0.9) and hard or soft versions. A soft-edge grad tapers from dark to clear, but the tapering means it won't do anything to clouds on the horizon, whereas a hard-edge ND grad works on everything right down to the horizon, and for that reason I prefer to use a hard ND grad.

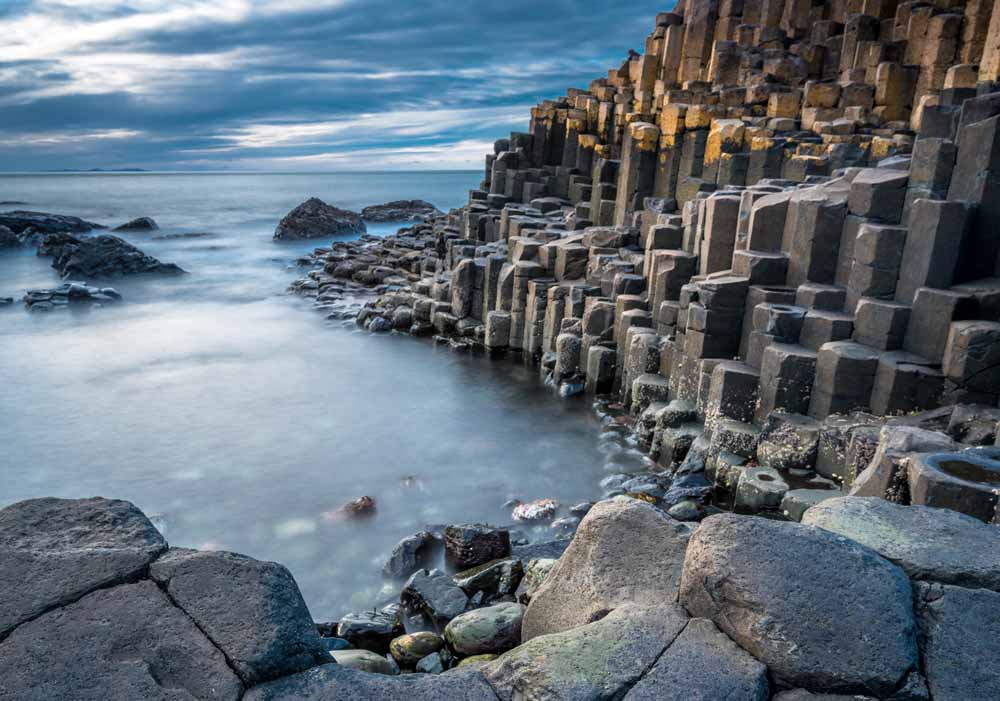
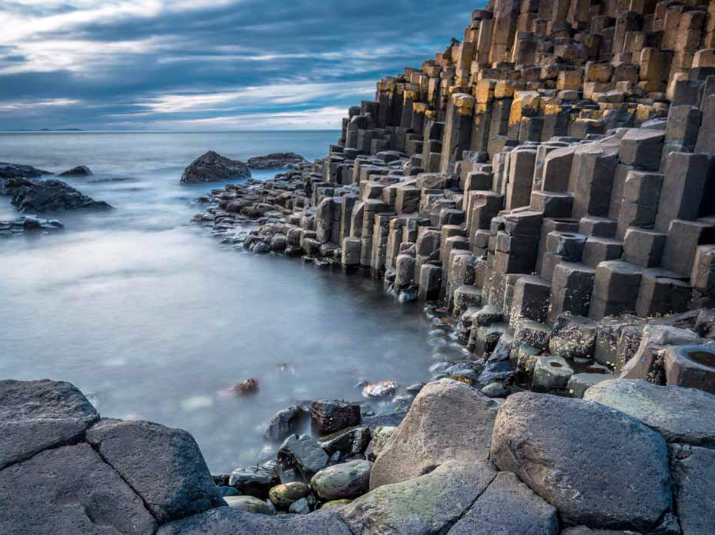
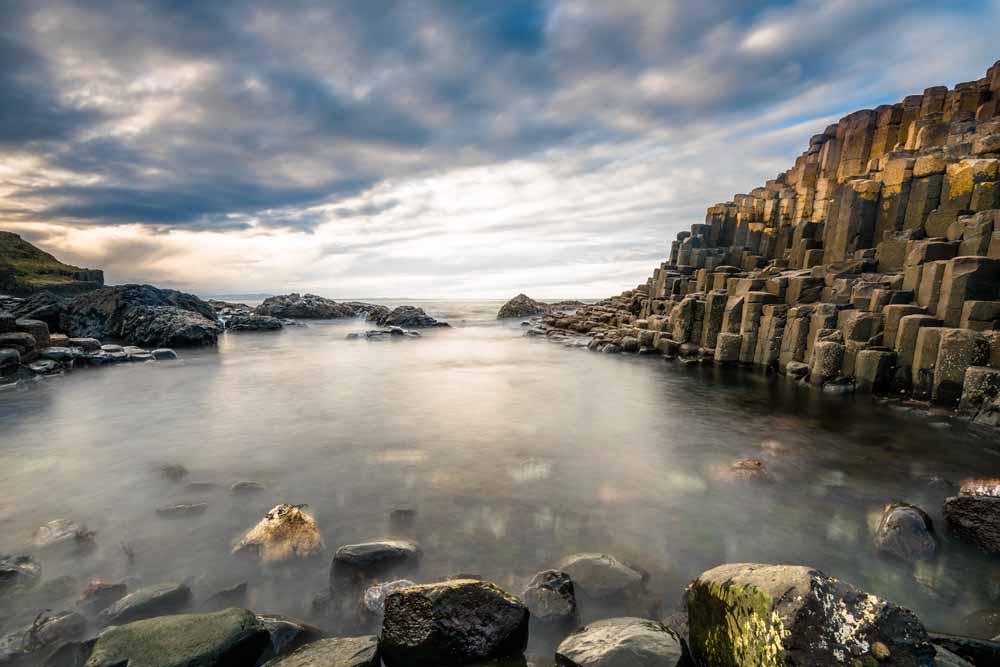
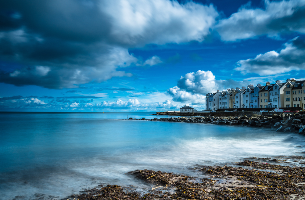
A neutral density filter helps you slow down your shooting speed which is vital if you want to create a milky effect with running water or smooth choppy waves, especially on a bright day. They come in a range of strengths, with Lee Filters' Big Stopper cutting 10 stops of light from the image to enable a far longer shutter speed than otherwise possible.

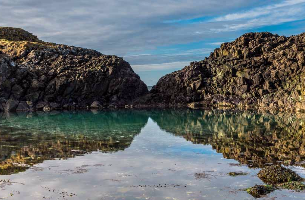
A polariser is another useful filter – great for cutting reflections from the water's surface so you can see through it, or for enhancing the colour of foliage, especially after it's been raining and it's covered in water droplets. You can also use a polariser to deepen the colour of the sky and add contrast, but once you're using a focal length under 28mm you'll start to get uneven polarisation in the sky, which looks odd, so a polariser is best avoided with very wideangle lenses.

Ultraviolet (UV) and daylight filters are used by some photographers to protect the lens's front element, which can be useful when you are shooting on a beach, for example, to avoid sand scratches, but I tend not to bother as I am worried they will degrade the quality of the image. Instead I usually use a lens hood for protection, and to cut down on the risk of glare in bright conditions.

Techniques

Now you've got your camera equipment sorted, it's time top get our into the great outdoors and start shooting! Take a look at the basic techniques below to help you get started.

Shooting mode

The go-to landscape setting is aperture priority, selecting around f/11 (up to f/16 at a push) for a wide portion of acceptably sharp depth of field. Beyond that, you'd get diffraction and the image would get softer, so it's a pay-off. You can add an ND filter to enable a slower shutter speed if necessary, or fine-tune the exposure using exposure compensation to get the results you want to achieve.

If you need a much longer exposure – around 30 seconds or more – you need to be in manual shooting mode and select bulb within that, and time your exposures using the timer on your phone or a stop watch. With such longer exposures, turning off the Auto ISO function and make sure the long exposure noise reduction feature is switched on.

ISO

With the camera tripod-mounted, you can now choose a low ISO setting to maximise your image quality. Depending on your camera, either ISO 64 or 100 will produce a very high quality image. By using a low ISO, the camera sensor is not as sensitive to light, so this will enable you to have longer (i.e. slower) shutter speeds.

White balance

I generally start with auto white balance as it's very, very good. If that doesn't give me what I want, I'll put it into custom Kelvin mode, where the lower you go (e.g. 3000K), the bluer and cooler your results will be and the higher you go, the warmer and more orangey/yellow your shot (around 8000 is great for warming up sunrises). 5560K is the typical 'daylight' setting.

RAW v JPG

Ideally, shoot in RAW/NEF to be sure of getting the most dynamic range out of the sensor and to give yourself the widest range of editing options in post-production on your computer – otherwise, choose large Fine JPG setting for good 'straight out of the camera' results.

Composition

Compositional 'rules' are a great place to start if you have no idea how to frame, but do bear in mind that these rules can be broken when you've developed your eye for an image. Try these for starters:

Rule of thirds – imagine the frame divided up by a noughts and crosses grid, into thirds both horizontally and vertically, and position key parts of your composition where any of the lines cross. If the sky is good, position the horizon two-thirds of the way down your frame, or one-third from the top if you've got an interesting foreground and the sky is dull.
Leading lines – these will track in from one of the edges or corners of the frame towards your subject, from the top corner into the image, directing the viewer's eye into the key point of the picture.
• Negative space – this is where your subject has lots of space around it to emphasise a simple, uncomplicated composition.

Metering

I would recommend matrix metering as the standard setting for landscapes, as it averages the exposure across the scene, and will be very accurate in most locations. If you have extremes of contrast, i.e. bright sky, darker foreground or vice versa, you should still use matrix metering and then think about using an ND grad filter.

Focusing

While autofocus is a good way of focusing your camera, for critical sharpness in landscapes, try switching the lens and camera to manual focus and switch on Live View focusing. Move the focus square to a point on a subject that you want to be in sharp focus (ideally around a third of the way into your frame), then use the touch screen or navigation buttons to zoom in tight on it on the screen. Now use the lens's manual focus ring to get critically sharp focus on the subject. Next, press the minus button on the back of the camera to zoom back out, switch into mirror lock-up mode, trigger the camera via remote release to lift the mirror, wait a couple of seconds for any micro vibrations in the shutter chamber to dissipate, then press the shutter release again with the remote to take the picture and drop the mirror back down.

Histogram

You can use the histogram on the LCD screen to check for good tonal range from shadows to highlights. Ideally you would want to see a good tonal range from edge to edge on the histogram. If it is roughly a 'bell shape' then great, but this is not always possible as it depends on the ranges of colours and tones in the scene you're photographing. Don't get too hung up on it in-camera, though, just use it as a quick guide – it's a much more useful and accurate tool when editing your images in post-production.

Perfect landscape locations

We're spoilt for choice in the UK and Ireland. These are some of the Nikon School team's favourites:

• Antrim – Giant's Causeway coastline
• Dorset coastline – Durdle Door and beyond
• Glencoe – one of Europe's last great wildernesses
• Lake District – lakes, tarns and mountains
• Northumbrian coast – castles and seascapes
• Snowdonia – formidable mountains
West Cornwall – beaches, rugged seascapes and moorland
• Wicklow Mountains – Lakes and peaks
• Yorkshire Dales – waterfalls , valleys and ruins

Nikon School Training

All of the photos in this article were taken by Nikon School Training Manager Neil Freeman. If you'd like to find out more about improving your landscapes on location with the Nikon School experts, check out our latest workshops here .

Want to read offline?

You can now download a PDF version of this Hints & Tips article to read offline and print

DOWNLOAD

NIKKOR Lenses
NIKKOR Lenses