Spring-clean your outdoor techniques with these tips direct from the experts at Nikon School and make the most of spring’s most iconic subjects.
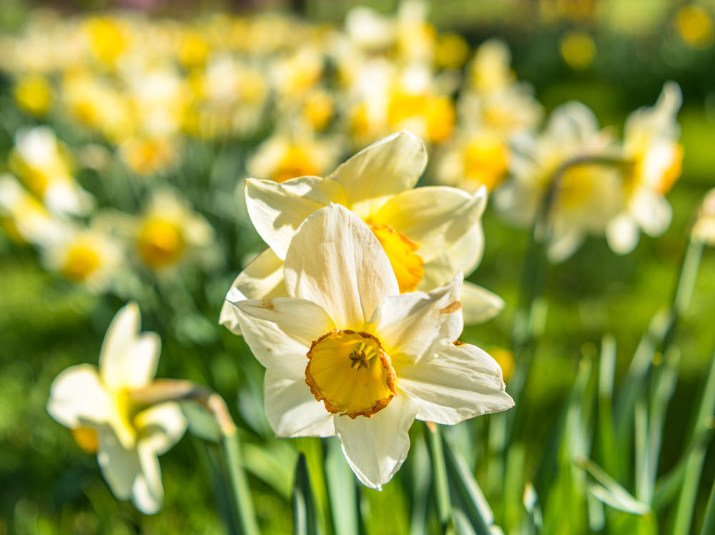
Whatever your subject choice – buds, flowers, foliage or blossom – a shallow depth of field will isolate it in pin-sharp focus against a blurred background and foreground, to really make it leap out. To get this degree of control over your depth of field, shoot in aperture priority.
Micro-NIKKOR lenses are built specifically for close-up work, enabling extremely shallow depth of field at the widest aperture (lowest f-number e.g. f/4) – just millimetres of front-to-back focus – compared to what is achievable on a standard lens. However, there might be occasions where this is simply too restrictive (the merest breath of wind will ruin such a shot, for example), so experiment with smaller apertures such as f/8.
On a DX, try the 40mm or 85mm Micro-NIKKORs, while as far as standard lenses go, the 35mm f/1.8 (50mm equivalent on a full-frame camera) is a great all-rounder that is also capable of excellent close-ups at f/1.8 and f/2. With an FX camera such as the D750, the 60mm f/2.8G ED Micro is a great choice, while the 50mm f/1.8 is also a good standard-lens option.
Alternatively, use the long end of a medium telephoto lens to compress the background into a subject-flattering blur. With a DX camera, the 18-105mm, 18-140mm and 18-300mm (all f/3.5-5.6 ED VR) are ideal. You will need to position yourself surprisingly far back from your subject to get it in focus, but it’s worth going the distance!
Next, consider your viewpoint. Whatever your lens choice, shooting from the plant’s “eye level” will generally give the most impactful results, and this means getting down – so if you don’t want to get dirty (or uncomfortably damp-kneed), take a thick black plastic refuse sack to use as a protector. Nikon’s D5000-series cameras come with a tilt screen which makes getting these types of shots a bit easier, as you can set the camera up low but frame and check your shot from above using the tilt screen in Live View.
To show plants in context, the new DX 10-20mm gives a super-wide angle view (for tips on making the most of it, click here ), while full-frame wideangle favourites include the 14-24 f/2.8 and the 16-35mm f/4 . The trick with using wideangle lenses for close-ups is to get as near as you can to the subject, preferably within touching distance, as wideangles “push” the subject away and will therefore render it too small in the frame otherwise.
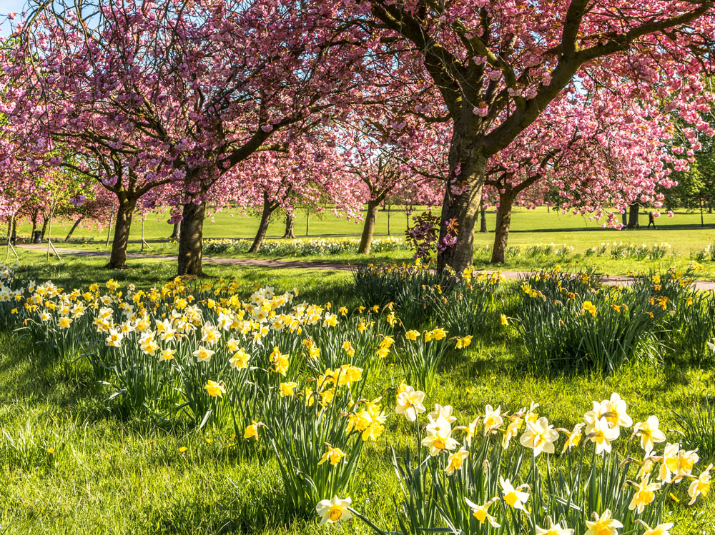
Spring blossom makes for classic shots at this time of year. Use a long lens to isolate individual clusters against a blossomy background, using longer focal lengths at the widest available aperture (e.g. f/2.8, f/5.6) to create stunning bokeh – soft, regular background highlights that complement the shape of the blossom. This can be particularly effective with tree blossom when the light is streaming through the leaves.
Whatever your subject choice, shooting earlier in the morning is a good idea for plants as they will look fresher before the sun has had time to dry them out, and the warmer, lower light is more atmospheric and flattering. Morning dew in a close-up also looks wonderful, and remember you can always create your own with a quick spritz of water from a flower mister. Don’t worry if it’s overcast, either – clouds actually act like a giant softbox and can give better colour saturation than harsh, bright sunlight.
For animals that tend to move around quite quickly – think of lambs or baby goats springing around a field – deploy your camera’s focus-tracking mode. AFA automatically detects whether the subject is moving or stationary and switches from single to continuous autofocus, so it’s a great place to start. On DX DSLRs, dynamic focus mode is denoted by the motorbike icon. This activates more focus points in the viewfinder than you can actually see, so when you half depress the shutter the AF system is able to constantly track the subject, keeping the autofocus locked onto it for sharp results.
Depending on your camera, you may also have a choice of drive modes – continuous low or high, where shooting a burst of shots enables you to capture a sequence and select the best resulting image.
With an FX camera, try back-button focusing. The problem is that when progressing from half-depressing the shutter button to acquire focus, to fully depressing it to capture the shot, there is a fleeting moment where tracking focus is lost. With back-button focusing, you depress the AF On button on the camera’s back plate (or reprogram the AEL/AFL button) to acquire focus with the back button and then depress the shutter as usual, so focus is continuous. It’s a simple great way to greatly improve your hit rate.
Again, it’s key to get down to your subject’s eye level to make your shot more realistic and engaging. This is best done with a mid-to-long range telephoto lens such as the previously mentioned 18-105/140/300mm for your DX camera, handholding so you can quickly respond to the animal’s movement, with VR engaged to stabilise the image and a faster shutter speed to freeze the action, at least 1/400sec or more for a sharp image – generally the faster your subject is moving, the faster your shutter speed needs to be. Shoot in shutter priority so you can select the appropriate shutter speed while your camera automatically sets the aperture.
With an FX DSLR, the new 70-300mm AFP f/4.5-5.6 is a great combination of telephoto reach, quick response and sharpness through the range, while if your budget stretches a bit further, you’ll love the new 70-200mm f/2.8E. The 24-120mm f/4 is a great all-rounder, while the 24-70mm f/2.8 revered by pro photographers is a long-term investment that will pay you back in spades in terms of image quality and flexibility.
With animals, first thing in the morning may not find them at their most active, which is fine if you want peaceful, static shots, but if you want to capture them full of the joys of spring, early evenings and sunsets can be terrific, especially against the warm lowering light and raking shadows.
You’ll get the highest quality landscape images shooting with the camera mounted on a tripod, triggering the shutter with a remote release like the ML-L3 infrared with a DX DSLR, or the WR-T10 system with newer FX DSLRs such as the D850, D5 and D500. This set-up prevents camera shake from ruining your pictures by steadying the camera and eliminating the need to physically depress the shutter. In the absence of a tripod, you can improvise by balancing the camera on a wall, rock, hat or jacket, and firing the shutter release via the self-timer. A beanbag is small and light enough to have tucked in a pocket or your kitbag at all times.
Using a tripod also prompts you to carefully consider your composition. For critical sharpness in your spring landscapes, switch to Live View focusing , then use the +/- buttons on the back plate (or pinch the touchscreen if your camera has one) to zoom into a particular area of the subject in the image. Now switch to manual and fine-tune the focus so this area is pin-sharp, and shoot.
To freeze the motion of flowing water, you’ll need to shoot in shutter priority mode with at least 1/250sec. To blur it into a smooth, ethereal blanket, select aperture priority mode and a slow shutter speed, which will probably require a neutral density filter to cut down on light entering the lens and blowing the image. For the “cheat’s way” to getting the same effect filter-free, see this tip .
Then book onto one of our acclaimed Nikon School courses – we recommend:
You can now download a PDF version of this Hints & Tips article to read offline and print