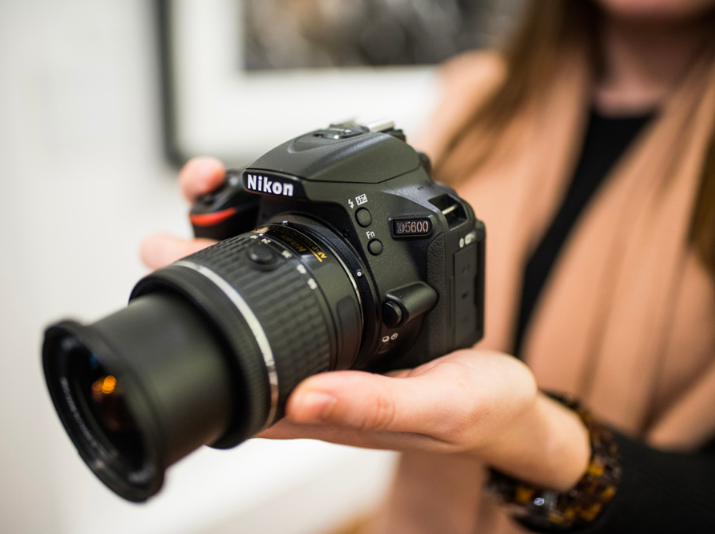
Welcome to Nikon School. The official Nikon education experts to help you learn how to get the best from your Nikon Camera and Lenses

Your Nikon School guide to improving your photography

If you are a DSLR beginner, Nikon School training manager Neil Freeman is here to help you make the leap from Auto to Programmed Auto (P) and beyond, covering all the basics to give you more creative control over your imaging....

It can be daunting taking your first DSLR out of the box – the sight of all those controls can leave you worried about leaving the safe shores of Auto shooting in case you press the wrong button and mess everything up.

Yes, our cameras have a lot of functionality (i.e. buttons, control dials and menus!) , but did you realise that the average working professional photographer probably only uses 10-20% of those functions day in, day out? They’ll only trouble the remaining 80-90% in very specific situations. So, make like a pro and concentrate just on the 10-20% of the functions you’ll probably use the most – which is where these tips come in…

1. Main controls

One of the key things you need to do to leave Auto behind is develop the muscle memory for instinctive use of your DSLR’s main controls. When I was starting out, I used to get off the tube at the second-to-last stop, then walk the rest of the way home taking pictures. It didn’t matter what I was shooting; it was all about becoming familiar with the controls, so it became second nature to find them and use them.

Key controls on your Nikon DSLR

• Record button

• Mode select dial

• Playback button

• Main command dial

• Sub-command dial

• Multi-selector

• Menu

• Delete button

2. File format: RAW v JPEG

A RAW (NEF) file will give you the highest quality images and the greatest opportunities for editing. Think of it as being like a negative in the film days; it’s got all the captured data in it, but it’s not really viewable until it’s been “developed” i.e. processed on your computer in software such as Photoshop or Lightroom. That’s an advantage or a disadvantage, depending on how much you enjoy playing with digital images… If you’re a novice to editing, our own free software, Capture N-XD, has similar features to Photoshop and Lightroom, so it’s a great way to get started.

A JPEG, on the other hand, is a “finished” image in a universal format, so you can share it immediately you’ve captured it. Although you can edit it on your computer, this is not to anything like the same extent as a RAW file. A JPEG is a “lossy” format, so every time you save it you irretrievably lose a little more data. What this means in practice is that the D7200, for example, will create a fine/large JPEG file of 12MP and a basic/large JPEG file of 3MP – that’s an awful lot of data lost compared to the camera’s 28.5MP RAW file.

You can hedge your bets by shooting RAW + JPEG, although this will obviously use up your memory card space even more quickly than RAW or JPEG alone – but it does give you a finished JPEG image if you decide RAW editing is not for you.

Select in the SHOOTING MENU
Find out more about RAW v JPEG

3. Exposure triangle

Getting the best results means balancing the three aspects of the exposure triangle: shutter speed (which controls motion in the image), aperture (which controls the area of acceptable sharpness in the image) and ISO (which controls image quality). A good starting point is to put the ISO on auto, so you just then have to concentrate on selecting the best the aperture or shutter speed according to whether your subject is static or moving. More info in tip 4.

For action shots, including kids, pets, wildlife and cars, choosing the correct shutter speed to freeze or blur the subject is key, and that means switching to shutter priority mode (S), which gives you control over the shutter speed while the camera automatically controls the aperture. More info in tip 5.

For landscapes and portraits you’ll usually want to take control of the aperture so you can decide on how much depth of field (front-to-back focus) you get in the final image. To do this, switch to aperture priority mode (A) and dial in your aperture choice. The camera will then automatically select a shutter speed for that aperture based on the light you’re shooting with. More info in tip 6.

However, if you’re not quite ready to move on from auto to aperture/shutter priority mode, program mode (P) is a good staging post, and great for situations where you can’t set the camera up quickly enough and don’t want to miss a shot. In P, the camera automatically adjusts the shutter speed and aperture so you achieve an optimal exposure. However, depending on your camera, it also enables you to adjust the settings slightly to give you a bias towards either aperture of shutter speed (although this doesn’t allow you the full control that aperture/shutter priority would give you over the camera). P works well with both manual and auto ISO. It also gives you control over focus-point selections and autofocus modes, plus the ability to fine-tune your exposure by using exposure compensation – all of which allows you to start thinking about shooting creative images.

Select P, S or A on the MODE DIAL

Find out more about shooting modes

4. ISO

In basic terms, ISO controls the sensitivity of the camera’s sensor to light. For the highest quality pictures you’d want ISO 100-200 (or lower if your camera supports it), with the camera on a tripod to provide a stable base and reduce any vibrations which can cause blurry images. A good way to get started is to assume ISO 400 is your baseline for a day with blue sky and fluffy clouds. If the scene is brighter or you are shooting on a tripod, reduce the ISO; if the scene is darker, you’ll need to increase the ISO above 400.

A compromise with using high ISO settings is that although you are making the camera more sensitive to light, at the higher ISO numbers more noise (distortion) creeps in – it’s like listening to music, with higher amplification leading to more distortion. Luckily, Nikon DSLRs are renowned for superb light sensitivity, so that they can be used at extremely high ISOs with very little noise.

Auto ISO is very helpful as it enables you to set a range of acceptable ISO settings which the camera will then choose from to give you the optimum setting for your particular shutter speed/aperture combination – one less thing for you to worry about!

Select ISO via the SHOOTING MENU

Find out more about auto ISO

5. Shutter speed

Your choice of shutter speed impacts on the creative appearance of the image by affecting the amount of light hitting the sensor.

In shutter-priority mode, choose a faster shutter speed (at least 1/250sec) to freeze the action, and slower shutter speeds (1/30sec or less) for a more dynamic result with creative blur. For example, shoot a burbling stream at 4sec and the water will appear ghostly and smooth, while a shutter speed of 1/200sec will freeze the individual rivulets and water droplets.

To sharply capture somebody walking, 1/60-1/125sec should do the trick, dancing will need around 1/800sec and a running dog 1/1000sec . For really fast-moving subjects like the Red Arrows, you’d want a much high shutter speed, typically 1/4000sec to freeze the action. At the other end of the scale, you can capture light trails at night at 8-15secs – use shutter priority, then move to using manual as you become more experienced.

Select shutter speed by rotating the MAIN COMMAND DIAL

Find out more about shutter speeds

6. Aperture and depth of field

Depth of field is the zone of acceptable sharpness around your subject – how sharp or blurred are the areas in front of and behind it. It’s controlled by widening or narrowing the lens’s aperture (f-number), which you can do yourself in aperture-priority mode. As a quick way to remember, the lower the f-number (e.g. f/4), the less of the image’s background will be in focus – ideal for portraits and close-up work; while a larger f-number (e.g. f/11, f/16) means more of the picture will be sharp – ideal for landscapes.

Select aperture by rotating the MAIN COMMAND DIAL

Find out more about depth of field

7. Manual (M)

In manual mode, you can take control of all the exposure settings – ISO, aperture and shutter speed. First think about how much of the picture you want sharp – for a portrait you’ll need around f/4, and f/8-11 for a landscape or building. Now play around with the shutter speed setting until the exposure compensation bar in the viewfinder or on the LCD screen is in the middle, effectively set to zero.

Next, check that the shutter speed is higher than the reciprocal of the lens’s maximum focal length. For example, if your lens has a maximum focal length of 70mm, you need a shutter speed of at least 1/70sec, and if that shutter speed doesn’t exist as an option (it doesn’t in this case), you move up to the next that is available – here, that would be 1/80sec.

Select M via the MODE DIAL

Find out more about manual shooting mode

8. Autofocus (AF) modes

• AF-S (single-servo AF) focuses on a single spot and stays there, making it ideal for portraits, landscapes and other static subjects (and aperture-priority mode).

• In AF-C (continuous-servo AF), if you half-depress the shutter (and keep it depressed), the camera will automatically track the subject under the active focus point(s), making it ideal for moving subjects (and shutter-priority mode).

• On some DSLRs, you also have the handy AF-A (auto-servo AF) option. This detects whether the subject is moving or static and then automatically switches the camera to either AF-C or AF-S – very handy if you’re not sure what you’ll be shooting.

Select by pressing AF-mode button while rotating main command dial

Find out more about AF-C for moving subjects

9. Focus points (AF-area modes)

Out of the box, your DSLR will be set up to shoot auto-area AF – where the focus will automatically lock onto the area of highest detail and contrast in the picture. But what if that isn’t where you want to focus?

For static subjects and when you’re shooting in aperture-priority mode, switch to single-point AF instead and move the focus point using the multi-selector button so it’s over the subject on which you want to focus. Alternatively, to make locking onto moving subjects easier, if you select one of the dynamic/multipoint-area AF settings such a d-9 or Grp (5 focus points), these modes activate more focus points, making it easier to for you to achieve focus lock on your subject as you have more focus points feeding back information to the camera.

Select by pressing AF-mode button while rotating sub-command dial

10. Picture controls

Picture controls enable you to change the look of your image when shooting JPEGs (they won’t have any effect on your RAW pictures). Your main picture-control options are:

• Standard, which gives a balanced result in most situations and is the default setting
• Neutral, for an image closest in colour to the original scene – ideal for editing afterwards
• Vivid, for high contrast, richly coloured images
• Monochrome, which gives monochromatic colours, including sepia, and black and white

Select via the SHOOTING MENU

Find out more about picture controls

11. White balance (WB)

Auto white balance does a great job of keeping your images free of colour casts for most of the time, particularly outdoors, but there will be occasions – usually indoors – when the lighting colour deviates so much from “normal” that you need give your camera a helping hand.

Entry-level DSLRs take the guesswork out of doing this by giving you a number of manually selected presets, which are the optimum colour temperature (measured in Kelvin, and shown as K on the camera) for direct sunlight, shade, cloudy, fluorescent, incandescent and so on. On a more advanced DSLR you have the option of dial in the specific temperature e.g. for direct sunlight you would dial in 5000-5500 K.

Select WB via the SHOOTING MENU

Find out more about white balance

12. Composition

If you’re a bit stumped, try these useful guidelines for pleasing compositions:

• Rule of thirds – imagine a grid of two vertical and two horizontal lines over your subject (like a noughts and crosses grid), then position your subject on one of the lines. Place the horizon on the top or bottom line. Portraits look good with your subject on the right or left third. On some cameras you can display these gridlines in the viewfinder.
• Leading lines – look for a line in the composition that you could frame up so it was coming into the scene from one of the corners of the shot, drawing the viewer’s eye to the subject.

But remember, these guides are not set in stone, and as you become more confident you can start experimenting by venturing outside them.

Select viewfinder grid display via the CUSTOM SETTINGS MENU

Find out more about composition

13. Delete button

Finally, don’t be downcast if you find yourself deleting most of the images you take. Use the delete button as a learning tool – it’s one of the best you have. So before you bin a shot, think about why you don’t like it and learn from what you’ve done.

Want to read offline?

You can now download a PDF version of this Hints & Tips article to read offline and print

DOWNLOAD

NIKKOR Lenses
NIKKOR Lenses