Welcome to Nikon School. The official Nikon education experts to help you learn how to get the best from your Nikon Camera and Lenses

Your guide to macro photography with renowned nature expert Ross Hoddinott

Ross Hoddinott has been shooting macro since he started taking pictures at the tender age of ten, using his parents’ ancient SLR and a standard 50mm lens with a close-up filter. Within a few months he had won BBC Countryfile’s inaugural photography competition, and by 18 he had turned pro. Today he is one of the UK’s leading wildlife and landscape photographers, and is probably best known for his exquisite close-up images. Read on for his expert tips for capturing the hidden beauty of the small world around us.

I don’t think there is anything more accessible than close-up photography. It doesn’t rely on hiking out into the countryside, baiting your subjects or sitting in a hide for hours on end waiting for them to show up. During the pandemic, with everyone being restricted to their immediate localities and a massive increase in working from home, the popularity of macro has soared as people have realised there is so much you can achieve right on your doorstep, in your local park, even in your own garden or home.

For me, the real beauty of macro lies in its ability to reveal exquisite miniature detail that most people just ignore or simply aren’t aware of. When you look at a butterfly at magnification, for example, you can see each individual scale on its wing, the hairs on its body, the antennae, its amazing insect eyes. Yet you simply don’t appreciate these extraordinary features until you get to see them through a close-focusing lens. There’s an incredible plant and insect life that’s so easy to overlook and yet it’s right there at your fingertips.

SPECIALIST MACRO LENSES

Technically speaking, macro means photographs taken at life-size reproduction or greater, but in reality most people are shooting close-ups, which are at a lesser magnification. In practice, though, we tend to use the terms interchangeably. Nikon’s specialist macro lenses – called Micro NIKKORs – all offer the same 1:1 maximum level of magnification, but different focal lengths give you different advantages.

For my DSLR macro work, I’ve always loved the 105mm f/2.8G IF-ED VR. Its build quality and optics are excellent, with the huge advantages of vibration reduction and a lightweight and compact design, so it’s a great lens for shooting handheld.

In the last couple of years as I’ve started shooting with Nikon’s new range of mirrorless cameras, I’ve been using the 105mm with the FTZ mount adapter on my Z 7II, but I’ve just done a field test on the new, dedicated Z-series MC 105mm f/2.8 S, and was so delighted with its performance that I’ve ordered one. It’s a bit lighter and shorter than the F-mount version, with a closer minimum focus distance of 0.29m. There’s also a handy digital display showing the reproduction ratio, aperture or focusing distance, which allows you to set your desired aperture on the lens itself. It’s perfect for handholding.

If you want to take more environmental portraits, displaying your subjects with a degree of context, the new Z-series MC Z 50mm f/2.8 will be just the job. With a minimum focusing distance of just 0.16m, and a small and neat build, it’s very portable and great for handholding.

My other main macro lens, both with my D850 and Z 7II via the FTZ adapter, is the sadly discontinued 200mm f/4 Micro ED IF AF. It’s quite long and heavy, but optically it’s fantastic. Its main advantage is that it gives you a longer camera-to-subject working distance, which is helpful for flighty subjects and enables you to create a beautifully soft-focused background for your subject to pop from.

USING TELEPHOTO LENSES FOR CLOSE-UPS

The great thing about macro is that you don’t actually have to use a specialist macro lens. Any telephoto with a good close-focusing distance – say within 2m – can also give you great results at the long end, as long as you don’t get any closer than that minimum focus distance. With a telephoto, the longer the focal length and greater the magnification, the easier it is to isolate your subject from its surroundings by throwing the background beyond focus.

Telephotos are ideal for larger flowers, orchids and insects such as dragonflies. I currently use the 80-400mm f/4.5-5.6 G ED VR, a NIKKOR F-mount lens with a close-focusing distance of 1.5m in manual – that’s extremely close for a lens of this power. I’m looking forward to trying out the Z-series 100-400mm S when it’s released, specifically for orchids and large insects.

TRIPOD VS HANDHELD SHOOTING

Depth of field is incredibly shallow when you’re shooting macro, which means your focusing has to be absolutely spot-on, so whenever it’s practical I use a tripod – it aids focusing as well as giving stability. I’ve added a geared head with very fine micro adjustments, so I don’t need to waste time unlocking and relocking levers.

A tripod is also essential when using Live View for composing and checking that the focus is perfect – try using Live View when handholding and you’ll soon see why three legs are better than two! If you’re shooting with a mirrorless camera, of course, what you’re seeing in Live View is exactly the same as what you’re seeing in the electronic viewfinder (EVF). One of the big benefits of using the EVF is that you can also see the shooting data at the same time, such as the histogram.

That said, I am doing more handheld shooting with my mirrorless Z 7II, thanks to the lighter, more compact design, the built-in image stabilisation and its incredible ISO performance. Sure, when handholding you might end up taking more pictures than you would on the tripod to guarantee a sharp result, but it does give you far more freedom and enables you to react more quickly, essential when insects are flitting around.

CONTROLLING THE LIGHT

Macro photographers have a huge amount of control over the light on their subject – even in awful weather – because they are capturing such a very small area, so it’s a good idea to add one or more of these accessories to your macro kitbag:

• Diffuser – softens harsh light and reduces contrast to bring out detail and colour, particularly with plants and flowers.
• Polarising filter – reduces glare and restore natural colour saturation when shooting plants.
• Reflector – bounces light back onto your subject, preventing shadows and warming up the image.
• Small, handheld LED lights – these provide a continuous light source, making it easier to light your subject creatively and preview the effect the light is having before you take the photograph. They’re not a replacement for flash but can help you create attractive lighting easily and quickly, and I’m using them more and more in place of reflectors.

EIGHT KEY CAMERA SETTINGS

1. Depth of field
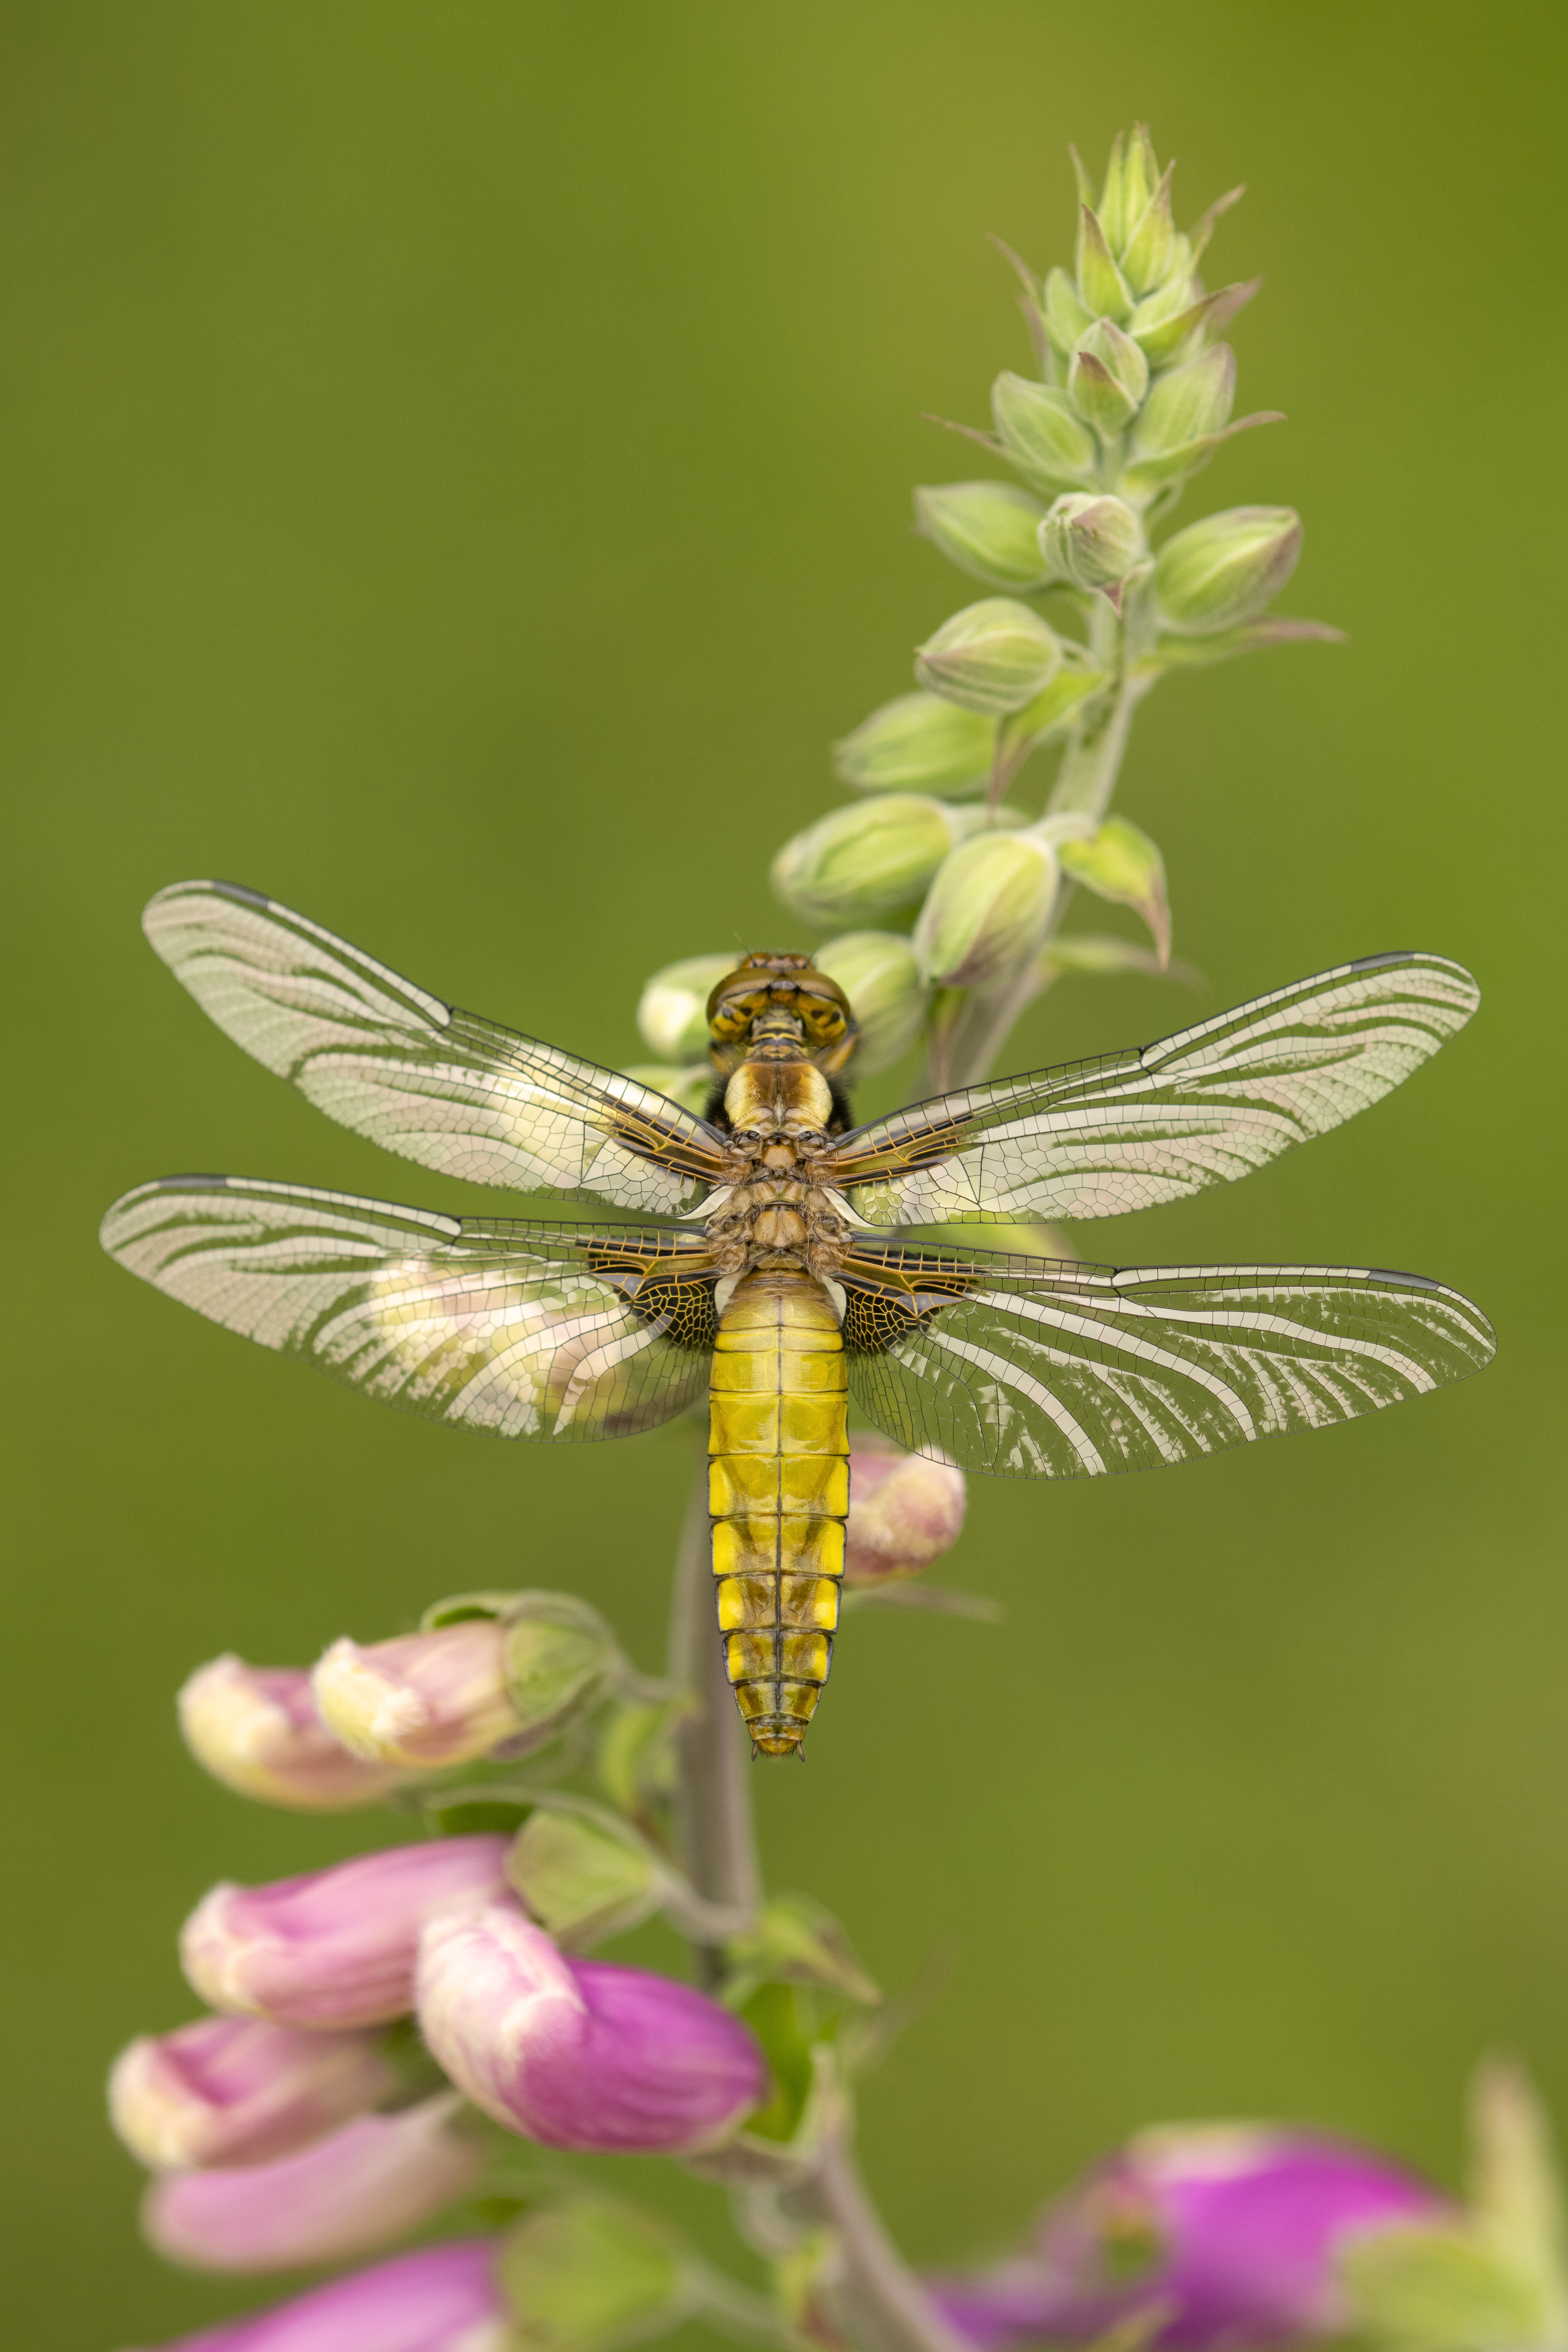
With macro, depth of field is very shallow, but rather than seeing it as a problem, go for large apertures to manipulate it. This means focusing and positioning the camera very carefully. A lens has one plane of complete focus, so it’s vital to get your camera parallel to the subject, so as much of the subject falls within that plane to keep the critical areas sharp. If your camera has depth of field preview, this is really handy for checking subject focus. The latest Nikon Z cameras have focus shift capabilities – taking multiple frames and shifting the plane of focus on each one, to allow you to later blend them together and give you artificially extended depth of field. This technique is known as focus stacking and can be useful for other genres too, like landscapes.

2. Aperture priority
I tend to shoot in aperture priority for control over depth of field, but I focus manually rather than automatically, especially if I’m using the tripod, because it gives you extra precision at high magnification. Lenses tend to search anyway, so although they have limiters, I’d still rather do it manually as it’s more precise.

3. Autofocus area mode
You’re best sticking with single-point AF, as this gives you a single focus point you can move around the entire focusing area, with the sharpest part of the image being the area under this point – making it ideal for static macro subjects where sharpness is critical.

4. Exposure
Generally speaking, with exposure you probably won’t have to do anything. Nikon metering is so good that it rarely gets fooled. I do a lot of backlit shooting – I love the drama of it and the way it highlights shape and form – and even with backlit conditions, which are renowned for fooling metering systems, my cameras rarely get it wrong, perhaps half a stop at most. I keep an eye on my histogram, but I don’t generally ‘expose to the right’ for macro as this technique requires a slower shutter speed. This is fine for landscape but not for macro, where the slightest movement will ruin the shot, no matter if it is correctly exposed. I actually think exposing to the right is becoming less relevant as Nikon cameras are capturing so many tonal levels and the shadow detail is so good that you generally don’t need to worry about pushing exposure as much as we did a few years ago.

5. White balance

I normally shoot with daylight white balance rather than automatic. Auto is normally pretty accurate and reliable, but with macro you often have a scene dominated by one colour, which the camera tries to neutralise, so it’s more likely to get fooled with close-up situations than with a general scene. When you shoot RAW it’s not massively important as you can fine-tune it later on, but it’s always good practice to get things looking right in camera, so I go with daylight white balance as I know where I am with it, it’s constant, and I rarely have to tweak it afterwards.

6. Metering
I always use matrix metering – you’ll never be far off with it and you can always apply compensation. There might be situations where spot-metering would be more precise, but it’s often just as quick to apply any fine-tuning afterwards; certainly for the subjects I shoot, matrix is very reliable.

7. ISO
While it’s good practice to keep your ISO as low as possible, it’s far less of an issue with the latest Nikon cameras. With macro subjects, even the smallest wind movement causes a huge amount of problems. In order to freeze motion, especially early in the day or late in the evening when there isn’t a huge amount of light, compensating through higher ISO is a great option. It’s also useful when shooting handheld to offset your own movement. With both my Z 7II and D850, I am very comfortable shooting close-ups at ISO 3200, or even higher is necessary.

8. Back button focusing
For insects that are moving around, instead of using the shutter button for both focusing and shooting, you can instead use the shutter button just for image capture and transfer the focusing function to one of the back-plate buttons – the AF-ON button if your camera has one, or otherwise any programmable button such as AE-L /AF-L. By keeping the assigned button depressed in AF-C (continuous autofocus) mode, you can constantly focus on the subject under the active focus point(s), even at the point of capture.

SHOOTING TIPS FOR SUCCESS

Keep the background simple Simplicity is essential for macro shots, and getting an uncluttered background (and foreground, for that matter) is key, so pay attention to your subject’s surroundings. You can usually make a difference just by altering the depth of field or changing position very slightly. With plants and flowers it’s easy to remove dead vegetation and bits and pieces – I carry scissors in my camera bag all the times – but do take a conservative approach. If you’ve got a flighty insect on the wing, it’s more to do with picking the right angle and aligning it with a background choice that is relatively flattering.

Choose the best time of day For insects you have more control if they are inactive and roosting, which is usually early and late in the day – and, by happy accident, that is when the light is best, too. After a heavy morning dew they’ll need to warm up and dry out before they can fly, so this will give you a window of opportunity. For both insects and plants, check for wind speed of no more than 12mph – anything higher and your subjects will be blown around. Pick a still day and you’ll find life a lot easier.

Check for sharpness I can’t stress enough that focusing for macro is so unforgiving; if your subject isn’t pin-sharp, it’s ruined, so you need to really scrutinise sharpness on the screen by zooming right in. If a subject is worth getting your camera out for, you don’t want to walk away until you know you have a pin-sharp shot. With my Z 7II and D850 cameras I’ve customised the zoom function to help me do this at the press of a button (check your camera’s manual to see if it offers you this possibility):
1. Select Custom Settings menu.
2. Scroll down and select f Controls.
3. Scroll down and click on Assign Preview Button (f3 on the Z 7II, f2 on the D850).
4. Scroll down to Playback, go into playback mode and go to zoom on/off – this shows you low magnification, 50%, 1:1 or high magnification.
5. Select the one you want, press “replay image”, and press the centre button and then you can check it really quickly for critical sharpness.

Watch Ross' first impressions on the new NIKKOR Z MC 105mm f/2.8, as we challenged him to take extraordinary wildlife close-ups in the early hours of the morning with Nikon School’s Neil Freeman.


Want to read offline?

You can now download a PDF version of this Hints & Tips article to read offline and print

DOWNLOAD

NIKKOR Lenses
NIKKOR Lenses