Welcome to Nikon School. The official Nikon education experts to help you learn how to get the best from your Nikon Camera and Lenses

Your Essential Guide to Photographing Christmas with Nikon School

Family, friends, gifts, good food, twinkly lights and Christmas trees – the festive season is full of fantastic photo opportunities. Make the most of them with these top tips from our experts at Nikon School!

Family, friends, gifts, good food, twinkly lights and Christmas trees – the festive season is full of fantastic photo opportunities. Make the most of them with these top tips from our experts at Nikon School, guaranteed to produce plum pictures rather than turkeys!

The tree


Christmas tree shots can be surprisingly tricky, especially with a very large tree, where trying to squeeze the whole thing into the frame can lead to a confusing image devoid of any main point of focus. Instead, either use it as a backdrop for portraits or try homing in on just one or two tree decorations. Do watch out for your reflection in shiny baubles – you may need to move them or yourself slightly.

Family and friends


First of all, think about your background. A Christmas tree can look great and suitably festive. Next, select your shooting mode: aperture priority mode (A) is your best bet, but go with Program (P) if you're less confident, as it will do the work for you, leaving you free to compose and shoot. If you do use A mode, you will have more control over your depth of field, however, as you can control the aperture yourself.

For group shots, to keep everyone sharp if they are standing in a horseshoe with an aperture of around f/7.1 or f/8; if they are in a line, you'll need around f/4 or f/5.6. Controlling your focus point is also important – use AF-S (single-point AF) or AF-A (auto AF) and then select a single focus point. You can use the multiselector on the back of the camera to move the focus point (or touch focus if you have a compatible camera such as a D5600, D7500 or D850) to focus on a particular face in the group.

If you're inside or shooting in low light (e.g. from candles), you'll need a high ISO. This will depend on your camera, but you'll generally be looking at ISO 2000 or above. It's also a good idea to active auto ISO, and switch on your lens's VR to allow far longer shutter speeds handheld in lower light than would otherwise be achievable.

Think about where the light is coming from. If you're shooting in front of a heavily backlit window, press the flash button to pop up the built-in flash (it will only come up automatically in full auto or some scene/effects modes) and use it to fill in and balance the ambient light. Don't use the flash on full power, however, as this will be too strong, bleaching out skin tones and looking rather false. Instead, use flash exposure compensation to turn the flash power down to around -0.7 or -1 EV depending on the light level you are working with. Keeping flash shots underexposed in this way captures the ambient light and skin tones for a more natural, "unflashed" look.

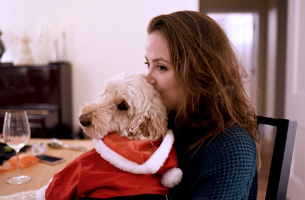
For an individual portrait, try positioning your subject by the tree, a roaring fire or the window (in daylight) so you can use the ambient light.

Candids

Sometimes the best people pictures are candids, where you capture them spontaneously enjoying the Christmas spirit. You'll get the most natural results when you photograph people simply doing what they're doing: dinner preparations, gift wrapping, chatting, table setting, eating, drinking, playing. It's not just Christmas dinner that's photogenic, it's also the work that went into its preparation, along with wrapping and giving gifts, and of course the Christmas board games and charades.

Two classic moments are the kids (OK, and sometimes the grown-ups!) rushing from their rooms on Christmas morning to see what "Santa" has left under the tree, and then eagerly opening their presents. To ensure you don't miss any magic moments, shoot in burst mode – particularly with children, who don't tend to hang around when it comes to ripping off the wrapping paper! Aim to keep sharp focus on the eyes or face for the best results, and for really effective shots with kids, get down to their level to capture what they see.

Pet portraits

Pets love to get in on the Christmas act, too – cats in particular are obsessed with Christmas trees, and a close-up of a feline face eyeing up a shiny bauble can work beautifully (although you'll have to be quick as the cat's next step is usually to grab the bauble and run off with it!). It's best to avoid using flash with pets as it can upset them. Instead, use AP or P mode and whack up the ISO so you can use the ambient light. For Christmas Day or Boxing Day walks with the dog, choose shutter priority (S) and a high shutter speed, around 1/500-1/600sec, to freeze your pet in action.

Bokeh

Add interest to your Christmas portraits and still life images with bokeh lighting effects – creating a soft, evocative backdrop for your subject that really brings out the Christmas spirit. Bokeh is the soft, defocused background highlights you get when shooting your subject with the lens at its widest aperture ("bokeh" comes from the Japanese word "boke", meaning "blur"). Candle light, fairy lights, car headlights and festive street lights all make for great bokeh backgrounds .

So, for good bokeh you need two things: lights in the background, and a lens with a wide maximum aperture of around f/1.4, f/2 etc, which means shooting in A or manual mode. For festive portraits with bokeh, however, you'll get better results by shooting at just less than the maximum aperture as this will give you a larger depth of field. The 105mm f/1.4 portrait lens is fantastic for bokeh, but you can also get lovely effects by using a zoom lens at longer focal lengths; you need to go right to the extreme end of the zoom, and that might mean stepping further back. Whichever lens you choose, go for single-point focus on your subject.

It is best to shoot in RAW so any white-balance problems from multiple light sources can be corrected in post-processing if required .

For interesting festive food images, place your subject a minimum of 3-4ft away from the background lights and you'll get a great bokeh background – a mince pie on a plate in front of a roaring fire will look tantalising shot like this.

Illuminated houses

Decorating the outside of a house seems to be getting as popular as hanging fairy lights indoors, and these outdoor lights can make for great images. With a highly decorated house, use a wideangle lens to include the whole scene. Shooting in manual will give you the most control over your settings.. If shooting handheld, start off with a shutter speed around 1/60sec and an ISO of at least 800, and higher if it's darker. If the results are too dark, slow the shutter speed down and/or increase the ISO, while if your shot is looking overexposed, go for a faster shutter speed – it's all about balancing the light you are working with. If you'd rather not use manual, select aperture priority. For the best images, use a tripod and remote release

Low light outdoor shooting

Take these hand-held with a high ISO, tending to shoot towards lower f numbers, but note that depth of field might be reduced, so instead try aperture priority or manual with a tripod and remote release, Try using mirror lock-up mode to get the sharpest result: press the shutter once to lift the mirror, then wait a couple of seconds for any micro mirror vibrations to die away, then press a second time to take the picture and drop the mirror back down.

Another useful tip is to go for critical sharpness via Live View: zoom in on the screen to magnify the area you want to be critically sharp, focus on that spot, then take the shot as normal.

Christmas markets

Christmas markets are increasingly popular and are a fun place to get festive shots, especially during the evening when the lights really stand out. It's easiest to get good results in manual (M) mode – dial in a minimum shutter speed of 1/60sec (ideally 1/125sec shutter) to freeze motion, set an f/4 aperture and no lower (unless you want bokeh effects) and let the ISO float up and down in auto ISO. Don't use flash as it will kill the atmosphere.

Enhance the composition by using strings of Christmas lights as leading lines. If the scene has a lot of lights, switch the lens to manual focus and take abstract, deliberately defocused shots – these can be very atmospheric. Zoom bursts can be great in low light for abstract Christmas scenes, too. Use a mid-range telephoto like a 70-200mm, tripod-mounted, set a 2sec exposure, press the shutter and smoothly rotate the zoom in the direction you want, either short to long end or vice versa. Make sure your subject is in the centre of the frame so everything zooms to or from that central point.

Christmassy street scenes

The key issue with any street photography – including festive shots of people shopping or chatting against brightly decorated shop windows or Christmas street lights, or traditional chestnut vendors standing over a smoking stove – is running the risk of influencing the scene you want to capture, so think about your choice of lens. A 16-80mm, 24-70mm or 24-120mm are ideal, because you can hang back and take pictures without sticking the camera in people's faces, as you'd have to do with a 35mm or 50mm prime.

It doesn't really matter which mode you're in – go with what you feel most comfortable. When selecting your shutter speed, look for how the light is hitting your subject. 1/60sec is going to be your absolute minimum, 1/125sec is better, but this will be subject to the focal length you are using. As you're going to be hand-holding, as a rule of thumb don't shoot any slower than the maximum length of your lens. So if you are using a 300mm telephoto, shoot at 1/300sec or faster. Vibration reduction (VR) can help a lot here, if you lens has it, make sure it's switched on

The D750 is terrific for street photography – it's lightweight and unobtrusive, with a high ISO and good dynamic range. The D500 also has an amazing low-light performance, with a tilting touch screen to make choosing settings and shooting even easier.

Video

Christmas videos can be fun, especially with excited children tearing into their presents. For the best results, set up as much as you can prior to shooting, because once your video is "rolling", the built-in microphone will pick up any noises made by your camera, as well as what you want to record.

In the shooting menu, choose either 3840 x 2160/4k or 1920 x 1080/full HD resolution and, unless you're planning to edit your video into slow motion, a frame rate of 25 fps. Next, set auto ISO, switch to manual focus on both camera and lens, set a wide open aperture (smaller f number) for deep depth of field to ensure everything is sharp from front to back in the frame, and manual exposure. For the most natural results, your shutter speed should be roughly twice your frame rate, so with a frame rate of 25, you're looking at around 1/50sec or 1/60sec. This will also ensure you don't get "flicker" if you're shooting under artificial lights. Finally, press the info button on the back to scroll through the displays and bring up the microphone option.

Now select Live View (Lv) via the button on the back of the camera and flick the switch on the button to the video symbol. Press the red record button to start, and press it again to stop. Rather than keeping things steady on a tripod, which might not be the best thing to be using indoors with over-excited children and animals rushing around, you can use your camera strap – put it round your neck then hold the camera at arm's length so the strap is taut, which means you can move and pan smoothly. And finally, it sounds obvious, but don't rotate the camera's orientation while shooting unless you really do want to simulate falling over!

Three fast festive tips:

1. Make sure your camera gear is ready to use before Christmas morning – charge up the battery, make sure the lenses are clean and that there is plenty of space on your memory card.
2. Black and white can look very atmospheric for festive candids, and it also removes distractions from too many competing colours, creating a calmer, more timeless image that's easier to "read".
3. Keep your camera at hand; you never know when a great moment is going to happen. "Hang on while I get the camera" is a sure sign you missed the shot…

Want to get even more from your Nikon kit? Visit Nikon School

Want to read offline?

You can now download a PDF version of this Hints & Tips article to read offline and print

DOWNLOAD

NIKKOR Lenses
NIKKOR Lenses