Welcome to Nikon School. The official Nikon education experts to help you learn how to get the best from your Nikon Camera and Lenses

Shooting with Window Light

Make the most out of natural light when shooting at home. Follow these hints and tips and let our Nikon School expert Neil guide you through the best set ups to maximise your shots.

There are, in fact, some interesting photographic advantages to spending time at home. When we are indoors there are many spots around your home that can be turned into great photographic locations if you understand how to work with window light. Here are some tips and techniques that explain how to work with window light so you can get creative with your camera and take some great images in your home.

There are many ways to use window light, all of which give various different types of lighting patterns. Where you put yourself as a photographer and where you place your subject in relation to the window will also have a huge effect on the image. When we work with window light, we are shooting with directional light. This gives us the option of using the window light as a side light, front light or back light.

When working with light, as a general rule, the larger the light source is in relation to the subject, the softer the light is. The smaller the light source is, the more intense the light will be. Small light sources will also often create very hard and deep shadows.

Window Light

Perhaps surprisingly, the weather you have will determine the type of shots you can take, even indoors. There is not necessarily a best time of day to shoot. The window light will be warmer at Sunrise or Sunset, but we can achieve this same look to a degree by altering our white balance settings in camera. A cloudy day will give you flat light, which is very soft and good for portraits, whereas a bright day with sunshine streaming in, is maybe better for other subjects. Direct sunlight does work well for portraits, but this type of light can be challenging. If you are up for the challenge, however, It is worth persevering with this type of light, as the resulting images can look very striking and dramatic. This is my favorite kind of light to work with as you can do so much with it.

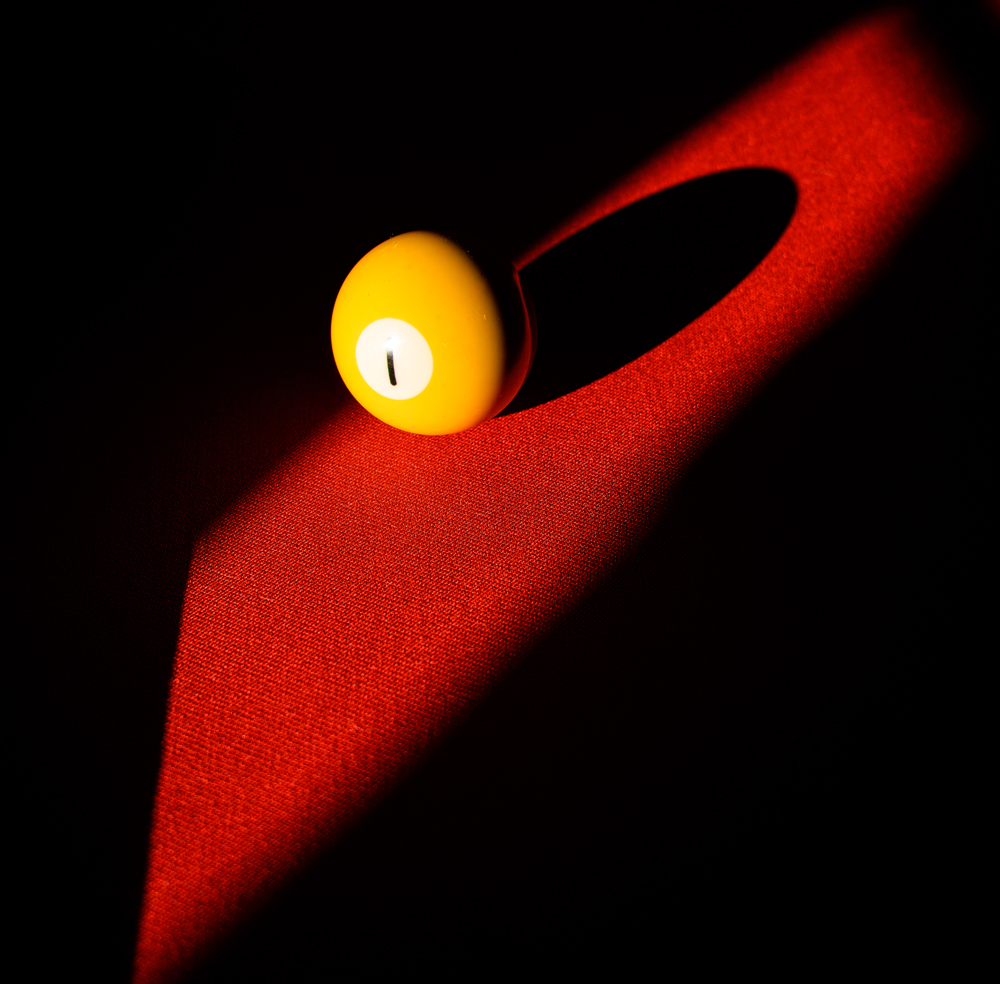
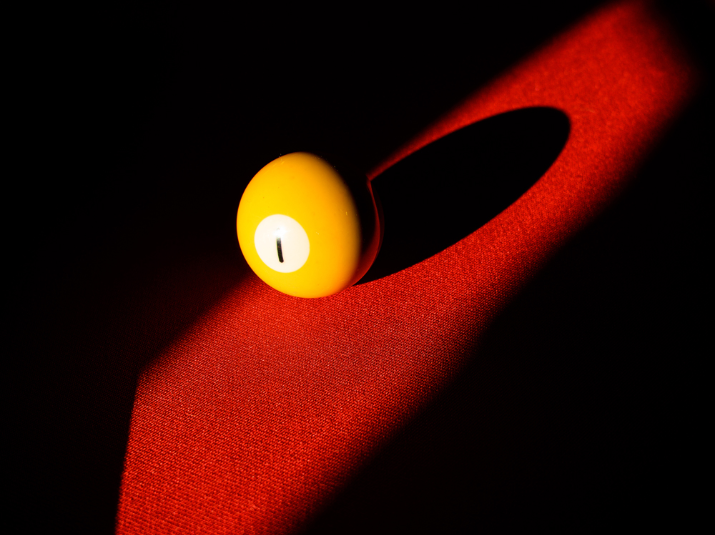
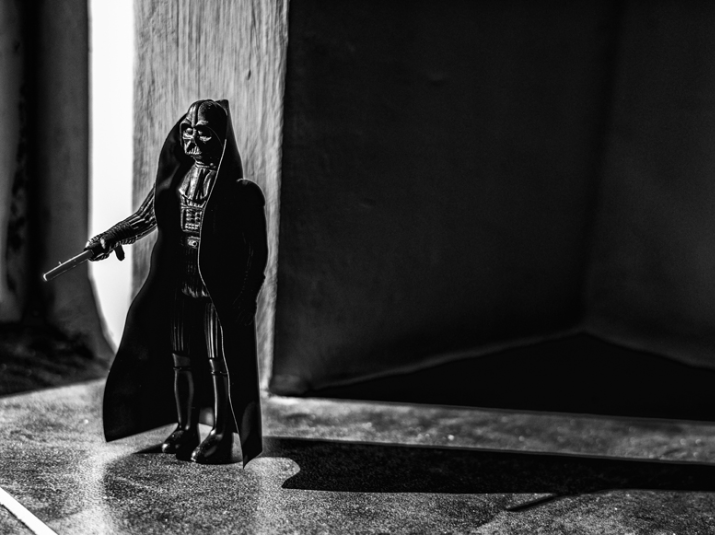
If you have large windows, sometimes you can have too much light for the image you have in mind. Slightly drawing a curtain or closing blinds can act as ‘barn doors’ or a ‘snoot’ to create shafts or pools of light that you can work with. You will have to experiment with this to get the best light for your image. The smallest movements to the placement of your subject will transform the look of your image when working with window light.

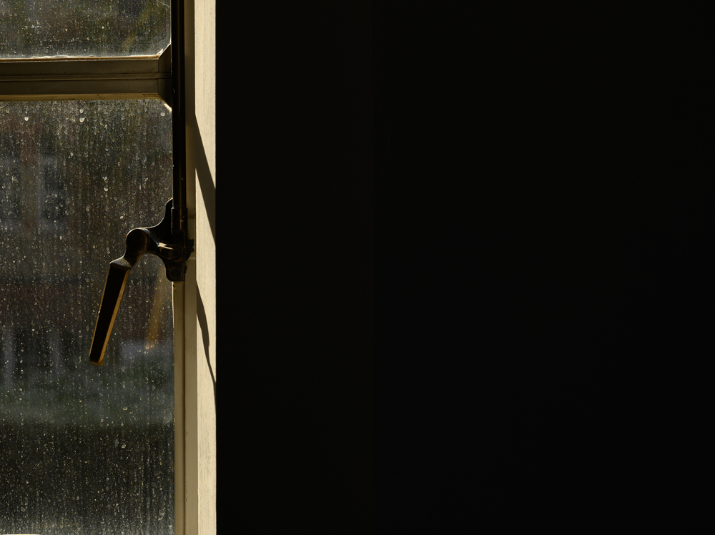
Almost any window in your house will make a good light source, as long as there is enough space for you to shoot the image you want. Any north-facing window is usually good for flat light since it will never have direct sunlight coming through it, though this can also be achieved with a west facing window in morning or an east facing window in the evening. If it is overcast or cloudy you can choose whichever window you like.

Different types of Light:
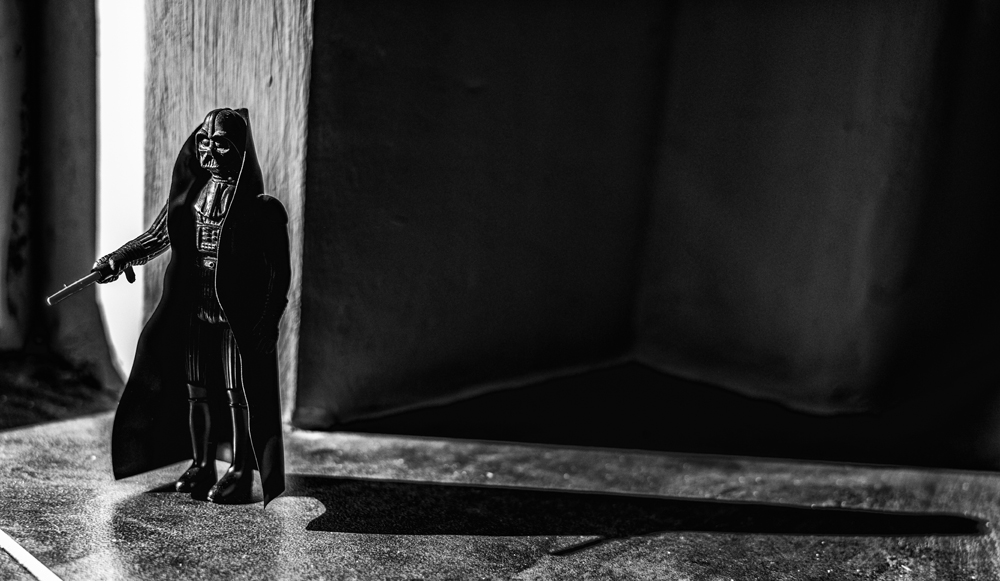
Front lighting

This is essentially shooting with the light coming from behind you and then striking your subject. It should produce an evenly lit image with shadows falling behind and away from the subject. However, be very careful that you do not ‘shadow’ your subject, completely blocking the light coming from behind you. Sometimes you may need to crouch down or move slightly to the left or right of the window so the light can still hit your subject.

Front lighting coming over my left shoulder to strike the ball. The area of light and darkness created by working with a smaller window.

Back lighting

Otherwise known as ‘contre jour’ or shooting into the light. Here you are shooting at the light coming in through the window. The light will be behind your subject and can be used to create two distinct types of images. You can either have the light ‘flare’ around your subject, or if you intentionally underexpose your image, you will create a silhouette of the subject. A word of caution: Please do not shoot or look directly at the Sun if it is low in the sky as this can be dangerous for your eyes.

Back light creating a silhouette of the subject.

Side Lighting

This is the most common type of light you will shoot with indoors. You and your subject will generally be parallel to the window and your subject is being lit from the left or right of the camera’s location. This technique can give you a lot of different looks. You can either position you subject further into the room for a flatter, evenly lit image or close to the window for a more dramatic higher contrast picture.

Side light from camera left. With the subject close to the window you get this very high contrast between the highlights and shadows.

Choosing a Subject

Remember that this is an exercise in learning to look at, and work with light to create great images indoors, so your subject could be anything. Everyday objects found around the home like kitchen objects or toys work really well. Window light is also great for portraiture. They key is to find something that is easy for you to work with and that you can place in a variety of different lighting conditions.

Composition

As most indoor environments do not always have clean lines and uncluttered backgrounds, think carefully about your composition so you do not include distracting items in the image. It is very easy to concentrate entirely on your subject and forget to check the corners of the frame or the background. Give yourself a mental checklist to check each corner and then look beyond your subject to check for items you may not want in the image before you press the shutter. Try not to get too much of the window in the image as this will result in a very high dynamic range between the shadows and highlight which means you may lose some detail in the highlights.

Positioning your subject

If you are looking to create a dramatic high contrast image then place your subject very close to the window. If you place your subject approximately 1 - 2 metres (3 - 6 feet) away from the window, the contrast in the image is reduced significantly resulting in even light on your subject. Just remember that if you move your subject too far from the window, it might be too dark to get a good image. Ideally the light should be coming from above your subject, so if it’s a portrait you may want have your subject sit down, or you may find yourself lying on the floor or using the flip out screen on the back of the camera to make your framing and focusing easier.

Side lit self portrait using Snapbridge as a control to compose and remotely trigger the camera. Here I’m about 2 metres (6ft) away from the window, hence the even flat light.

Camera Settings

You have a range of options for your camera settings when shooting with window light. The shooting mode you choose will be governed by the subject you are photographing and how much creative control you want to have. Some general settings that will get you off to a good start would be:

Shooting Mode

Programmed Auto (P) for the least creative control, but nice looking images if you place your subject correctly in the light. Use Aperture Priority (A) if you want to control your depth of field to separate your subject from the background. Shutter priority (S) will give you control of the shutter speed and the motion in the image. Higher shutter speeds should result in a sharper image, while slower shutter speeds will add blur to the image. Manual mode (M) will allow complete control of both the motion (shutter speed) and the depth of field (aperture) in the image for maximum creativity.

Aperture

Try starting at f/4 or f/5.6 depending on the lens you are using. If you want to add more separation between your subject and background use f/1.8 or f/2.8 if your lens allows. If you require everything sharp in your image try shooting at a higher ‘f’ number such as f/8. This might be a challenge indoors unless you have a large amount of light or a very high ISO.

Shutter Speed

With Vibration Reduction (VR) technologies built into lenses or the in-camera image stabilisation (IBIS) in some of the Z series cameras, shooting at low shutter speeds and still producing a sharp image is becoming much easier. With my Z 7 and a 24-70mm I can handhold at around 1/20th and still get a sharp image. This allows me to get away with a lower ISO which is very useful when shooting indoors with window light. I would suggest starting at 1/160th or 1/125th and then work down to lower shutter speeds if you need to do so. If you have the space for a small tripod, you can always use that which will allow you to shoot at lower shutter speeds without the risk of getting camera shake and blurred images.

ISO

Set your camera to the native ISO i.e. lowest number your camera supports and now turn on Auto ISO. Nikon cameras are great for shooting in low light as they produce low image noise even at high ISO values. The native ISO on my Z 7 is ISO 64, so I would set that then tune on Auto ISO. Auto ISO will now automatically raise the ISO if needed (might go up to ISO 2000 or 3200) depending on the shutter speed and aperture I select for the light levels I’m working with. Shooting with Auto ISO is a great idea as it gives you one less variable to think about allowing you to spend more time looking at the window light and composition. In the Photo Shooting menu on the camera you can also set High ISO noise reduction to ‘On’ to reduce the noise levels at high ISO’s. This is also possible in post-production and especially useful if you are shooting RAW images.

Exposure Compensation

A great way to fine tune the exposure of the image if the highlights are too bright or the shadows are too dark. It’s always recommended to first try a shot without any exposure compensation. But, if the lit side of your subject is overexposed, you would dial down the exposure compensation to about -1 or maybe -2 EV to reduce the highlights, note this will also darken the shadow areas. If the shadows are too dark, you may want to lighten them using +1 or +2 EV, but this will brighten your highlights as well. Using exposure compensation is a fine balancing act between getting the shadows and highlights just right. You can also fine tune your exposure in post processing if you want as well.

Metering

Set your camera to Matrix metering as it will work perfectly for window light. There is very little need or benefit to working with the other metering modes.

White Balance

Start with Auto White Balance or Daylight Auto White Balance. This should be suitable for most of the situations and light you will find yourself shooting with. If you do get a colour cast in your image, try changing the white balance to Kelvin (K) and dialling in a specific value ie. (5560K for daylight on a bright day). If you are shooting RAW you can also do this in post-production. When shooting, a great tip to get the white balance correct in camera is to set your camera to Live View or turn on your LCD Screen, now select white balance and scroll through the various settings, you will see the colours change in real time on the screen.

Focusing

For accurate focusing on static subjects, start with AF-S and Single Point Auto focus. Now move the active focus point on to the subject, focus the image and press the shutter to take the picture.

For reference, my starting settings were: ISO 64 with Auto ISO set to On, Auto White Balance, Manual Mode, f/4, 1/125th, Matrix Metering and shooting RAW files. Exposure compensation was used if needed.

I hope this has inspired you to pick-up your camera and make the most of the window light you have indoors and shoot some great images. If you are inspired to take some images, please share your
creativity with the wider Nikon community on Social Media using #createyourlight.

Products Featured

Nikon Z 7
Nikkor 24-70mm f/4 S

Want to read offline?

You can now download a PDF version of this Hints & Tips article to read offline and print

DOWNLOAD

NIKKOR Lenses
NIKKOR Lenses