Ultimate Guide to Live Streaming with your Nikon Camera
If you want to achieve outstanding image quality when live streaming during a video conference call, follow the steps outlined below to achieve a more professional look to your video image quality and audio.
Ultimate Guide to Live Streaming with your Nikon Camera
If you want to achieve outstanding image quality when live streaming during a video conference call, follow the steps outlined below to achieve a more professional look to your video image quality and audio. Let’s take a look at the equipment required:
Nikon DSLR or Z series camera with Clean HDMI output
Nikkor Lens
Tripod
Capture Card or Device
Live Streaming Software
Lighting
Microphone
Computer
Optional: EH-5B & EH-5P Power Adaptor and dummy battery
Achieving a professional quality broadcast look is not as difficult as you think, and there are many different ways to configure and setup the components to enable you to ‘Go Live’. I will take you through the setup I have in place that meets my requirements, but they are alternative ways to do this depending on the quality and complexity of the streaming solution you require.

Camera Setup
Lens Choice
The lens you use will be determined by the space you have available and the look you want in your stream. A zoom lens such as a 24-70mm f/2.8 or f/4 will give you flexibility with your composition and framing. You could also consider a 35mm or 50mm f1.8 prime lens, which will both give a really good look to your stream, but are less flexible when it comes to framing your shot. A f/1.8 lens is a good choice if you want to hide a distracting background by setting your aperture to f/1.8. However you need to make sure you are at least a couple of metres from the background and have focused the camera accurately as your depth of field will be very small at these apertures. I’m using a 24-70mm f/2.8 S lens as it gives me flexibility with composition and the ability to blur out the background to a certain degree.
Video Resolution
You can use any Nikon DSLR or Z series camera that has a ‘clean’ HDMI video output. To set up the camera video output resolution, navigate to the Video Settings menu and select your required video resolution and frame rate for your region. Nikon cameras can output in 1080p or 4K depending on the camera model you have. You will also need to check the specs on your computer or laptop to see if that has the processing power to handle 1080p or 4K video. For most applications 1920 x 1080p at 30 or 25 frames per second (fps) will give you good quality. If your camera supports it 4K video you could select 3840 x 2160 at 25 or 30 fps if you want the very best video quality. If you are going to stream in 4K, you will need a very high spec computer and a very fast internet connection to get a smooth stream with no
interruptions in the video or audio feed.
Colour
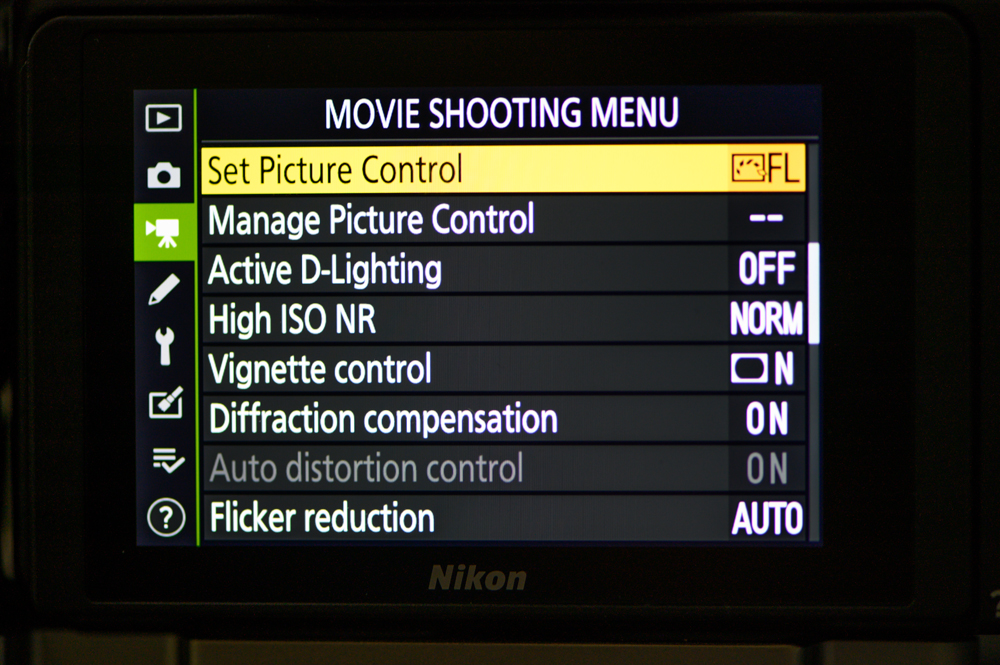
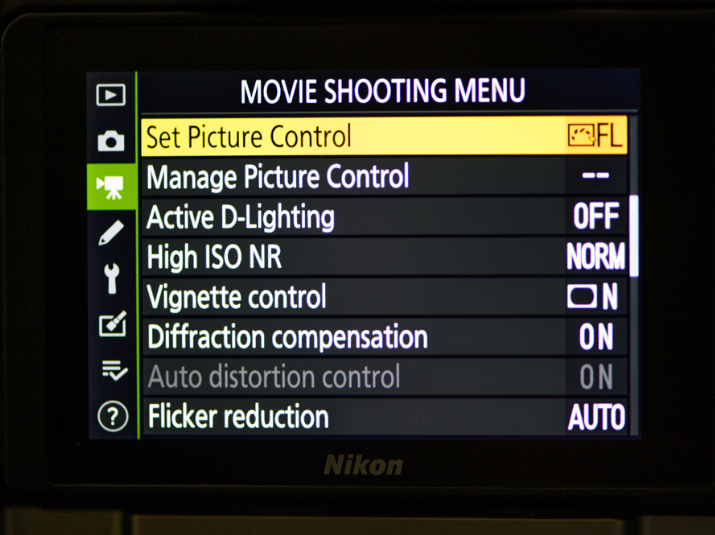
You have two approaches to grading the colour that is output from the camera. You can either apply a profile in camera that is then sent to the streaming software, or alternatively choose to colour grade the video output from the camera from within the software. Whichever approach you feel is best for your situation, go to the video settings menu, and select ‘Picture Control’. If you want the camera to handle the colour use either the Portrait or Standard picture control settings. I would recommend that you do your colour grading within the streaming software if possible, so would suggest you set the picture control to Flat.
Focusing
For most Nikon DSLRs your best option would be to set your camera or lens to Manual focus, and turn the manual focus ring to focus on the area that you will be streaming from. If you are using low aperture values such as f/1.8, make sure that you remain within the depth of field of the lens as this area will be quite small. If you move around a lot during your stream you may want to consider an aperture of f/2.8 or f/4. If you have a D780 or D6 you could take advantage of the latest autofocus technology in these cameras and setup them as outlined below using the face tracking video autofocus modes.
Nikon Z series cameras will give you a lot more flexibility with focusing due to the very fast and accurate face detection autofocusing algorithms. Set your Z series camera to AF-F and then Auto Area focusing mode. This will automatically detect and focus on a face and then maintain focus lock on the face if it moves within the frame.
Camera Settings
Using the display switch, put your DSLR or Z Series camera into video mode, and I would suggest setting the camera to Manual mode for maximum control over the camera settings and look of your stream. The following settings are a good baseline:
Aperture: Depending on your lens choice, you should choose the lowest ‘f’ number you can to give you good separation between yourself and the background. An
aperture value between f/4 to f1.8 would be ideal for this.
ISO: Set the ISO to 64 or 100 depending on the native ISO settings for your camera and then turn on Auto ISO.
Shutter Speed: Should be either 1/50th or 1/60th of a second. The general rule here is to make your shutter speed double your frame rate. I.e At 25 fps would shoot at 1/50th (25 x 2). This is especially important If you are streaming under artificial lights otherwise you will get a ‘rolling band’ in your video.
Frame Rate: Using 1920 x 1080p at 25 or 30 fps will give a great picture quality. If your camera supports it you could shoot in 4K at 3840 x 2160p again at 25 or 30fps for the highest quality picture.
Picture Control: Set your picture control to Flat, Standard or Portrait depending on how you plan to colour grade the video output.
Standby Timers: You should also turn-off any power or sleep timers that are set on the camera.
Microphone: In the video settings menu on the camera you will need to setup up microphone levels if you are using the camera's microphone or external microphone placed on the camera. Using the manual setting on the microphone level works really well and you would want to ensure the output stays in the
yellow area on the audiometer, if it touches the red area, your audio will ‘clip’ and distort.
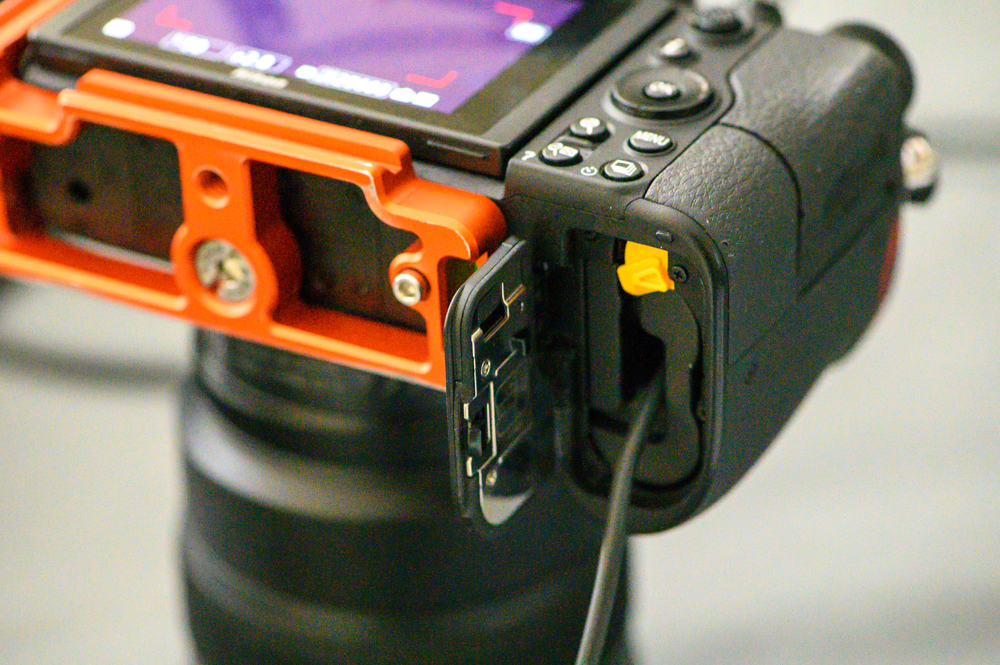
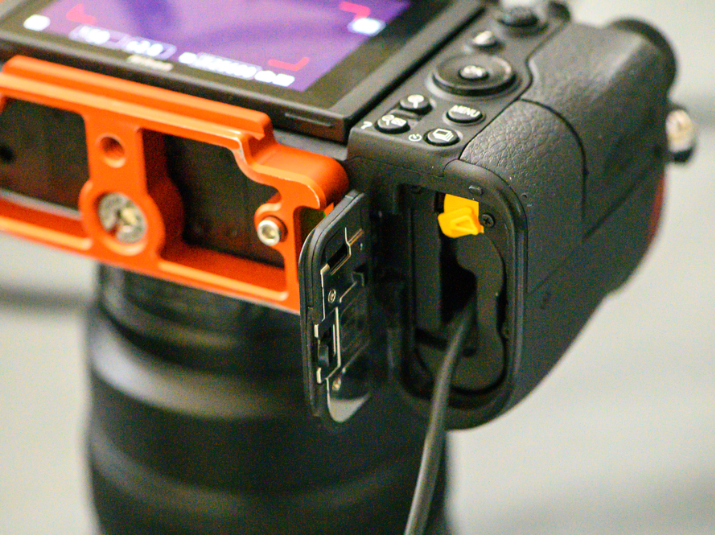
If you are planning on a short video conference or streaming session then the camera will be fine to run from battery power. However to be on the safe side, you may want to look at getting a mains battery adapter to allow the camera to run on mains power. Consider a EP-5B and EH-5P AC adaptor and battery replacement for longer live streams if you have a camera that uses EN-EL15 batteries.
From Camera to Computer
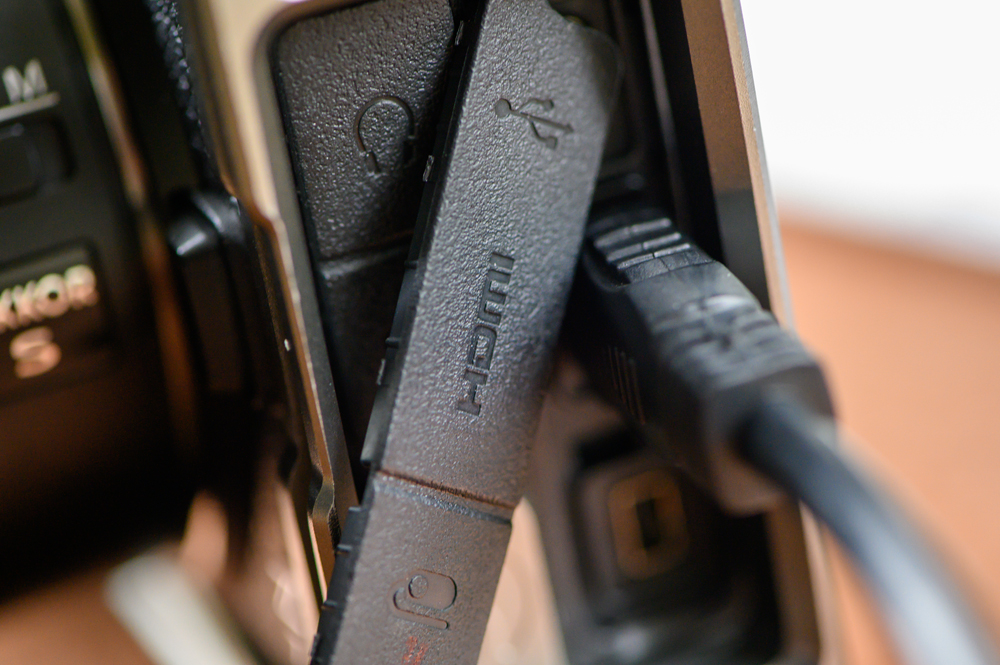
Now we have our camera setup, we need to get the video signal from the camera to our computer. The usual way to do this would be via the HDMI output. However due to the wide variety of video and audio codec standards, a video capture device is needed to re-encode the signal into a format that your computer can understand.
It is also possible to use the USB output on a Z 6 or Z 7 as if you were tethering on a studio photographic shoot. There are very few software applications that can do this. Software such as Ecamm can create a ‘virtual camera’ using USB input from the camera which you can then also stream live. This means you do not need a video capture device, however it will require significant additional processing power from the computer.
There are many video capture devices on the market. I would recommend an external device unless you are happy to take apart your computer and install a video capture card. One of the easiest to use and setup would be the Elgato Camlink 4K. There are other video capture cards and devices to choose from if you can’t get hold of a Camlink 4K. I’ve used both the Elgato Camlink 4K or the Elgato HD60 S+ external video capture devices which both work well with my Z 7. If you are looking at more complex multiple camera setups a capture device like the Blackmagic Atem Mini.
The most important thing to check is when using your Nikon camera as a webcam or streaming camera is that the video capture device supports something called UVC also known as USB Video Device Class. UVC is a data protocol that standard webcams or computers use so they can work with streaming and video conferencing applications.
Once you have your video capture device, connect the HDMI output of your camera to HDMI input on the capture device. Now connect the video capture device to your laptop, this is usually done with a USB cable. Depending on the video capture device you have, you may need to install some additional software drivers to make them work with your computer.
When this is all connected, the video output from the camera can now be seen on the computer by streaming applications.
Audio
Now you have your broadcast quality video from Nikon camera and Nikkor lenses, using an external microphone should provide you with very high quality sound. There are a wide range or Microphones on the market and I’m only going to cover two types which should allow you to achieve high quality audio on a reasonable budget and are easy to setup.
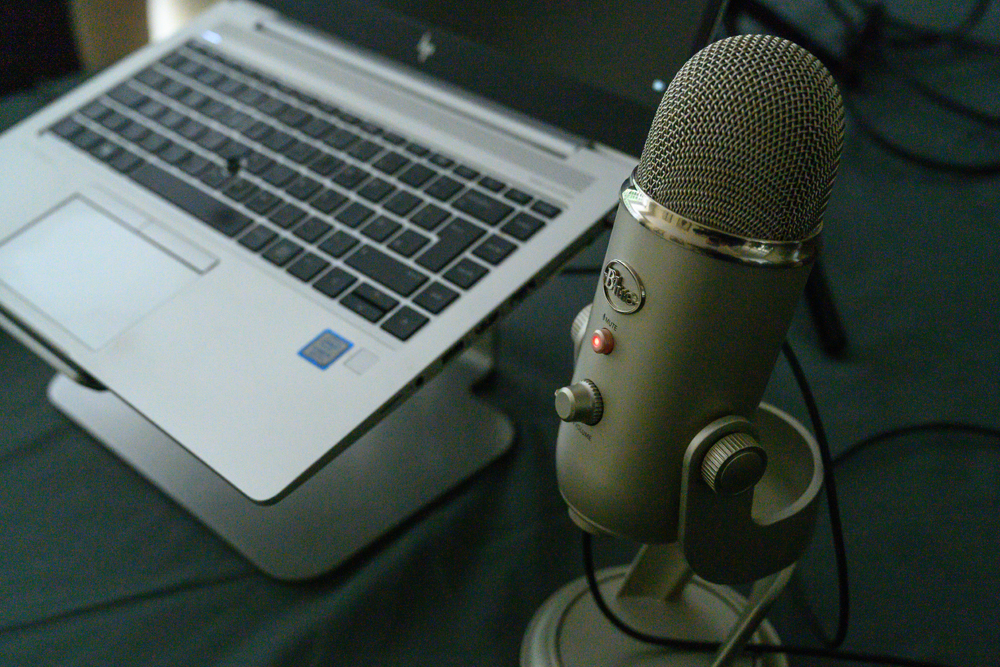
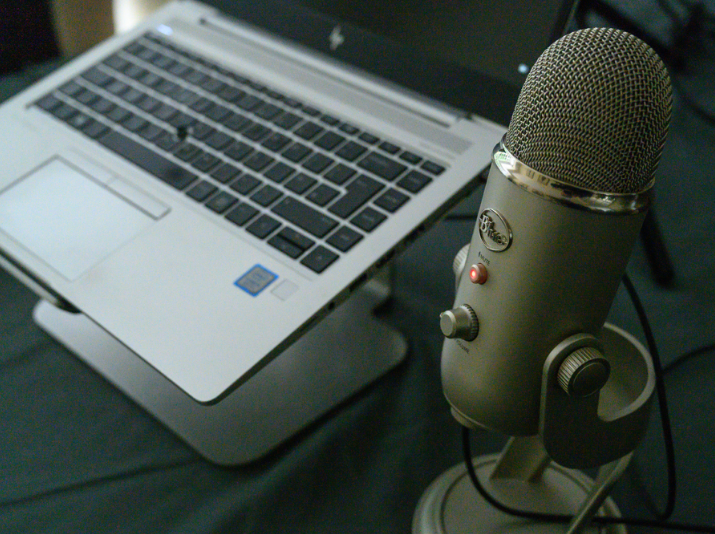
USB Microphones: This is a microphone that plugs into the USB port on your computer. A condenser microphone such as a Blue Yeti is a good choice as it gives great quality audio and requires almost no setup. These microphones are usually placed on a desk or mounted on a boom arm with a shock mount and are great for static setups.
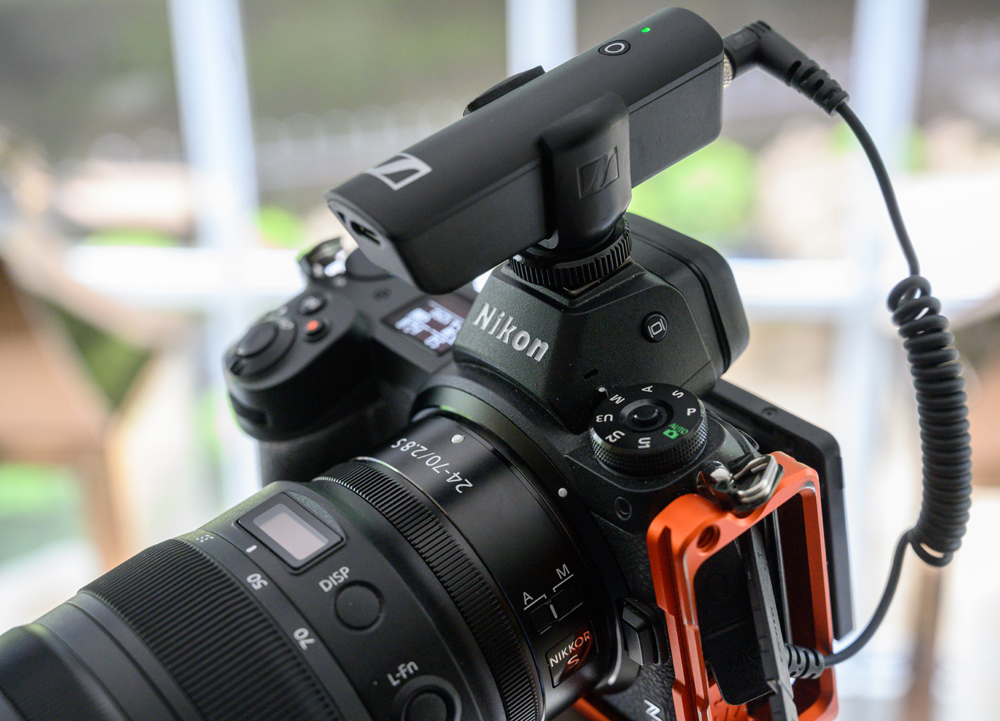
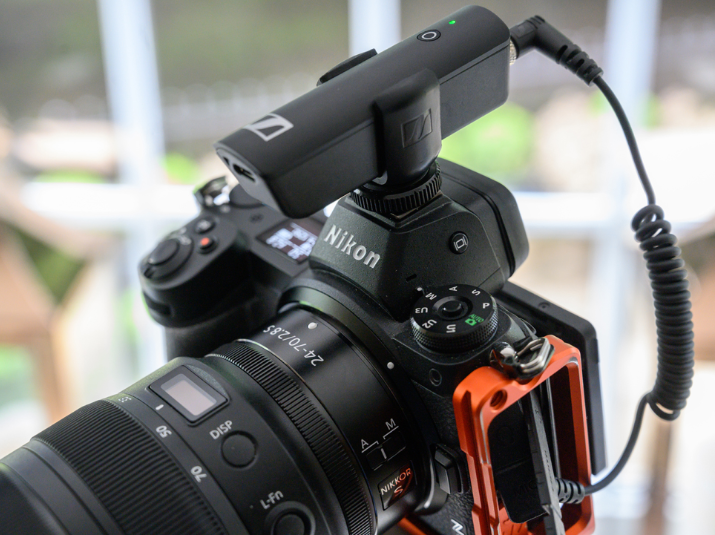
Lavalier Microphones: These are also known as lapel mics. We use Sennheiser XSD wireless microphones as they allow more freedom to move around when streaming which is essential for some of the workshops we live stream. The receiver part of the microphone sits on the camera hotshoe mount and is plugged in the microphone port on the camera. The transmitter is plugged into the microphone and then placed in a pocket or clipped to the belt of the person streaming. The audio signal is sent back to the receiver on the camera when the person streaming talks. Both the audio and video signals are now sent to the computer via the HDMI cable from the camera via the video capture device. The audio and video signals are now ready to be synced in the streaming software.
Broadcasting & Streaming Software
The next part of the setup is the broadcast or streaming software. There are many applications to choose from depending on your requirements and functionality. You have standalone streaming apps such as; Xsplit, OBS, Streamlabs or Ecamm, high end broadcast software such as Wirecast; or browser based streaming solutions such as Streamyard. Some video conferencing software will also allow direct audio and video from your video capture device. Your choice of software will also be determined by your computer hardware. All of the software I’ve listed runs on Windows, but not all of them run on MacOS. There are no right or wrong choices here, choose the streaming software which offers you the functionality you require whether it is a free or paid for solution. I’ve worked with various software on both windows and macOS and have found XSplit on running on a Windows 10 to be the best platform for live streaming our Nikon School workshops.
Key Terms
All of these apps offer a wide range of options for you to configure your stream exactly how you want it. There are already a lot of online tutorials about setting up streaming software, so I’m only going to cover the main points here.
Scenes: A scene is effectively a blank canvas for you to add your input sources onto. The big benefit of using the software to build our scene is that you can set up multiple scenes all with different source inputs and then transition between them at the touch of a button.
Sources: These would usually be your video and audio feed from your capture device. You can add multiple sources into a scene, which then build as layers allow you turn a source on and off if needed. All software has a live preview window which shows your scenes and sources in real time, so you can see what you will be streaming
Recording & Streaming: The recording feature can record your stream directly to your computer for later upload to your social media channel or if you select the streaming option, you can stream your ‘scene’ live to your audience. Most good software will also allow you to multicast or configure a custom RTMP (real time messaging protocol) stream which allows you to multicast to various different social platforms simultaneously.
Virtual cameras: Some software will also allow you to create virtual cameras which you can then relay the output to the video conferencing software if your choice of streaming software is not natively supported by the conferencing software.
Setup
To get your stream up and running, launch your streaming software and then add your video and audio sources into your scene. In Xsplit and OBS, when you click on ‘Add source’ and ‘video device’ they automatically detect the Camlink 4K I’m using. For your audio input, you need to ‘Add source’ again, but this time ‘audio input device’ if you are using a HDMI video capture device such as the Camlink, it should show up, as would a USB microphone such as the Blue Yeti.
You can now get creative with your stream and add extra input sources, such as chat comments, ticker bars or multiple camera feeds if you want. This allows you to create an customised stream.
Going Live
To stream your output, choose which live streaming platform you want to use by selecting one from the menu in your software, enter your stream key and you are now live streaming. If you are video conferencing, open app, select the camera input as Xsplit or OBS depending on the software you are using and you now have a high quality picture within your video conference software.
Standing out from the crowd
If you want your broadcast or live stream to look really exceptional think about adding a couple of finishing touches such as lighting or ‘green screening’ your background.
Lighting
As we all know, great photography and video needs good lighting, this is the same with streaming. To get the best video quality you should think about the lighting that you are using. A main front light to illuminate yourself is essential, a LED light panel with a diffuser works well in this situation. Just make sure the light source is large enough relative to you to ensure there are no harsh shadows. A second light on the background could also be used, as this will add extra depth to the image.
If you still have shadows or dark areas in the image, lighting those with small additional fill light is always an option.
Green Screen
Some streaming software allows you to ‘green screen’ the background so you can replace your physical background with a virtual one. This can get quite complex, but it does offer you the opportunity to get really creative with your stream.
Summary
That’s it, connect your Nikon camera to a video capture device, put the output through the streaming software, switch on your microphone and bring up the lights and you are now ready to go live and stream yourself out to the world with professional level image quality from your Nikon Camera.
You can now download a PDF version of this Hints & Tips article to read offline and print