Welcome to Nikon School. The official Nikon education experts to help you learn how to get the best from your Nikon Camera and Lenses

Learn the D-SLR Basics

If you’re just starting with DSLR photography and are feeling slightly overwhelmed by the plethora of menus, dials and buttons, shorten your learning curve and boost your imaging confidence with these quick settings tips.

Key camera controls

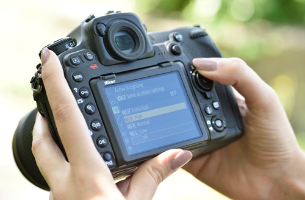
Menus – you'll find these on the LCD screen. Access your choices using the arrows on the multi-selector button on the back panel, or use the touch screen if your camera has it.

Main command dial – top right on the back panel.

Mode dial – left on the camera's top plate.Rotate the mode dial with your thumb and middle finger (some models may require you to press down the little button in the centre with your forefinger)

WB (white balance), QUAL (image quality), ISO and info buttons on the back panel or as part of the menu screen, depending on camera model.

Your basic settings

If you're just starting with DSLR photography and are feeling slightly overwhelmed by the plethora of menus, dials and buttons, shorten your learning curve and boost your imaging confidence with these quick settings tips.

1. JPEG or NEF (RAW) files

A JPEG is processed by your camera, so it's ready to view as soon as you've shot it, and as it's compatible with most software and devices, it's highly shareable too. The downside of this format is that you can't do much with it in post-processing, so what you see is essentially what you get.

A NEF (RAW) file records all the raw data captured by your camera's sensor, including a greater dynamic range and more data than a JPEG, giving you lots of scope for creativity when you download it onto your computer (think of it as a digital negative). But that's the downside, too – not only does this make the file much larger than a JPEG, taking up a lot more room on your memory card, it also means the image can't be 'normally' viewed until it's been processed on your computer.

If you're not sure which to choose, why not go with both? NEF (RAW) + JPEG normal or fine gives you an immediately useable image, plus a RAW file you can edit at your leisure.

• Select via the shooting menu OR hold down the QUAL button and rotate the command dial to show all the different choices on the control panel (the top-plate LCD screen) - this can also be seen on the back display screen,

2. Exposure modes

Select the exposure mode on the mode dial. 'Point-and-shoot' Auto will set everything up for you – including shutter speed, aperture, ISO, white balance and flash – but why not go for Program (P) instead? This automatically selects the optimal exposure, setting the aperture and shutter speed for you, but gives you the freedom to choose ISO, white balance and whether to pop the flash. It also allows you to choose your focusing point


Aperture Priority (A) enables you to choose the aperture via the command dial, with the camera automatically choosing the optimum shutter speed. A large aperture (low f-number) reduces depth of field so that anything behind and in front of the main subject is out of focus, making it ideal for portraits. Small apertures (high f-numbers) increase depth of field, bringing out foreground and background details, so it's perfect for landscape photographs.

Shutter priority (S) gives you control over the shutter speed via the sub-command dial, leaving the camera to select the optimal aperture. This is ideal when you want to freeze the action (fast shutter speed) or to blur movement in order to suggest motion (slow shutter speed).

3. ISO

With ISO – the digital equivalent of film speed – a fail-safe approach when you're starting out is Auto ISO, as this leaves the camera to set the optimum ISO sensitivity for the lighting conditions. If you're worried about noise, which increases at higher ISO settings, you can choose a maximum sensitivity in the ISO menu.

• Select via the shooting menu OR you can also choose your ISO by holding down the ISO button whilst rotating the command dial to show all the available ISO options on your camera.

4. White balance

Auto white balance is ideal for the majority of the shooting situations you will find yourself in. You can also choose warm up or cool down the look of your image, by changing your white balance settings.

• Select via the shooting menu OR hold down the WB button and rotate the command dial to show all the different white balance options.

5. Creative effects

Want to get a bit more creativity into your images from the off? Use your camera's scene modes or special effects modes.

In a scene mode, the camera automatically chooses the best settings for that scene, to give you great results at the press of the shutter button. These include portrait, landscape, child, sports, close-up, night portrait, night landscape, party/indoor, beach/snow, sunset, dusk/dawn, pet portrait, candlelight, blossom, autumn colours and food. To access them, first select 'scene' on the mode dial, next press the info button on the back plate to see which scene is currently selected, then rotate the main command dial to choose the scene mode you want.
Effects include high key, low key, miniature, silhouette, colour sketch, night vision and selective colour. To access them, rotate the mode dial to 'effects' then follow the same steps as for scene modes.

Where to get more advice

• Read the manual – it's packed with info!
• Book a Nikon School course for friendly, expert tuition.

Want to read offline?

You can now download a PDF version of this Hints & Tips article to read offline and print

DOWNLOAD

NIKKOR Lenses
NIKKOR Lenses