Want to unleash your inner Spielberg? Here's how to start shooting D-movies with your Nikon camera… And action!
Want to unleash your inner Spielberg? Here’s how to start shooting D-movies with your Nikon camera… And action!
Want to unleash your inner Spielberg? Here's how to start shooting D-movies with your Nikon camera… And action!
Use these basic settings to get you up and running.
• Set your camera to Program so the exposure will be set automatically, leaving you free to concentrate on being creative.
• In the shooting menu, go to Movie Settings and choose the quality/frames per second. Most videos are shot at 1920x1080/30p – that's full HD (high definition), recording 30 frames per second. For a more cinematic or filmic look, go for 24p for 24 frames per second. Remember: the higher the image quality, the larger the file.
• Switch ISO to Auto to allow your camera to automatically make any necessary ISO changes.
• Select the Focus Mode. For general video shooting, AF-S will be fine, as long as your subjects aren't moving – in which case switch to AF-F. The other choice is MF (manual focus), which you could try as you become more experienced.
• Choose the AF Area Mode. Normal should be fine for most subjects, and there's also a Wide option. In Face Priority your camera will focus on faces, while Subject Tracking is great for moving subjects.
• Turn on Live View, press the red Record button, and you're shooting video…
But before you do start shooting, you'll need to think about which lens to use. You'll get good results with any Nikon lens – and one of the biggest advantages of shooting video with a Nikon DSLR is the great selection of NIKKOR lenses available – but some are better suited to specific types of shoots than others. Asking yourself these questions will help you choose:
• Will I be shooting a lot of low light video? Yes? Then look at primes or fast zoom lenses. No? Zooms will do the job perfectly.
• How important is shallow depth of field? If it's very important, you probably want a couple of fast primes i.e. f/1.2, f/1.4 or f/1.8. Not that important? Then go for zooms.
• How often do I want to change lenses? If you don't, choose a zoom. If you have the opportunity to swap lenses easily, then consider using primes.
Keen video shooters often gravitate towards f/1.4 primes because of their image quality and superb low light capabilities. However, f/1.8 primes can deliver equally stunning image quality in similar lighting conditions, usually for less outlay, and you can always whack up the ISO if you need a bit more light.
• 24mm f/1.4G ED – perfect for low light shooting, as well as giving you extraordinary control over depth of field.
• 28mm f/1.8G – brings a wider perspective to your shots, and it's great in low light scenes.
• 35mm f/1.8G ED – ideal for scenes where extra light is needed.
• 50mm f/1.8G & f/1.4G – perfect for a variety of shooting situations, from interviews to documentary allowing for beautiful shallow depth of field and low-light shooting.
• 85mm f/1.8G & f/1.4G – the longer focal length allows for flattering interview and character shots, as well as great depth of field control. While the f/1.4 version lets in twice as much light as the f/1.8, because Nikon DSLRs are so fine tuned for low-light shooting, in most situations the f/1.8 will do a great job – and for a fraction of the cost.
One drawback of primes' wide apertures is their extremely shallow depth of field, which can make keeping subjects in focus challenging. A zoom lens gets round this problem and also gives you the freedom to shoot a wide range of focal lengths without having to change lenses. VR (Vibration Reduction) image stabilisation is built into many zooms, enabling you to shoot handheld and still get wobble-free results, which is usually very important – unless you want to shoot 'shaky-cam' style à la Cloverfield or District 9.
• 14-24mm f/2.8G ED – the film-makers' favourite, thanks to its superior sharpness and unique focal length range paired with an f/2.8 aperture, allowing for excellent low-light shooting and depth of field control.
• 16-35mm f/4G ED VR – takes you from super-wide to wide, giving you the flexibility to get the wider shots for greater scene variety.
• 24-70mm f/2.8G ED – this versatile range means you can easily go from shooting wide scenes to close-ups.
• 24-120mm f/4G ED VR – great focal length range and zoom flexibility make this a very popular all-rounder for video.
• 70-200mm f/4G ED VR – packs the latest generation of image stabilisation, which means steady video even when handholding at 200mm. The f/2.8 VR II version is a long-time pro favourite and quickly becoming the filmmaker's, too, for its ability to create a beautiful separation between subjects and the background, which creates a real sense of intimacy.
So you're all set up and ready to shoot. The next thing to consider is framing, because good composition is just as important for video as it is for stills imaging. Luckily, most of the same techniques apply.
For example, with video, it's still very helpful to bear in mind the rule of thirds. When you look at your subjects using Live View on the LCD screen, imagine a noughts and crosses grid over it. The lines and the points at which these lines intersect are the ideal places – the 'thirds' – in which to position your subject for a balanced composition. Move your camera so your subject appears where two of the lines meet; it doesn't have to be directly on the intersection, just somewhere close to it.
Cropping people well is also key. Avoid cropping at major joints like the waist or knees. For example, if you're showing someone full-length, you don't want to accidentally chop them off at the ankles. Likewise, for a medium shot, don't crop your subject at the knees; frame your shot just above. With a tighter shot, avoid cropping your subject at the wrist, as the viewer will be left wondering what their hands are up to! Make sure you're only leaving a small amount of airy space above your subject's head, as too much space doesn't good. In fact, when framing a tight close-up, you can get away with cropping off part of your subject's head, as long as their eyes fall on the top rule of thirds line.
In video, you've also got to consider the type of shot to use. There are essentially just three: establishing shots, medium shots and close-up shots, and they are used everywhere, from big Hollywood productions to commercials and even wedding videos. Establishing shots are the wide ones that allow the viewer to take in the entire scene and get a feel for what's happening, and they're often the first shots in a scene. Medium shots can be of a subject or a tighter shot of a scene. Close-ups are tightly cropped, showing details e.g. a face, or something happening that is key to your movie's storyline.
But it's not all lights, camera, action – there is the sound to consider, too. High quality audio adds to the professional feel of your D-movie and to your viewer's enjoyment.
Many Nikon DSLRs have a mono microphone built-in, but if you want more control over how you capture your film's sound, it's worth investing in an optional accessory mic. The Nikon ME-1 is a compact, lightweight stereo mic that slips onto the hotshoe and plugs into the audio-input – and because the audio is recorded in-camera, no other dedicated audio recording equipment is needed. As well as DSLRs, it can also be used with Nikon 1 cameras and any Coolpix that has an external mic jack.
The ME-1 allows good sound pick-up for sources in front of and close to the camera – that, however, will include you, so keep schtum while shooting! You can also use it with an extension cable so you can position it closer to your subject. The ME-1 includes a 'windscreen' to reduce wind noise when shooting outside, and it's also designed to reduce vibration noise from the camera itself during autofocus use. Some Nikon DSLRs have their own wind-cut setting, while others have a low-cut filter, further reducing low-frequency noise by limiting the frequency range the mic can capture.
You can also use Nikon's wireless ME-1W mic and receiver with any camera equipped with a mic jack. It can capture sound direct from the source for up to three hours, making it ideal for recording presentations, street interviews and pro-quality video blogs. As both the microphone and its receiver capture sound, you can also use them to record a two-way conversation. To capture a music performance in stereo, simply plug the ME-1 into the ME-W1's external jack.
Many Nikon DSLRs have a built-in peak audiometer with audio levels shown on the LCD in Live View. The scale is in three sections: white is the largest and it's where most of your audio should fall, yellow is at the top end of acceptable levels, and red means the high end of the range will be distorted. Each time you record audio in a new location, do a test recording and check the results; if levels rise into the red, simply lower the audio sensitivity until they drop into the yellow area at the very least. It's best to do this by listening to the audio via headphones e.g. while playing it back on a computer.
So now you really are ready to get the camera rolling. Bear in mind these additional points for ensuring you get great results.
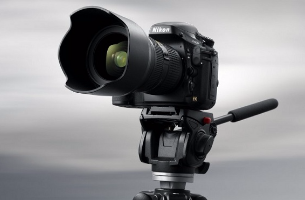
• Keep the camera as steady as possible – use a tripod or monopod, with a fluid head to ensure smooth pans and tilts. Otherwise, shoot handheld with feet slightly apart and elbows drawn into your body, leaning against something sturdy for added stability. Also try holding the camera in front of you with the strap taut around your neck – this enables you to pivot or walk while shooting steady footage.
• The more pre-production planning you can do, the better – either writing out a list of shots you want to capture, with a simple outline and dialogue ideas if applicable, or by working up a script and storyboard (sketches of each shot).
• Move the camera – shooting everything at eye-level from a standing position will result in a boring movie. Instead, look for creative angles, including low to the ground or from a high vantage point, but don't go mad – too many zooms or pans can be distracting.
• Pad your shots – shooting a little extra footage before the action begins and after it ends makes it easier when you're editing, because you've got extra frames to edit around.
You can now download a PDF version of this Hints & Tips article to read offline and print