Welcome to Nikon School. The official Nikon education experts to help you learn how to get the best from your Nikon Camera and Lenses

How to get the Exposure Right

Exposure is all about getting the light right, and that means knowing how to manipulate aperture, shutter speed and ISO.

Exposure is all about getting the light right, and that means knowing how to manipulate aperture, shutter speed and ISO. All three are interlinked, so by adjusting at least one of the trio, you should be able to get the exposure and effect that you want.

Aperture

When you press the shutter release to capture an image, it's your camera's lens and shutter that control how much light gets to the sensor. So let's start by looking at aperture. Most lenses have a mechanical diaphragm (the aperture) that can be opened up and closed ('stopped') down to let in more or less light, and this is referred to using the terms 'f-numbers' or 'f-stops'. While a large opening obviously lets in more light than a small one, large openings are referred to with small numbers, while large numbers mean that a small opening is being used.

So, if you want to let more light in through the lens, you have to open up the aperture, which means going from a narrower aperture of, say, f/16 to a wider one of, for example, f/5.6. A 'fast' lens – one capable of a very wide opening to let in lots of light and therefore enable a faster shutter speed to be used (see below) – will have a maximum aperture of f/2.8, f/2, f/1.8 or f/1.4. Most lenses will close down – narrow their aperture – to somewhere between f/22 and f/32.

Shutter speed

The second part of the exposure triangle is shutter speed. Your camera's shutter controls the length of time the light coming through the lens hits the sensor for, and this is usually referred to in fractions of a second. A very fast (short) shutter speed such as 1/1000sec, will freeze most action in its tracks, while a slow (long) shutter speed like 1/30sec will blur passers-by – in fact, use a very slow shutter speed like 2 mins and anyone strolling through the frame won't even register in the final image (which can be very handy when you're after timeless shots devoid of people).

ISO Sensitivity

The third leg of the exposure triangle is ISO – altering this changes how sensitive the image sensor is to the light falling on it. The the more light in the scene, the lower the ISO you need to get a good exposure (100, for example). Thelower the light, the higher the number required for a good exposure (say, 800). Modern Nikon cameras have amazing ISO sensitivity, so even black cats in coals cellars don't present a problem. The flagship D5 enables shots at up to a mind-blowing 3,280,000 ISO !

Metering modes

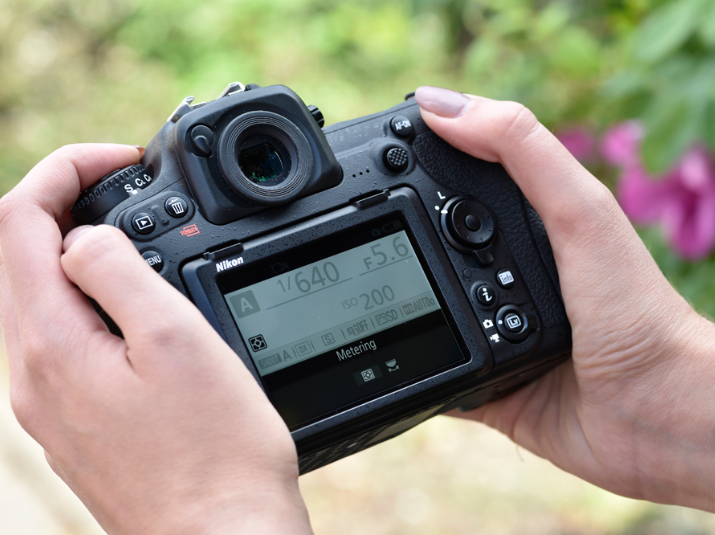
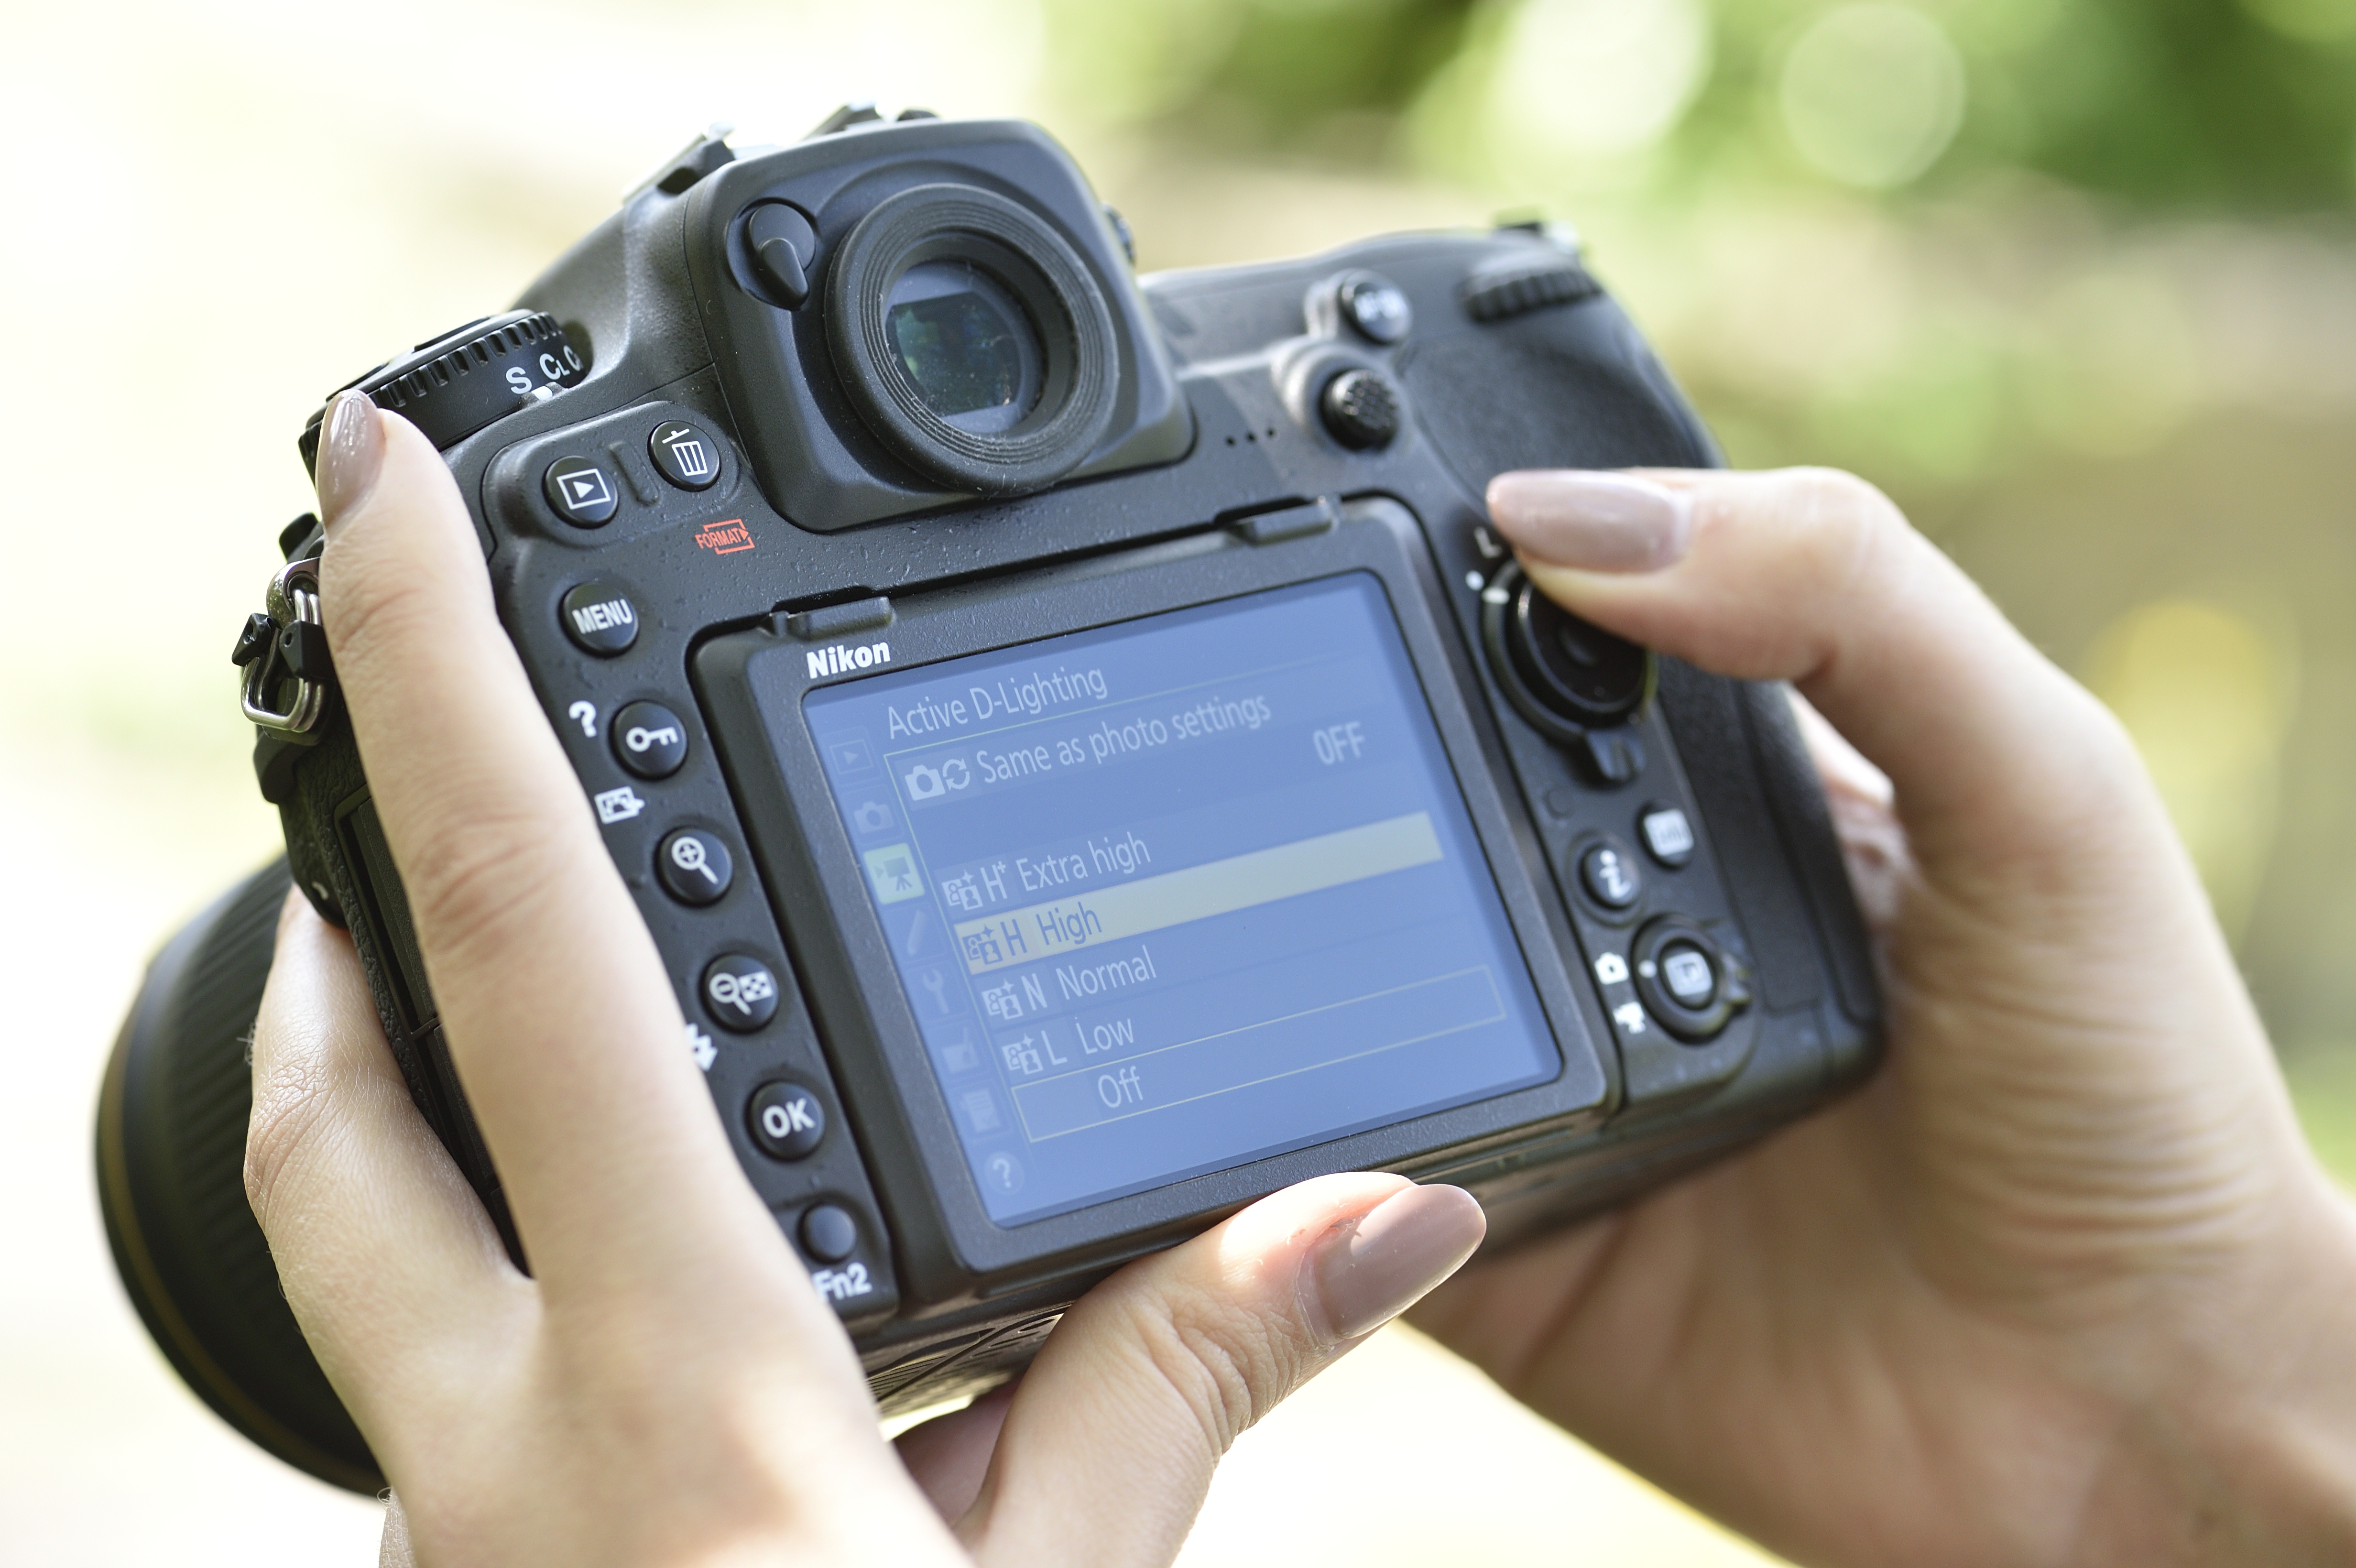
One way to ensure great exposures is by selecting the right metering mode. While the human eye deals adeptly with hugely varying brightness levels across a scene, like the brightness of the sky contrasting with foreground shadows, this is slightly trickier for even the best camera to do without burning out highlights or rendering dark areas detail-free. This where metering choices come in.

The default setting for Nikon DSLRs is Matrix metering. This calculates an average exposure for the whole scene, by splitting the scene into a series of tiny sections (i.e. a 'matrix') and analysing light levels, colour and focus information in each of them, then comparing this with an internal database of around 30,000 scenes to calculate the best exposure for this particular subject. It's usually spot on, so you can treat it as your metering choice for all but the trickiest of lighting situations.

For portraits or a shot where a bright sky threatens to throw your subject(s) into silhouette, you might be better switching to centre-weighted metering. This assumes that your subject is in the centre of the frame, so while it still takes readings across the whole frame, those from the centre are given the most weight. For situations where exposure precision is key, such as with backlit images, wildlife, or when you want to ensure detail in a highly contrasty image with a bright subject, such as the moon in the night sky, try spot metering. This only analyses the light levels around the active AF point – i.e. your most important point of focus, such as an animal's eye – but it can be tricky to use because you have to be sure you've picked exactly the right AF point.

Exposure compensation

Another way of dealing with a very bright or dark scene is to use exposure compensation (this only works in P, A and S mode). Hold down the exposure-compensation button (+/-) then rotate the command dial to add or subtract an exposure value (EV). For a bright scene, add stops, and for a dark scene set negative stops. Check the results on the LCD, and check the histogram – a balanced image should produce a histogram that fits within the scale. If the histogram is bunched up towards the right-hand side, your image is still overexposed and losing detail in the highlight areas, so to compensate you'll need to select a positive EV number. If it's chopped off on the left, it's underexposed, losing details in the dark areas, so you'll need to select a negative EV number to balance this out. Remember to reset your EV to zero every time you leave the place you've been photographing.


• Quick tip When you're using matrix metering with a high-contrast scene, set Active D-Lighting to high or extra high (if your camera allows this) – this automatically applies the appropriate correction to maintain highlight details for a more balanced, natural-looking image.

Want to read offline?

You can now download a PDF version of this Hints & Tips article to read offline and print

DOWNLOAD

NIKKOR Lenses
NIKKOR Lenses