Welcome to Nikon School. The official Nikon education experts to help you learn how to get the best from your Nikon Camera and Lenses

How to edit images with NX Studio

Welcome to NX Studio, Nikon’s new free image-editing software. Nikon School Training Manager Neil Freeman shows you how to get started with your first RAW images and then progress to creating your personalised NX Studio workspace.

NX Studio is Nikon’s new software editing suite, enabling you to browse, process and edit still images and movies. ViewNX-i was designed primarily for viewing and sorting images, with only limited RAW image-processing capabilities. Meanwhile, Capture NX-D has editing tools but doesn’t enable image cataloging, browsing, adding keywords, geolocating images or movie editing. To take advantage of all these features, photographers have had to move between both applications. Not anymore.

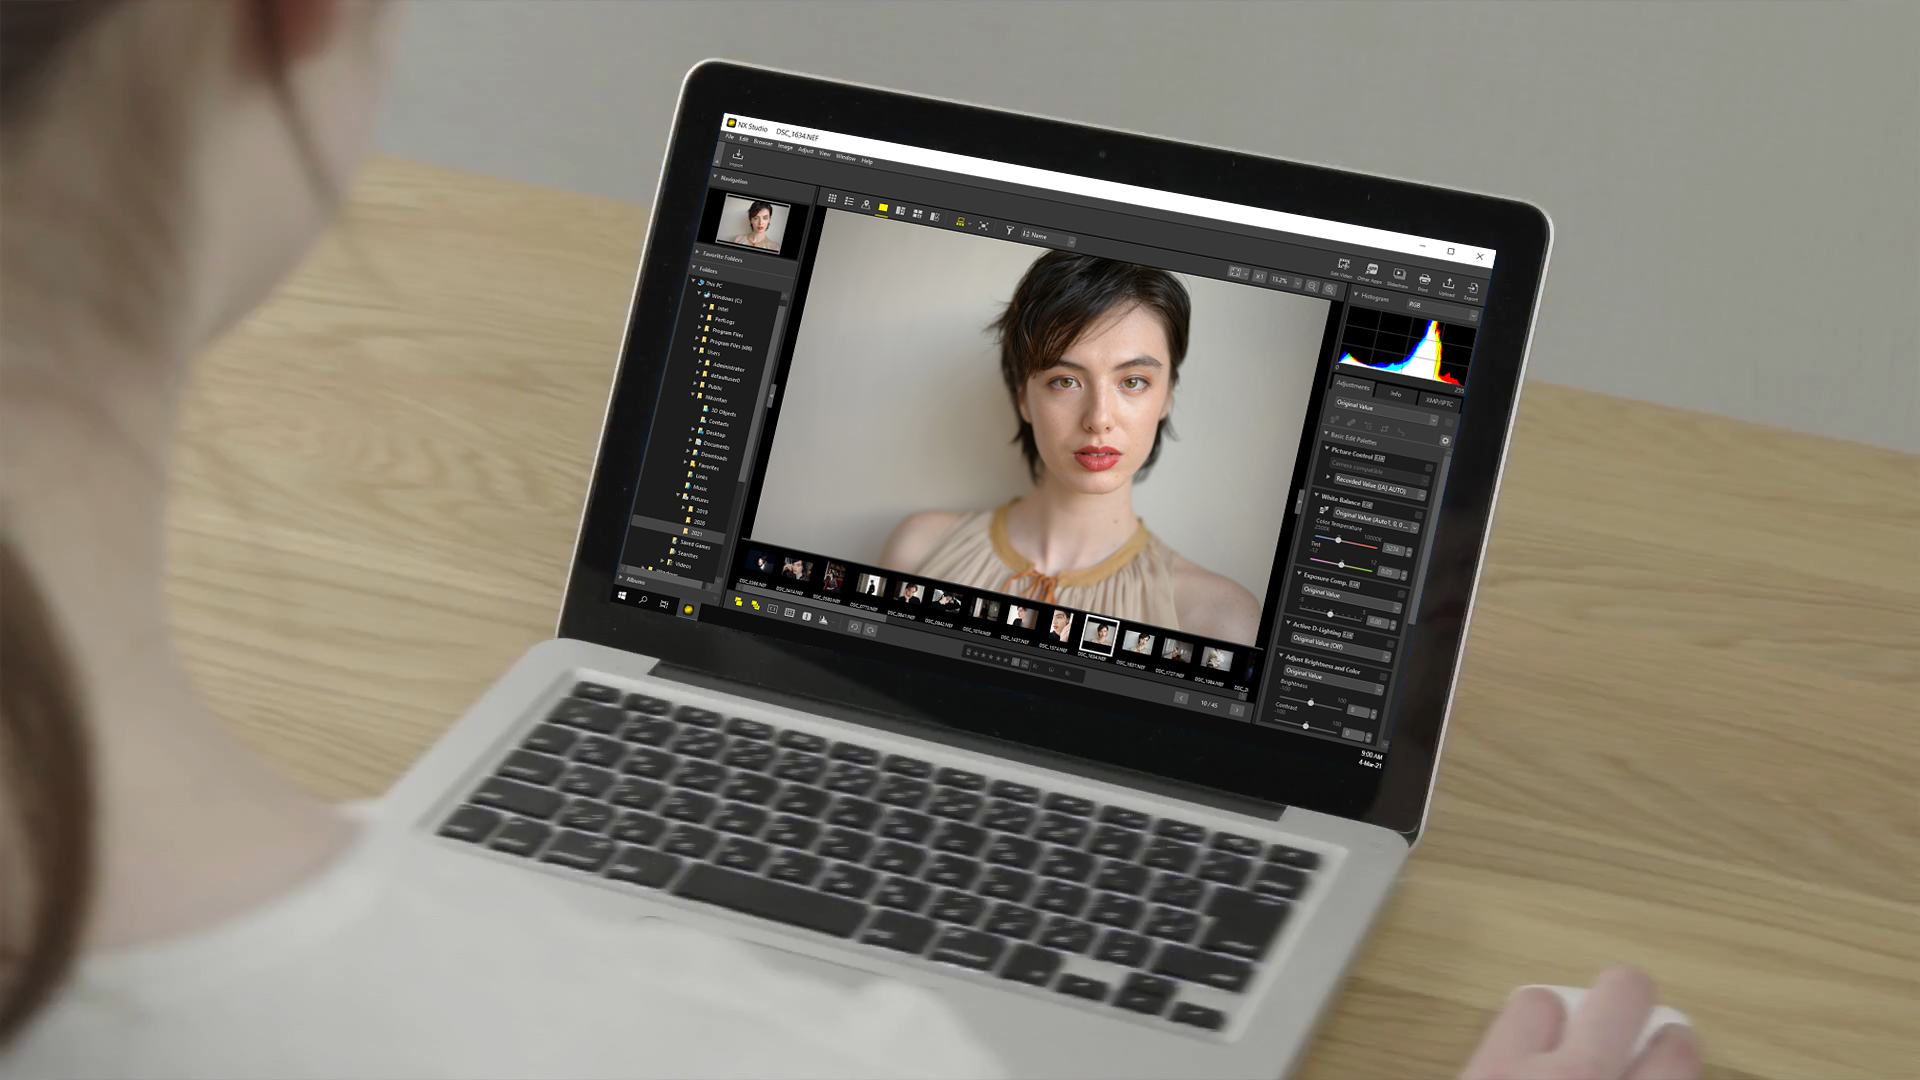
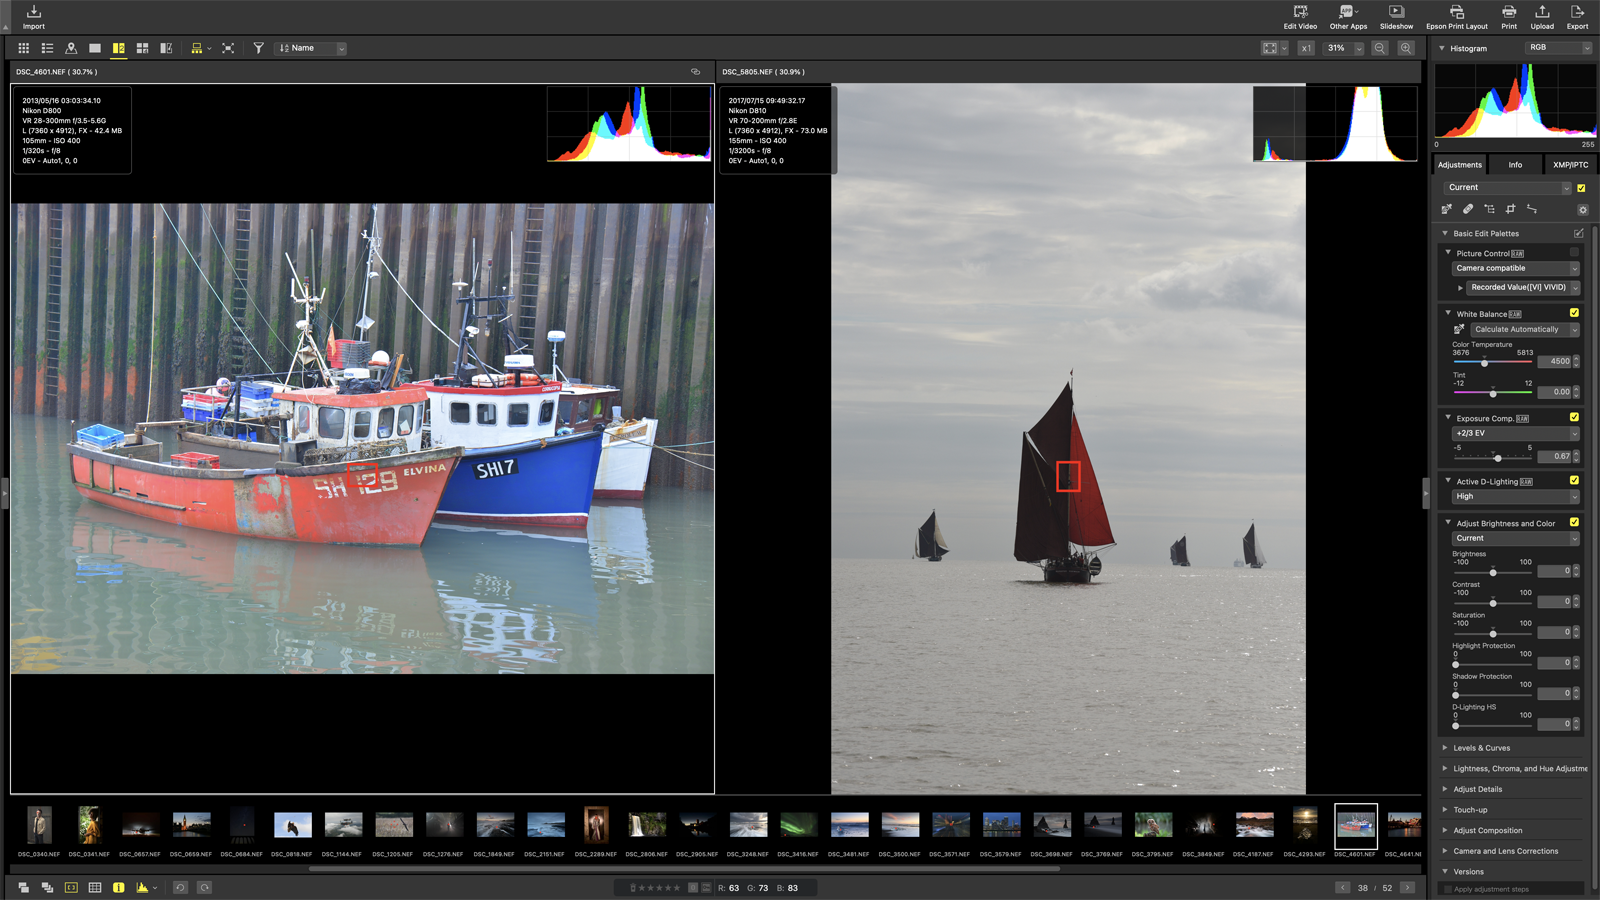
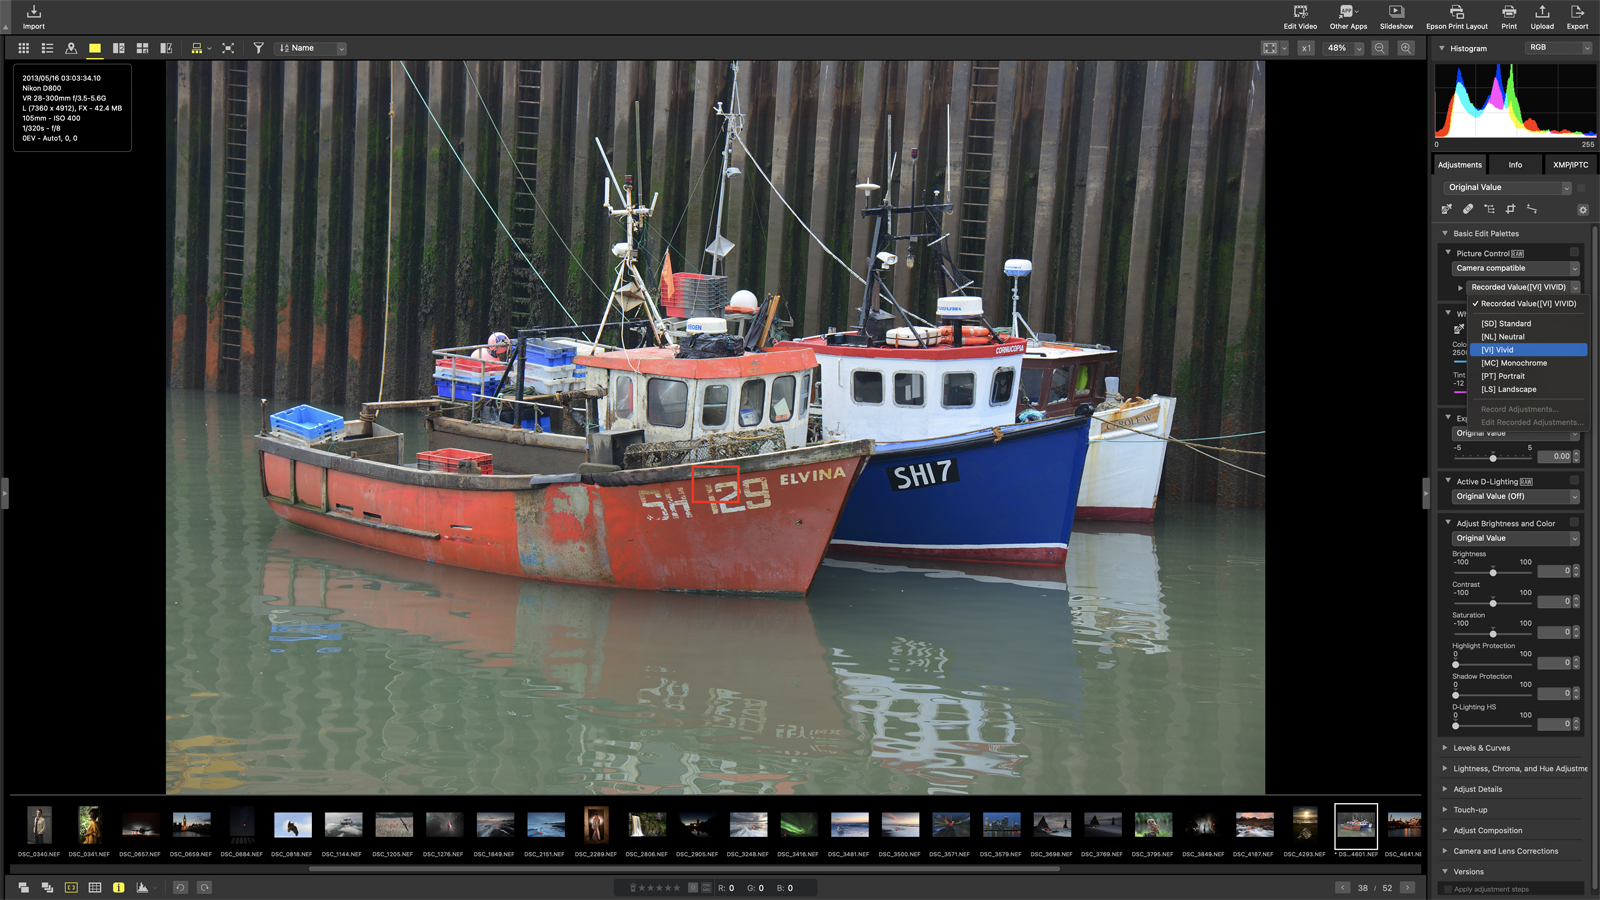
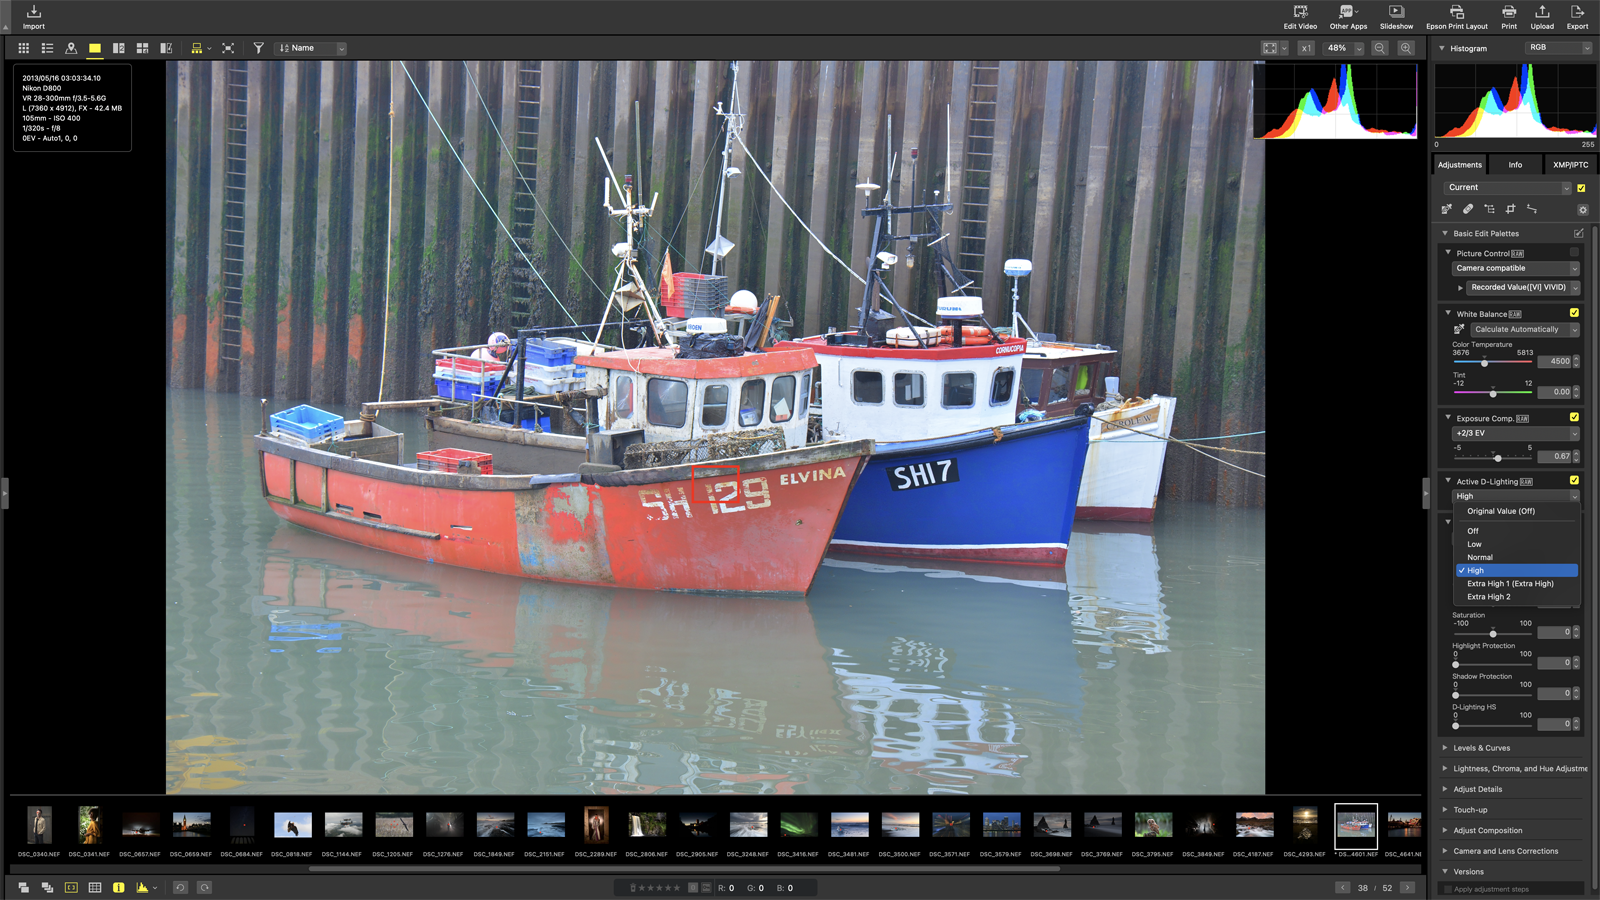
NX Studio blends the main functionality from both applications into a single program that supports all Nikon DSLRs since the D1, the latest Z II generation of mirrorless cameras and most Coolpix compacts. The redesigned user interface is cleaner and easier to use. It achieves good image quality and colour reproduction when editing, and also lets you play back and apply basic edits to movies. The workspace is customisable using the VIEW and WINDOW menus. There are single, two or four-up image views plus a before/after view, and the filmstrip can be moved from the horizontal bar at the bottom of the screen to a vertical bar to the left.

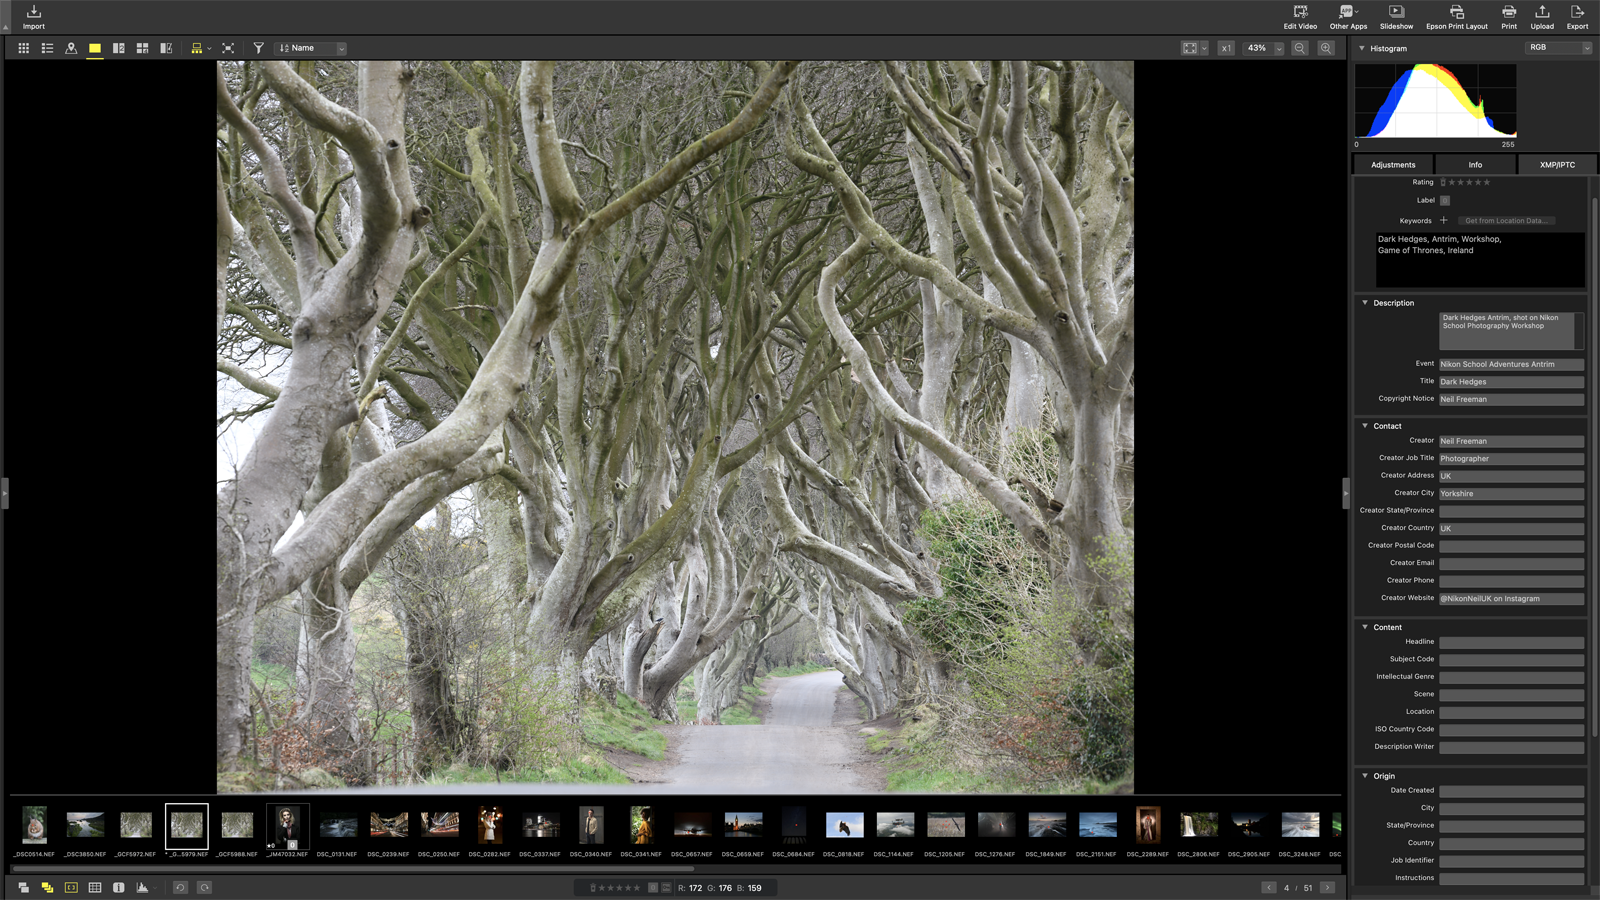
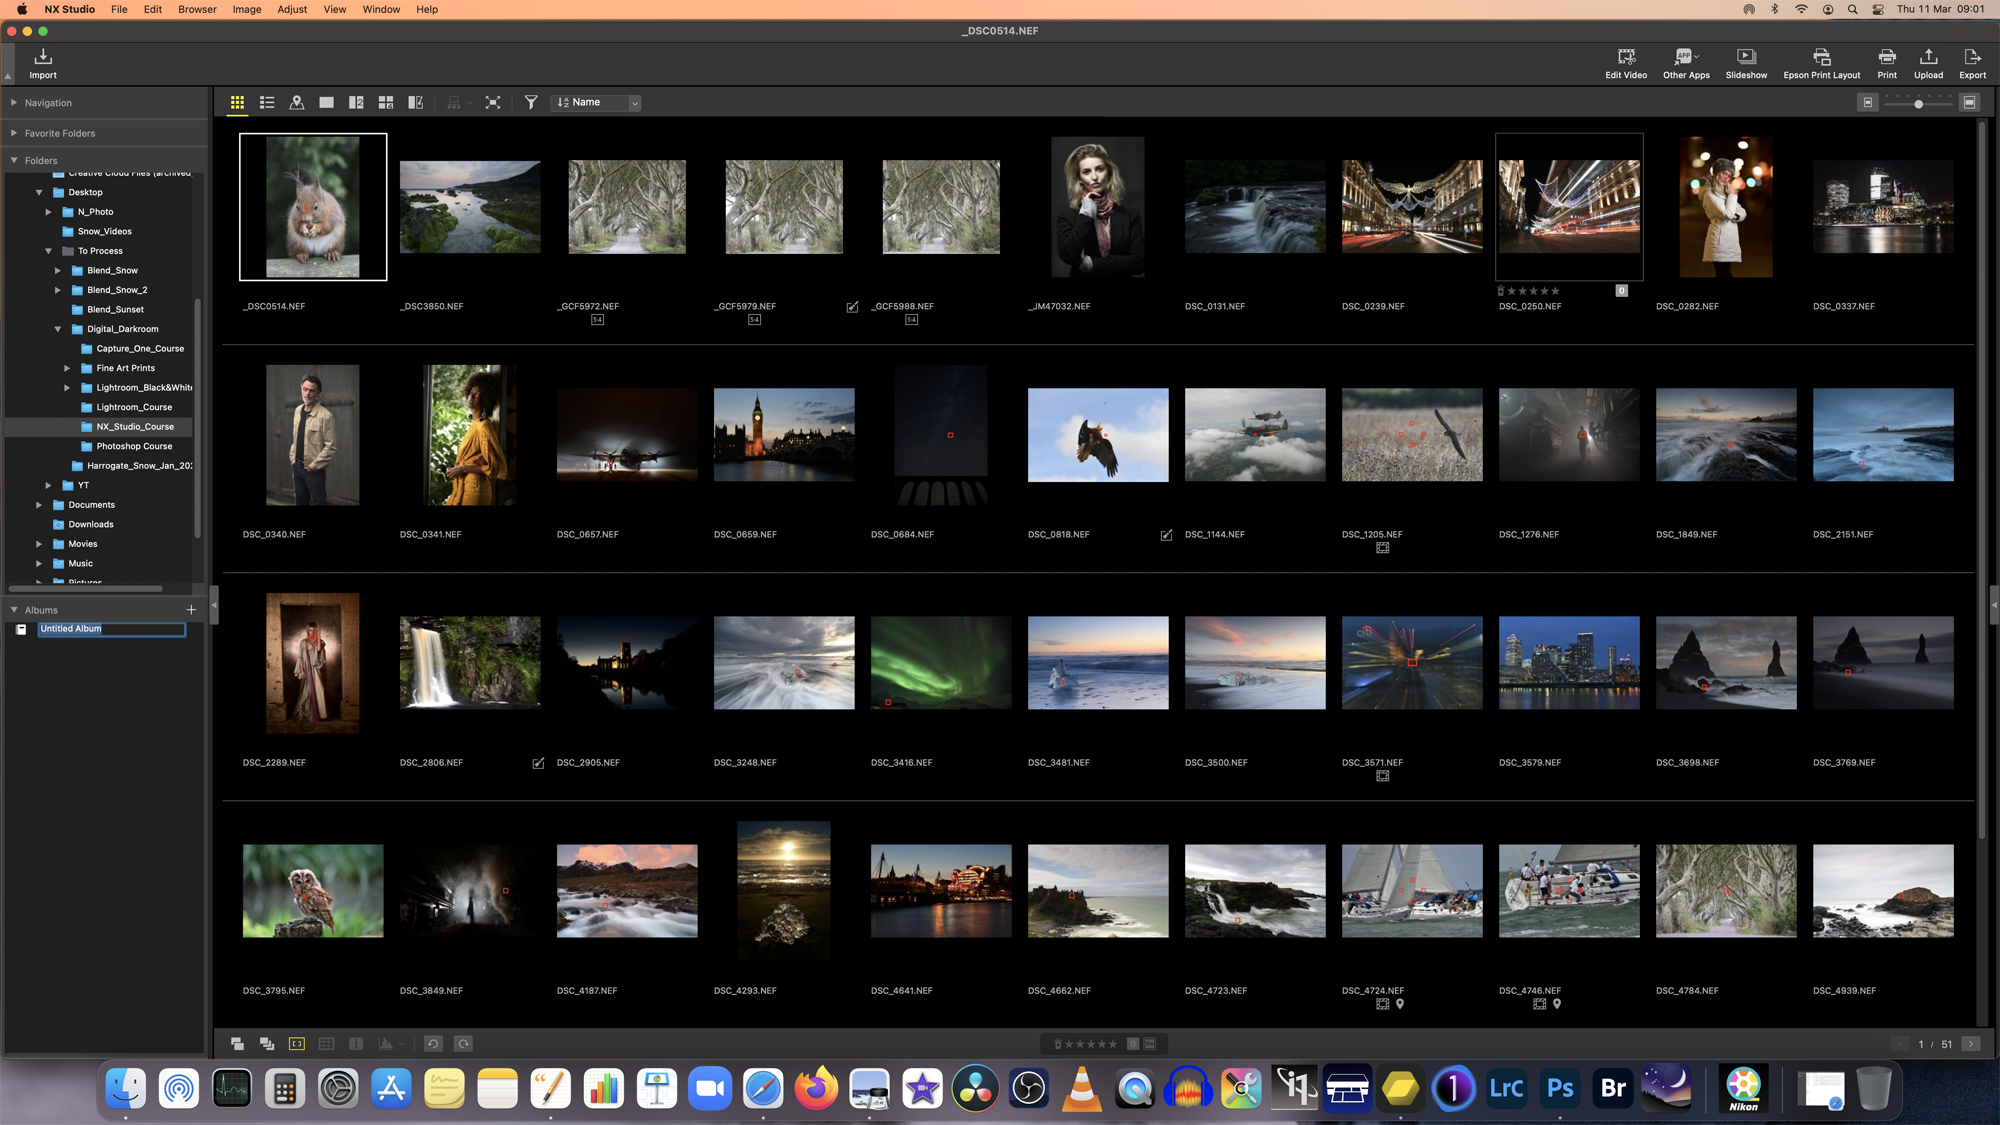
Navigation for your image folder structure and album controls is positioned on the left of the screen, with the main layout options across the top of the screen. On the right you’ll find the histogram display, editing adjustment tools, EXIF and keyword tools. You can resize or hide both the left and right panels or drag the filmstrip to make it smaller, allowing you to maximise your valuable screen ‘real estate’.

Images processed in NX Studio will deliver good quality edits with realistic colours and impressive shadow recovery from the Active D-Lighting settings. The new software will also read and apply existing image adjustments from ViewNX-i and Capture NX-D, which means you can upgrade without having to redo any previous edits. One last point – while NX Studio can currently run alongside Capture NX-D, it will replace any previously installed version of ViewNX-I.

NX STUDIO’S NEW FEATURES

As well as the image-editing controls, NX Studio has some significant new features, including:

• XMP and IPTC keyword functionality enables you to manually add, edit and remove keywords and metadata from your images.

• Map view displays geotagged images from your selected folder on an interactive world map. You can choose a normal, hybrid or satellite map, with images shown as yellow pins and the currently selected image shown in red.

• Movie playback and editing tools allow you to trim the start and end of clips, combine multiple movies and create titles, transitions and captions. You can also add your own music or process the movie clips to remove autofocus noise.

EXPERT TIP: USE ALBUMS TO MANAGE YOUR IMAGES

The Album feature within NX Studio makes it very easy to sort and search for images. To create an album, go to the Navigation pane and select Album, then press the ‘plus’ sign to create a new one, give it a name and press enter. You can now move any images you want to put into that album from either the filmstrip or the grid view. To select multiple images, use Command on a Mac or CTRL on a PC, click the images and drag the entire selection into the album.

THE BASIC EDIT PALETTE IN FOUR EASY STEPS

Follow these 4 steps

1. Choose your image

From the image viewer, choose a RAW image to edit. Before making any adjustments, select the zoom from the top toolbar and magnify the image to 100%. Now navigate around your image, checking for sharpness. Once you’re happy, zoom out to ‘fit’ the image to the screen by clicking on the rectangle with four arrows in each corner from the top tool bar

​2. Picture control and white balance

Select the picture control you require to either exactly match the settings from your DSLR/Z camera or change the picture control to apply a baseline colour, contrast and saturation preset, all of which you can then edit. You can also alter the white balance to warm up or cool down the image’s colour temperature to achieve an overall pleasing colour tone.


​3. Make exposure adjustments

With the exposure compensation slider, you can next fine-tune the overall exposure, paying attention to the histogram to ensure you’ve not clipped any shadow or highlight detail in the image. Use the Active D-Lighting settings to balance the contrast in the image and uncover shadow detail to maximise the dynamic range from the sensor.

​4. Refine brightness and colour

Finally, use the brightness and colour tools to finish the basic adjustments to the image. The contrast slider will create additional depth, while the saturation slider can make the colours pop. If any clipping has occurred, use the highlight and shadow protection sliders to see if you can reduce this.

CUSTOMISING YOUR NX STUDIO WORKSPACE

So now you’ve got a good idea of the basics, let’s explore some more features that will help you review and edit your images. In the default NX Studio view, along the base of the screen under the filmstrip, you’ll find six tools that can be individually toggled on or off, allowing you to set up the image viewer in the optimal way for your image-editing workflow. From left to right:

Show RAW & JPEG pairs as single images
If you shoot RAW + JPEG in-camera, this allows you to hide or unhide both copies – handy for cleaning up duplicate images in the filmstrip, and helps you pick out the high-resolution RAW files to edit.

Show sequences as single images
Gives you the option to view multiple, similar frames produced in a ‘burst’ shooting mode as one single image in the grid or filmstrip, which again declutters your grid or filmstrip view.

View or hide focus points
This useful feature enables you to see where the autofocus point(s) are in the frame, which is essential when you’re checking for accurate focus in your images.

Show or hide grid
Activates an overlay grid to help align horizontal or vertical subjects within your frame.

Show or hide image info
Displays key EXIF data from the image in the top left corner of the image viewer, so you can quickly see information such as image pixel size, shutter speed, aperture, ISO and focal length.

View or hide histogram
Shows the histogram of the current image in the top right corner of the image viewer, enabling you to check the dynamic range and if any shadow or highlight clipping has occurred.

NX STUDIO ADJUSTMENTS TAB

Use the gear icon to personalise adjustments to your own taste:

• Click on the Adjustment tab, and you’ll see a gear or cog icon. Select this to show the Customise Adjustments tab sub-menu. Your options are the default Show All Adjustments setting or Customise Adjustments, which gives you the option to change which adjustment panels are displayed.

• Choose Customise Adjustments to view the customisation sub-menu. Select New and give your workspace a name, then use the tick boxes to select the adjustments you require. This newly created set of adjustments now becomes the default view for NX Studio.

• If you want to further customise the adjustments tab or revert to the default display, revisit this menu, and use the Remove option to delete any custom adjustment menus you’ve created.

NX Studio can also replicate the info screen from your camera, displaying key information such as shooting mode, shutter speed, aperture, ISO and focal length – much the same as how you see it on your camera’s LCD screen. To set this up:

• Select the Info tab (next to Adjustments) on the right-hand side of the screen. By default, you’ll see an extensive view of all the image information.

• If you then click on the little camera-shaped “i” icon, this information switches to an LCD-style display of the basic EXIF data.

FOUR STEPS FOR ADJUSTING YOUR COMPOSITION

1. Adjusting composition
In the Adjustment tab, select the crop cursor tool and choose an image to tweak. Open up the Adjust Composition menu and click the arrow to reveal the composition tool options. There are three main sub-menus: Crop, Straighten and Perspective Control.

2. Creating custom crops
Click and drag your cursor across the image to draw an initial crop-selection box and activate more options in the Crop sub-menu. To create a custom crop, select the Free Crop option. A drop-down box will then open, displaying a range of preset crop (aspect) ratios and a Custom option for creating your own.

3. Choosing portrait or landscape
As part of the custom crop sizes, you also easily change the image from portrait to landscape orientation. You can use the orientation icon to the left of the aspect ratio boxes to quickly flip between portrait and landscape options, and your custom aspect ratio will be maintained in either format.

4. Fine-tuning your composition
Now you’re happy with the crop, do any necessary fine-tuning. Horizons on the wonk can be levelled out with the Straighten tool, while any distortion to structures caused by the camera angle can be dealt with using the Perspective Control tool. Tick the Show Cropping Grid box to help you get it spot-on.

Download the software

Book onto Nikon School’s Introduction to NX Studio online workshop

Want to read offline?

You can now download a PDF version of this Hints & Tips article to read offline and print

DOWNLOAD

NIKKOR Lenses
NIKKOR Lenses