Streaking car-light trails captured at night can make for eye-catching images, and they're quite easy to do, with a bit of planning and patience.
Streaking car-light trails captured at night can make for eye-catching images, and they’re quite easy to do, with a bit of planning and patience.
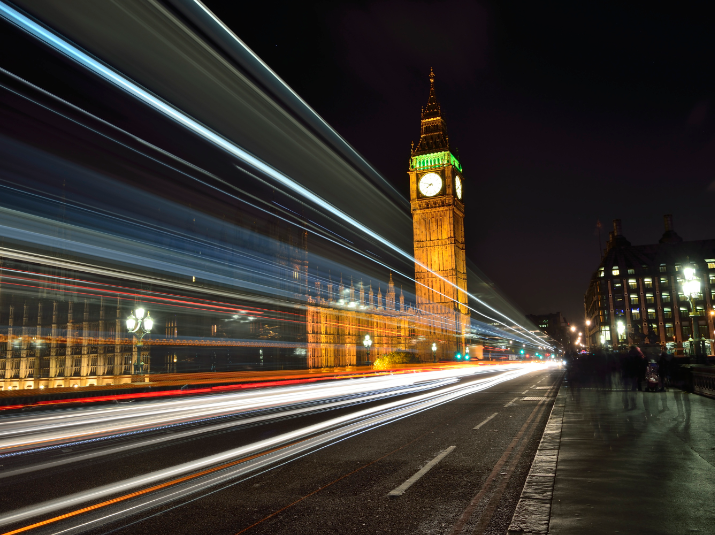
Streaking car-light trails captured at night can make for eye-catching images, and they're quite easy to do, with a bit of planning and patience.
• Your basic ingredients are a camera capable of long exposures and a tripod to keep it stable and prevent blur. For the same reason, you'll also need to fire the shutter via the self-timer or a remote release.
• Shoot in shutter priority mode or manual mode. Bulb setting is ideal for light trails, as it keeps the shutter open for as long as the release is depressed, enabling long exposures; around 10-30 seconds is a good place at which to start experimenting. Basically, the longer the exposure, the longer the light trails, and vice versa. So, if your light trails are truncated, just increase the shutter speed a touch to boost their length.
• Beware of bright static lights in frame, such as streetlamps, as these can burn out (become overexposed) during a long exposure. Start off with a mid-range aperture of around f/8-11. Then, if you're getting overexposed shots, close down the aperture (i.e. increase the f-number) to reduce the amount of light entering through the lens and hitting the sensor, and if your results are underexposed, open up the aperture (i.e. decrease the f-number) to increase the amount of light hitting the sensor.
• Busy junctions, crossroads and multiple-lane carriageways will yield intersecting, dynamic lines, while roundabouts and winding roads create impressive circles and swirls of light. Shooting from a higher vantage point generally gives the best results – bridges are a good choice. Use the rule of thirds and leading lines to draw the viewer into the shot – and remember that the trails themselves can act as dynamic leading lines to foreground or background points of interest, such as an iconic building or cityscape.
• As well as in the dark, try shooting just as the sun dips below the horizon – this will often create incredible colour in the sky, adding more interest to your image, especially if you have an interesting background to silhouette against the sky. Depending on when the sun sets, you might get more traffic earlier rather than later, too, giving you more intense light trails.• Your basic ingredients are a camera capable of long exposures and a tripod to keep it stable and prevent blur. For the same reason, you'll also need to fire the shutter via the self-timer or a remote release.
• Set your lens to manual focus to prevent the AF from hunting in the gloom.
• Go for a low ISO to keep noise to a minimum (although with many Nikon DSLRs this simply isn't an issue anymore, given their incredible high ISO capabilities).
• Check your results regularly on the LCD to make sure you're getting what you want.
• Shoot in NEF (RAW) if you can as this gives you the most scope for post-production editing on your computer.
You can now download a PDF version of this Hints & Tips article to read offline and print