Welcome to Nikon School. The official Nikon education experts to help you learn how to get the best from your Nikon Camera and Lenses

Gear Hacking

Make the most out of your gear when shooting at home. Follow these hints and tips and let our Nikon School expert Neil guide you through the best gear hacking techniques to maximise your shots.

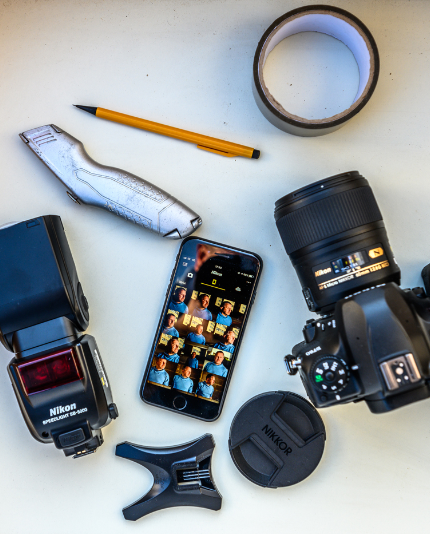
Gear & Camera ‘Hacks’

Gear Hacking is the concept of making your own DIY versions of whatever equipment you need. It is really useful when I need to manipulate light make with shapers or modifiers and don’t have my usual softboxes with me. For this week’s #CreateYourLight challenge, I will be showing you how to achieve some professional level lighting effects with everyday items you may have in your home. These effects can be used for either a home studio setup or for shooting outside in your garden. They are gear hacks that will let you shoot creatively and quite literally create your own light wherever you are. Gear hacking your own lighting equipment is not only great fun, but it’s also inexpensive and makes a good project when you have time on your hands.

These hacks are easy to make and put together with almost zero craft skills required. If you happen to have craft skills, your finished products might look better than mine! Ultimately, though my gear hacked products might not look great, they modify, shape and diffuse light which allows me to produce the results I’m looking for. At Nikon School in London, we have some excellent professional softboxes, lighting stands and accessories for modifying and shaping light. However, without access to them at the moment, if I want to work with and create the lighting effects I use in my images, I need to think about how I can make my own light shapers and modifiers to achieve the same look.

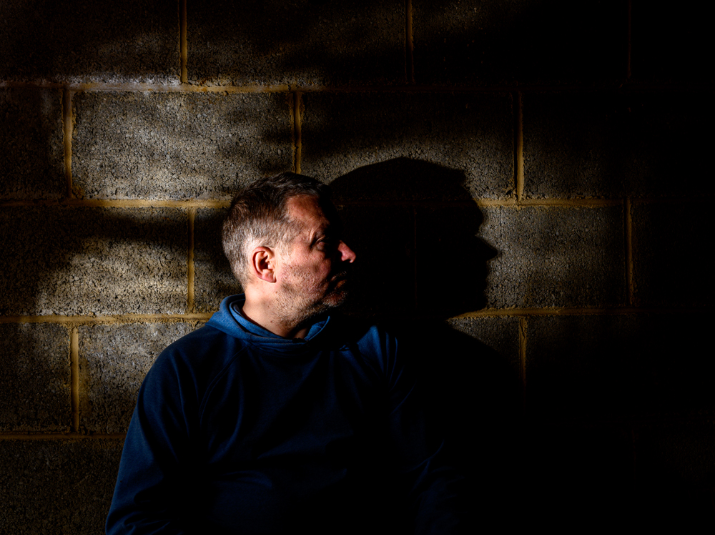
Great images are, more than anything else, defined by the lighting with which the shot was taken. You can have a great subject, but in poor lighting you are going to get an uninspiring image. Conversely, a poor subject in good lighting can actually look great. When I first started out in photography back in the days of film, I couldn’t afford professional quality softboxes and reflectors. Practising with low cost homemade softboxes was an ideal way to start learning about lighting.

Hopefully you will find the following gear hacks useful and a way in which to shoot some inspiring images with your own personal custom made photography lighting gear. Experiment with the setups and images - you might even want to come up with your own gear hacks. We can’t wait to see whatever you create with them shared on #CreateYourLight.

Building your own Softbox

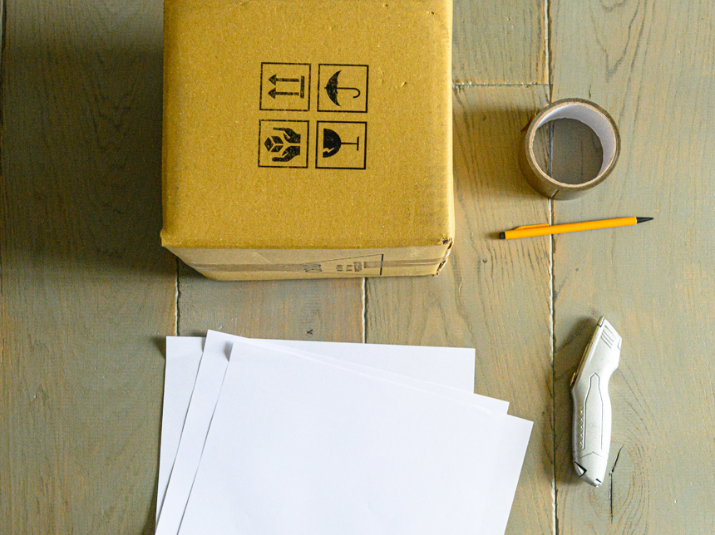
This is one of my favourite hacks. You can get amazing light whether you are using this with a speedlight (my preferred way) or a constant light source. Materials for the project are straight forward: cardboard box, white or clear diffusion panel (optional tin foil interior) and some tape to put it all together. It really doesn’t matter which way round you put your softbox together. I start by measuring out the length and size of diffusion material I need and cutting that to shape. If your cardboard box has flaps, I would recommend keeping those as they can act as barn doors and be used to further shape and control the light. For the diffusion material you can
either use polythene dust sheets or a white bin liner. You might want to layer them until you achieve the desired level of diffusion for the images you want to take. You could also add tinfoil inside the softbox. This will scatter the light inside the softbox and the silver also produces a bit more ‘kick’ to the light, further helping to light up your subject. When the diffusion material is cut to shape and taped down, mark out and cut a hole in the back of your softbox for the speedlight or lightsource and find a way to tape or fasten it securely in place. That's it! Now you have a custom made softbox.

Softboxes make your light source bigger. This softens the light striking your subject and reduces the shadows in an image. They are also a great way to achieve even light and subtle lighting, especially if you have barn doors to further control any light spill.

If you don’t have access to the above materials and you want to diffuse light, try placing a white t-shirt or cotton bedsheet between your light source and subject. Either of these will also act as a light diffuser.

Flags

Flags are a very basic way of controlling light spill. They are really easy to make and use. In this example, I have used a black plastic bag (to absorb the light) and some tape to fasten it on to my light source. You could use a piece of card or paper as well. The idea of a flag is that you ‘flag off’ the area that you do not want the light to hit. In this example it wanted the light to fall onto the camera, so the flag was placed in a way that meant no light would spill into the other areas of the image.

Light Bouncer / Reflector

This is the opposite of a flag, in that it increases and widens the spread of light from your light source. Depending on the size of your ‘bouncer’ or ‘reflector’, it will also help to soften the light reducing shadows. This is made in exactly the same way as a flag but, crucially, it needs to be made from a reflective material. Items like plain card or paper, tin foil or white plastic all work really well for this hack.

Snoots

A snoot is a light modifier that produces a very concentrated beam of directional light. You can use these for all sorts of creative lighting effects. The easiest way to build a snoot is to take a cylinder and then cut the front edge at an angle so you get a ‘flag’ built into it as well. The flag will stop any stray light spilling towards the camera and causing flare in the image. You can create a snoot for both normal light sources and speedlights. For my snoot, I have taken a crisp tube and cut it in
half. This makes two snoots if I also cut out the bottom of the can. As you can see it fits perfectly on to my speedlight with no further modifications. It is worth noting that I haven’t yet seen any difference in the quality of light produced by varying the flavour of crisp tubes usesd.

Light Tents

We can even gear hack a light tent. This will give you great looking product images or images where you have a completely clean background and minimal to no shadows. You can also achieve the effect of your subject or product ‘floating’ on the background. This hack also requires minimal materials. I’ve built my light tent from a cardboard box, some A4 paper and tape. Your main consideration is down to the size of your subject you wish to shoot. Start by removing the flaps on the cardboard box and then cut out the windows on the sides, back and as an option the top. Now use either A4 or tissue paper to cover the window holes you have just made. The paper acts as a diffusion screen for you to shine your light through. This setup can be used with all sorts of lights and by having ‘windows’ on each side of the light tent, you can also use multiple light sources for even more depth to your images. Additionally I’ve lined the inside of my light tent with white paper to
allow for creative product photography.
Top tip: Try and shoot from above your subject at a downward angle to create the ‘floating’ effect.

Colouring Backgrounds

If you only have plain uninteresting backgrounds to work with you can transform them using a light source, bottle of water and some food colouring. This again is a simple light hack. Take a translucent bottle, fill it with water then carefully add the food colouring of your choice. Fasten the cap securely on the bottle and then shake the bottle to fully mix the colouring and water. Now place the bottle close to your light source, so it acts as a go-bo (short for ‘go-between’ light and subject) and the resulting light background and subject will take on the hue of the food colouring.

Making Patterns

Instead of colouring a background, why not think about making patterns across it. Lots of everyday household objects can be used as a ‘go-bo’. For my example images I’ve used a kitchen colander. Notice how the holes in the colander create an interesting pattern across the wall. As they are small holes, they have the effect of creating hard shadows as well, so you can create some ‘Noir’ effect images. Other items that work well are household plants, especially ones that have ‘fern type’ leaves. You could use a CD or DVD and refract the light off that to create rainbow type patterns if you have a high intensity light source. Experiment with using different objects at home as a gobo. You may be surprised by the effects you can create.

Hack Safely

These are just a few examples of some lighting gear hacks you can use to improve the quality of light in your images. There are many more hacks to be found and made, so please share you lighting hacks with us using #CreateYourLight.

We do hope you will enjoy building and using these gear hacks. Just a small caveat - we want everyone to enjoy photography, so please stay safe and be careful when working with some of the equipment outlined in the above hacks. Please note that if you are using a constant light source or hot lights, be very careful not to use flammable materials to make your gear hacks or, if you do, please place it at a distance where there is no risk of it catching fire. Make sure any of your equipment is securely attached to the softboxes or light modifiers. We wouldn’t want you to damage your kit!

Behind the Scenes

If you have watched the accompanying #CreateYourLight video for this challenge, you will see that I share some secrets about how this was produced. One of the biggest assets I had was to use my mobile phone as a remote trigger for the self-portraits. This was done via the Nikon Snapbridge app and selecting ‘Autolink’, then ‘remote photography over Wi-Fi’


Want to read offline?

You can now download a PDF version of this Hints & Tips article to read offline and print

DOWNLOAD

NIKKOR Lenses
NIKKOR Lenses