Welcome to Nikon School. The official Nikon education experts to help you learn how to get the best from your Nikon Camera and Lenses

Flat Lay Photography with Kiran Cox

Get the most out of camera when shooting at home. Follow these hints and tips and let professional photographer Kiran Cox guide you through the best set ups for your flat lay photography.

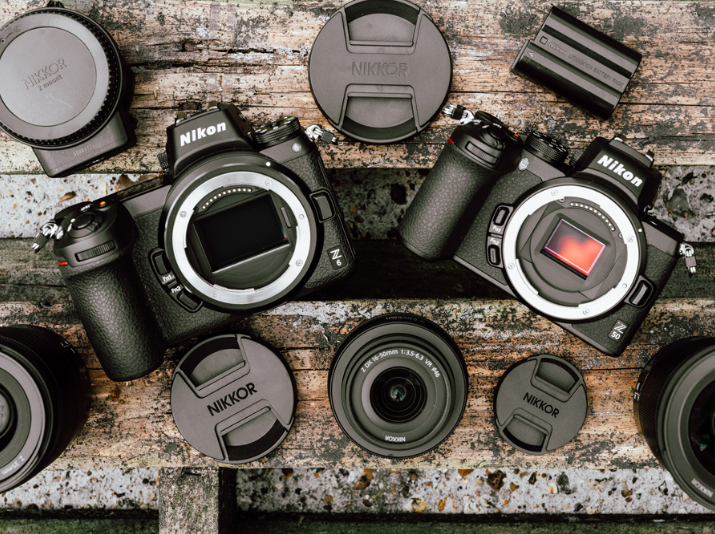
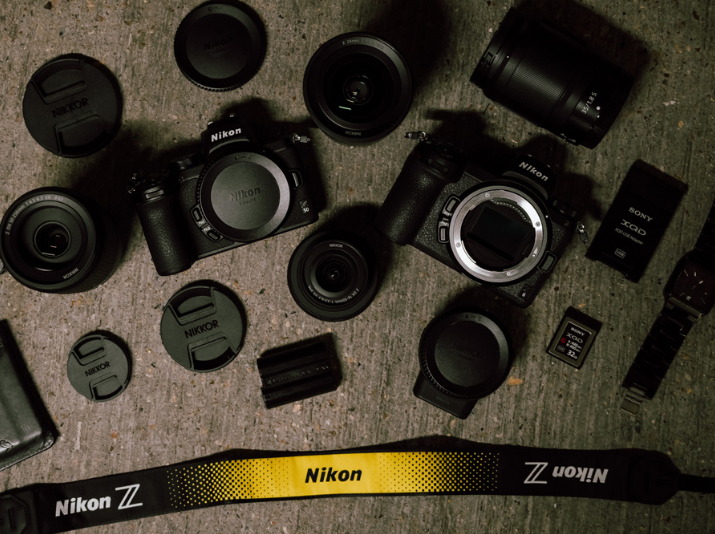
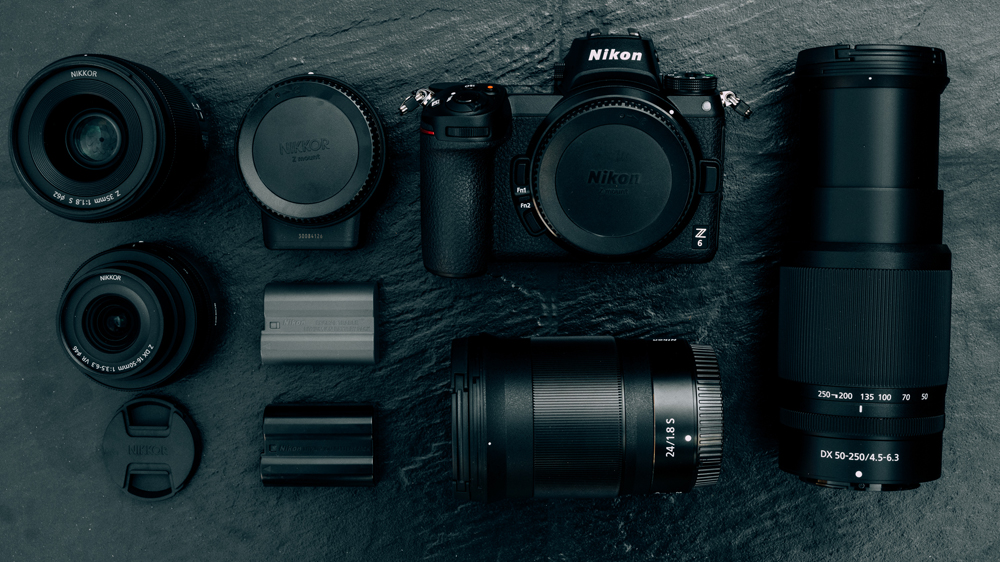
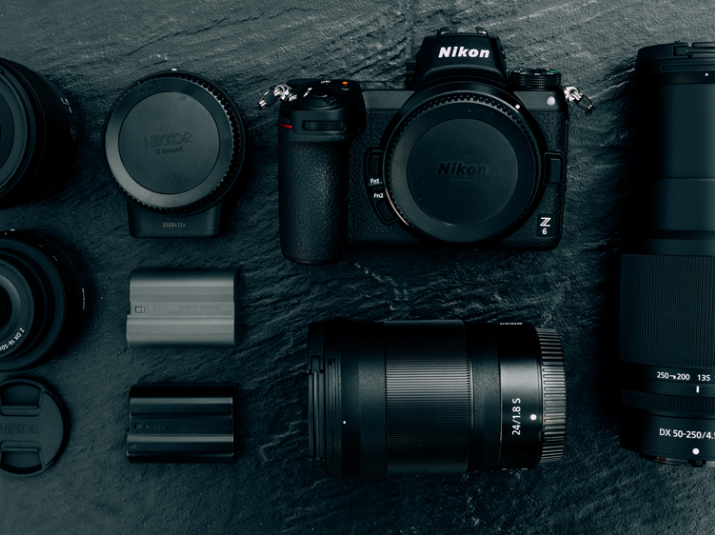
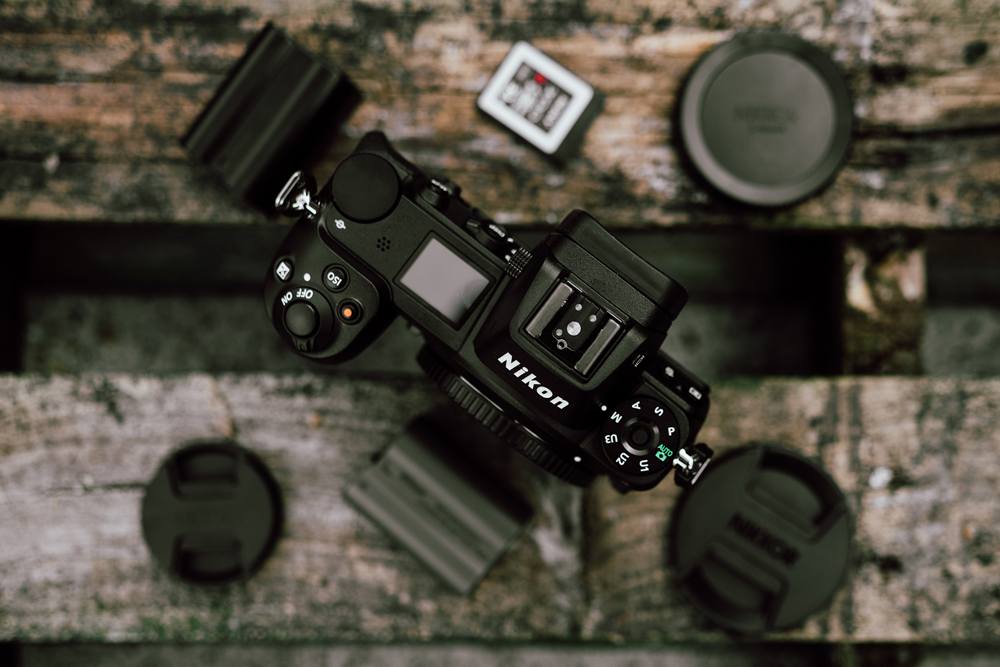
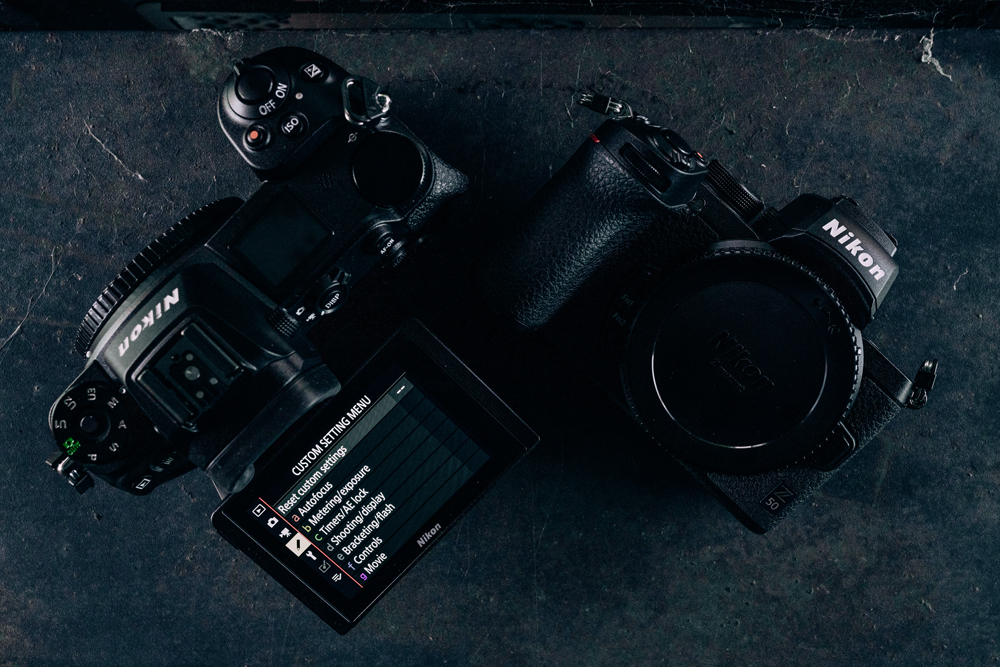
Photography has played an immense role in the continual growth of social media over the years, and flat lay photography is a style used by many. From bloggers, chefs, graphic designers and of course photographers! You will often see flat lay photos on blogs, websites and Instagram. It’s a great way to share a personal story through objects and is known for gaining great interaction with viewers.

It’s been quite a while since I took some flat lay photos. A few years ago it used to be my go-to style when I worked as an in-house product photographer and designer for an independent gift company. I always loved when a new range of products would arrive and I had the opportunity to grab some different backgrounds to experiment with - whether it was using different coloured sheets of card or being able to box everything up and head out to find a location. I think coming from a street and documentary photography background is why I enjoyed this the most; Being able to explore and hunt down the perfect texture and light always made the result more rewarding.

The key things to consider

Here are the three main things you should consider when shooting a flat lay photograph. If you follow these steps, you will be on your way to creating some amazing shots.

Composition

The composition is an essential part of any flat lay photograph. It is the composition that will draw the viewer’s eye into the photo, and it is up to you to bring them into the main focal point. This would be your main product/item, most often known as the hero piece. As a good starting point, placing the hero piece in the centre of your frame is an easy way to start building your scene. From here, you can start to add or remove items to see what works best. Remember to take a step back every so often to get a full view of how your layout is coming together.

There are a few different styles of composition you can play with to do this. The most common two are structured layouts, where each item is meticulously placed around your hero piece and a more random looking layout where you can place things at different angles and also have some of your pieces partially cropped out of the frame.

Points to consider when composing your shot

· Ensure your hero piece is in the centre and commands the most attention from the viewer
· Try not to use larger items in the corners of your shot.
· Keep an eye on the distancing between each piece. Keeping things equally spread always works well.
· Negative space can be very distracting, so keep an eye out for this - especially in the corners of your frame.
· Try to focus on the main parts of your hero piece e.g. with the Nikon Z 7 you might want to show the layout of the buttons at the top.
· Try some slightly different angles, adding a very slight tilt can add a lot more depth and dimension to a photograph without taking too much away from the birds-eye view.
· Use items that have different heights. This is a great way to make certain items stand out and make good use of any negative space.

Lighting

In most flat lay photography, you will see an even light spread across the image to avoid long and harsh shadows that might cover some of the items in the scene, and in some cases become a distraction from the main focal point. There are a few ways you can light your photo; natural light (if you are shooting outside, a cloudy sky will give you great even light with hardly any shadows), artificial light such as neon lights from a sign, continuous lighting or a speedlight.

However, in some cases introducing some direct light can help add depth and personality to your photo, if it does not overexpose any of the items you have laid out.

Points to consider when lighting your photograph:

· Try to create an even light across your photo to make sure everything is exposed correctly and equally.
· Be mindful of harsh shadows as they may cover some of your items.
· When photographing items that are reflective, you can often get bright spots that could cover key details you are trying to capture.
· Keep an eye on your white balance. This is especially important if shooting under things such as blue skies, tungsten bulbs and fluorescent tubes.

Balance, colour and tones

This is where you can start to bring out the personality of the photograph and make it unique to your aesthetic. There are a few ways you can go about doing this.

Here are a few examples of things you can try:

· Try using a colour that contrasts with the products to help them stand out more, equally using the same colour can be just as visually appealing to the eye.
· Use different textured backgrounds - these always work extremely well e.g. bricks, wooden textures, and concrete.
· If you are using textures, keep them minimal so they do not take away from the items you are showcasing.

Telling a story

I mainly shoot street and documentary photography, and with this genre I am constantly trying to tell a story - either through a single image or from a group of photographs. I wanted to bring this into flat lay photography. Here are a few ways in which you can do this:

· Introduce some personal items into your photograph – such as a pair of sunglasses, a plant or a baseball cap. Just be careful that they do not detract from your hero piece.
· Background and textures always add depth and personality to a shot. If you are using the photos for a blog or Instagram feed, search for textures that match your style and bring out your personality.
· If you are shooting product, try to demonstrate some of its features. One example would be shooting the Z 6 with the tilt screen extended out.
· Bring in other elements such as water. Adding a light mist to your products or background can further help visually tell the story behind the photograph (such as demonstrating the weather sealing capabilities of the Z Series range).
· Postproduction editing. Every photographer edits their photographs in a unique way. Use this to add flavour to your photos.

Settings

Now comes the technical bit of flat lay photography. With regards to the settings on your camera, we have the shutter speed, aperture, ISO, and the focal length you are shooting at. Here is a quick breakdown of some settings I would recommend for shooting flat lay photography.

Shutter speed

How you set your shutter speed is dependent on how you are shooting. If you are shooting handheld, you want to ensure it is set at a fast enough speed that you avoid any camera shake. A good way to gauge what shutter speed will avoid capturing any movement is to double the speed of the focal length that you are shooting on. For example, if you are using a 50mm lens, make sure your shutter speed is set no slower than 1/100 of a second.

Aperture

The aperture you choose to shoot at really depends how much depth of field you would like your photo to have. Typically, you would want to shoot at f5.6 or larger, this will ensure that everything in the photo is sharp and in focus. If you have items that have a lot more height than others, then you may need to further increase the aperture. Alternatively, if you really want to highlight a specific part of the photo such as your hero piece, moving to a more narrow aperture such as f2.8 or lower will give you a nice blurred background.

ISO

In most cases you will be shooting flat lay photos under a good lighting source, so having a high ISO should not be necessary. Ideally, I would say to keep it as low as possible to avoid grain and keep your photos as sharp and as clean as possible. Most of the photographs I photographed of the Z Series were shot on ISO 500 or less. If you are working in darker situations, try using a tripod as you can decrease your shutter speed and keep the ISO down.

Focal length

You can shoot flat lay photography with most focal lengths but if you go too wide, you will start to get some lens distortion. To avoid this, I would recommend shooting at no wider than 50mm. I usually shoot solely with a 35mm when shooting street photography but for flat lay work, you have to move in quite close or you will see some distortion in your final photographs.

Editing

There are so many applications and apps available for editing photos. I predominately use Adobe Lightroom. It is fast and easy to use, and a great way to keep all your files organised. If you are new to Lightroom, the best way to learn is to go through the editing tools and adjust the sliders, play with the tone curve and just turn options on and off to see how they affect your image. Once you know what each one does, you can start to make adjustments to suit your style. It is also a great tool for making small corrections such as removing dust spots and tidying up small areas of your photo.

Tips for editing flat lay photographs in Lightroom

· Always start by checking the “Remove Chromatic Aberration” and “Enable Profile Corrections” boxes under the lens corrections section. This will reduce lens distortion.
· Be careful when adjusting colours. For product photography especially, you want to try and keep any of the colours as close to the original as possible.
· If you have a full set of photos on the same background, save the edit you are most happy with as a preset. You can then apply this to all your selected photographs.
· I mainly edit in the ‘Tone’ and ‘Tone Curve’ sections. You can drastically increase the natural colours and tones in a photograph from this section alone.

A few final tips

· Sometimes less is more. Flat lay photos look great when the entire frame is filled with different items but sometimes just having maybe two or three can be just as impactful and creative.
· Keep a small cloth and soft brush to clean up your setup before you start shooting - this will save a lot of time in post-production removing dust spots.
· If your camera has an app such as SnapBridge, take full advantage of it. If you are shooting on a tripod, being able to view your frame from your smart phone saves a lot of time and makes arranging your shot much easier.


Want to read offline?

You can now download a PDF version of this Hints & Tips article to read offline and print

DOWNLOAD

NIKKOR Lenses
NIKKOR Lenses