Welcome to Nikon School. The official Nikon education experts to help you learn how to get the best from your Nikon Camera and Lenses

Beginner’s guide to editing Milky Way shots

Nikon School Training Manager Neil Freeman explains how to get stellar results editing RAW Milky Way images in post-processing, even if you’re a novice star-shooter…

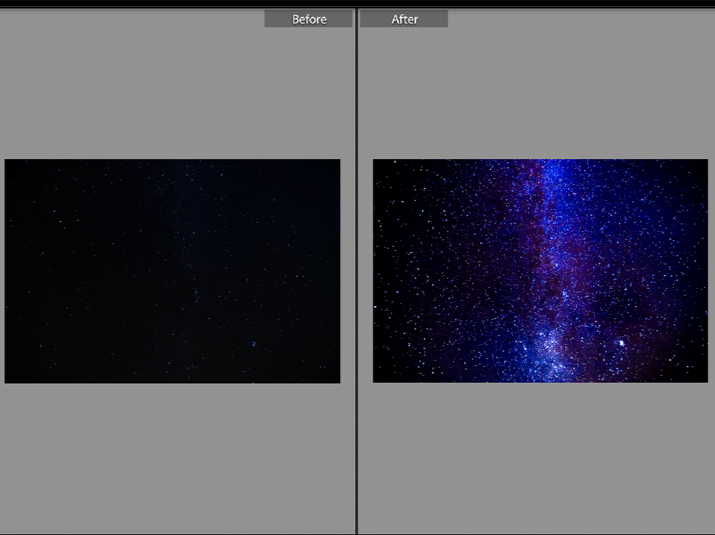
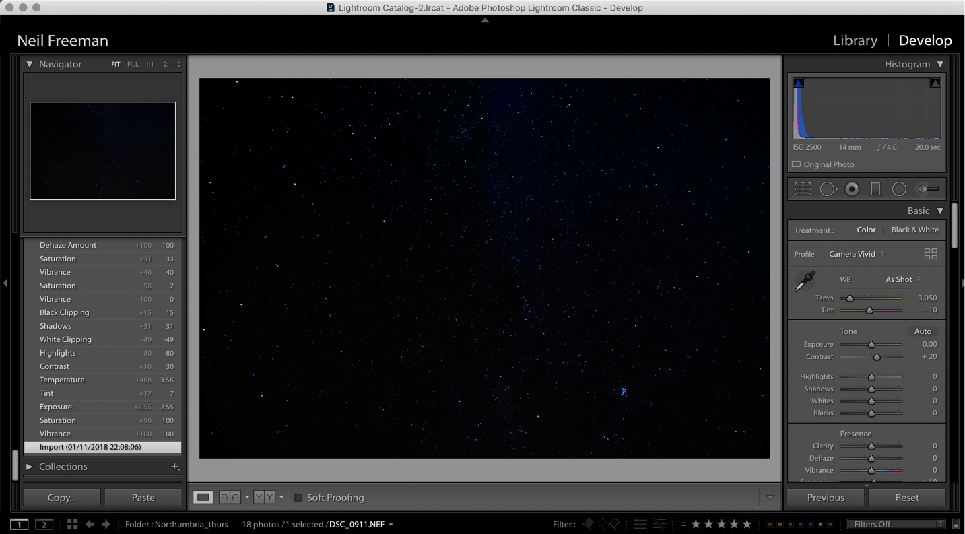
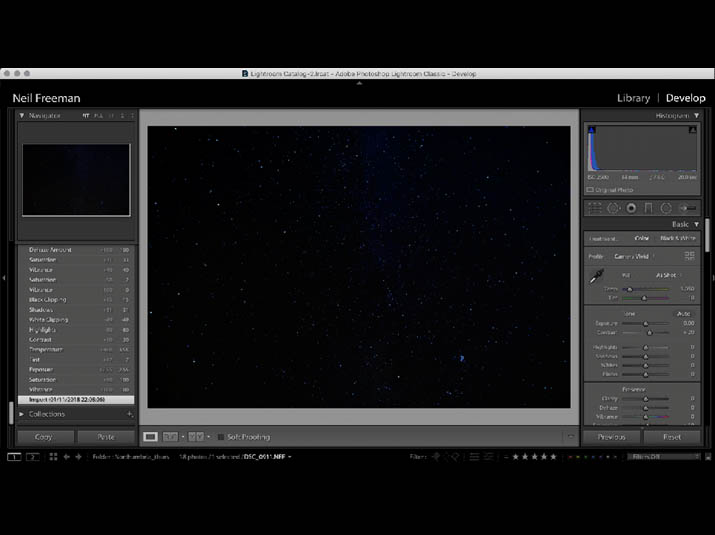
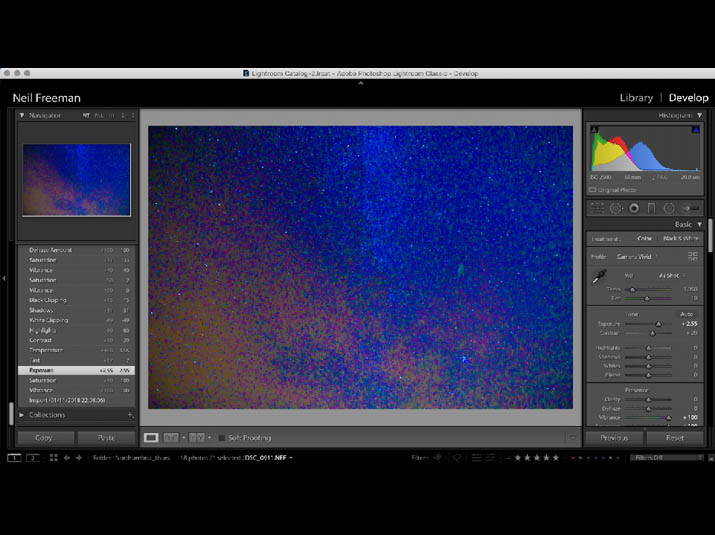
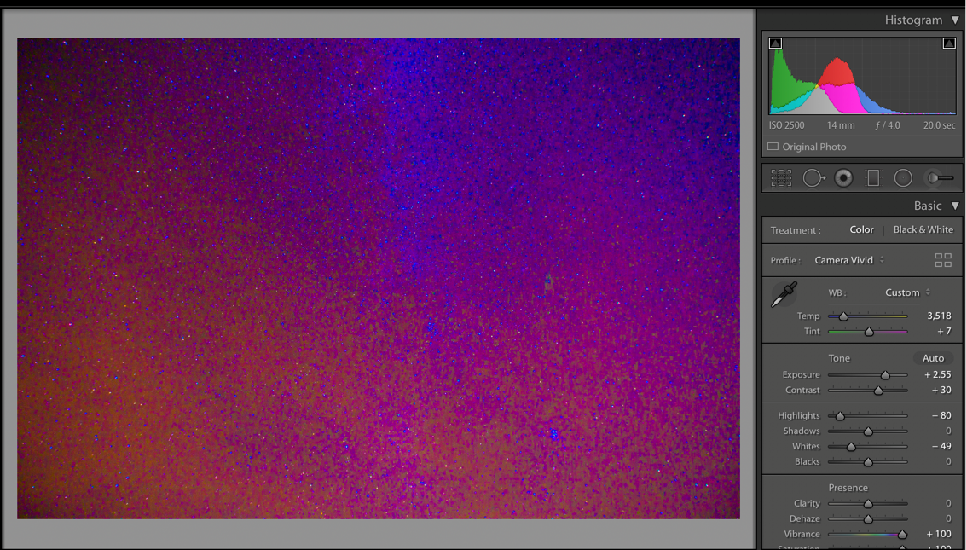
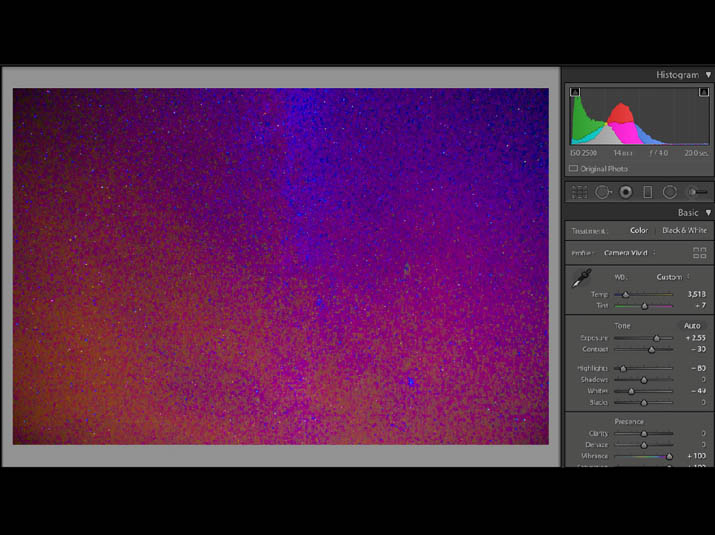
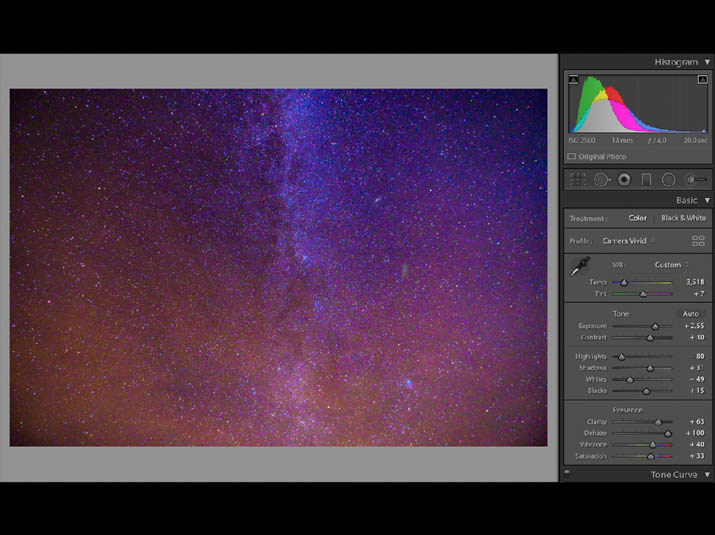
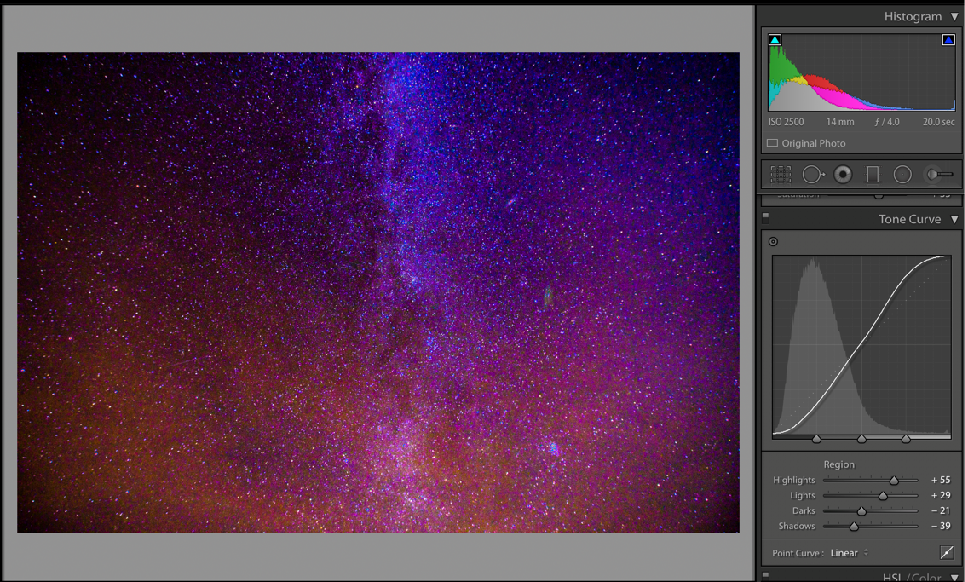
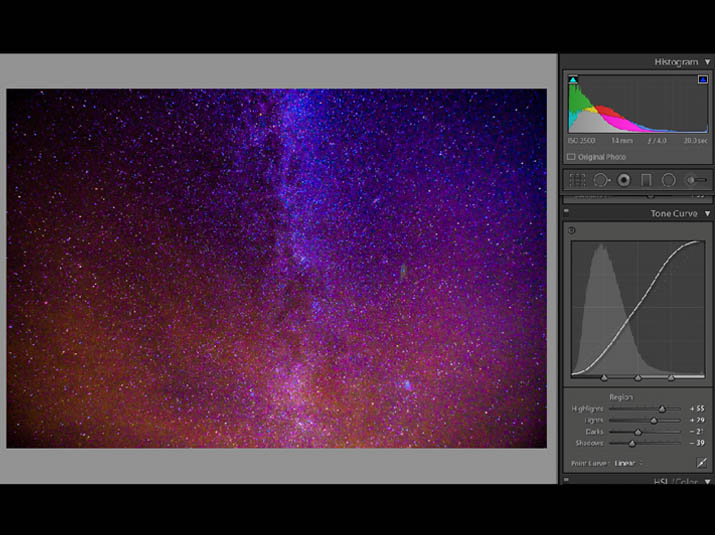
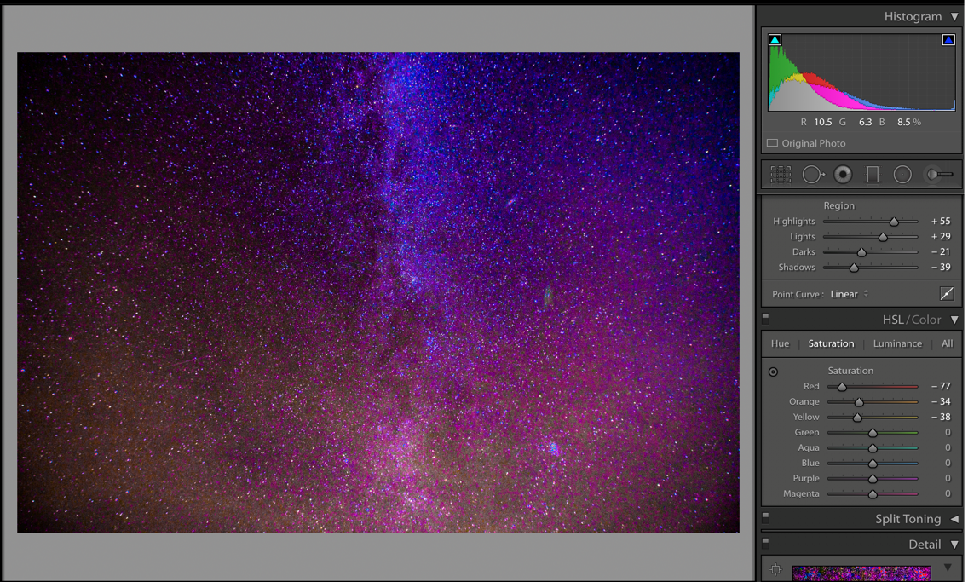
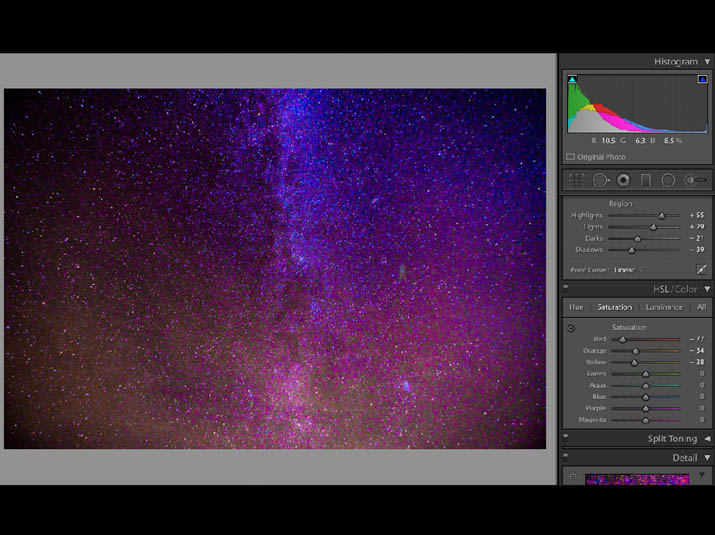
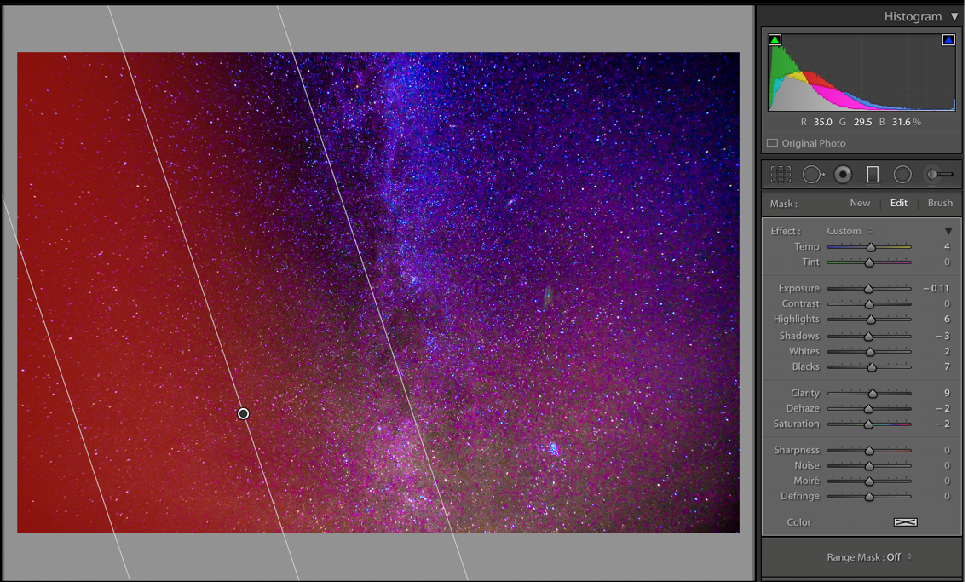
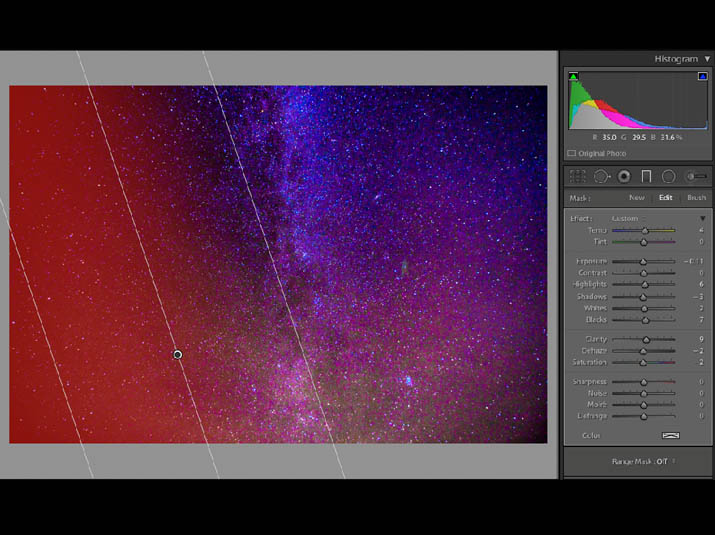
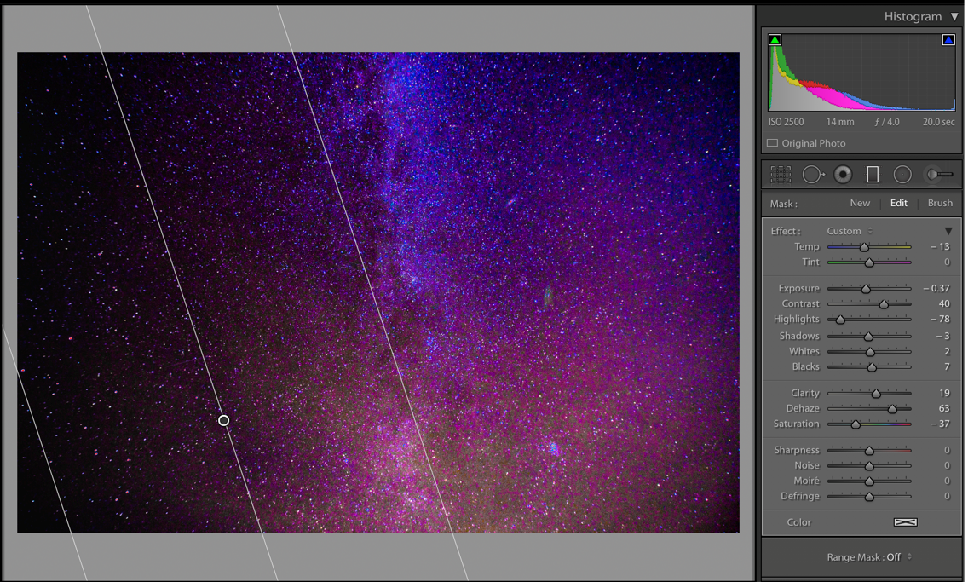
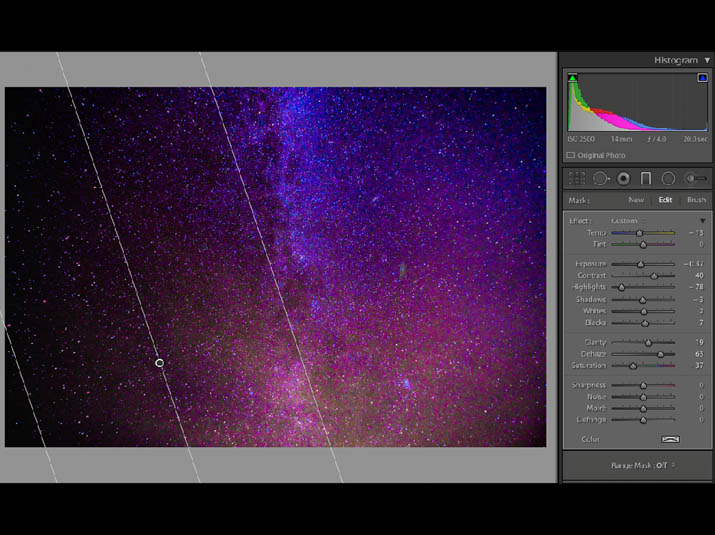
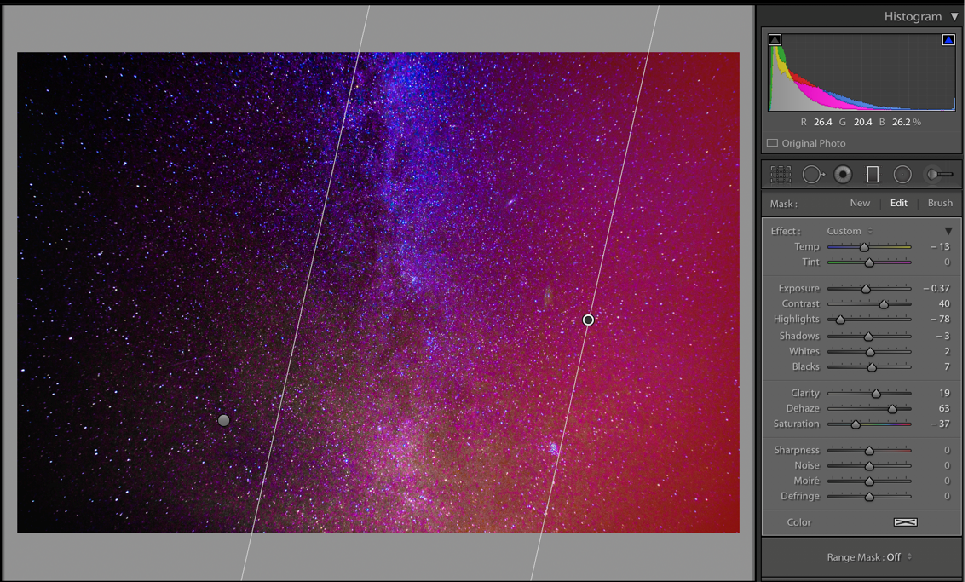
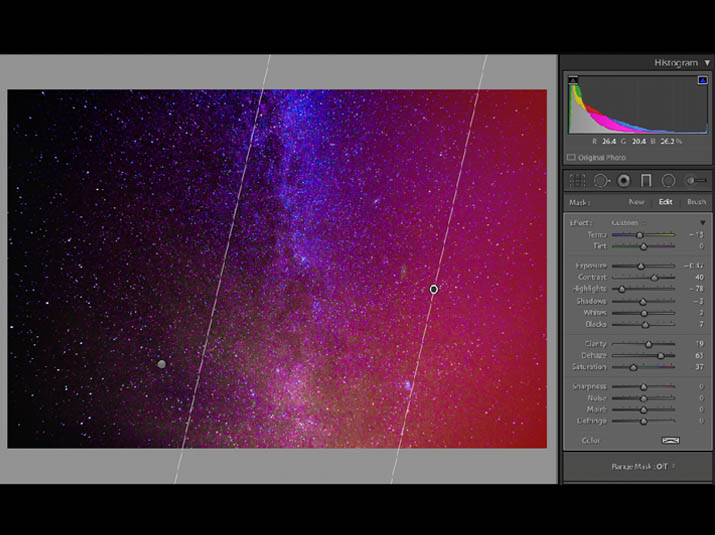
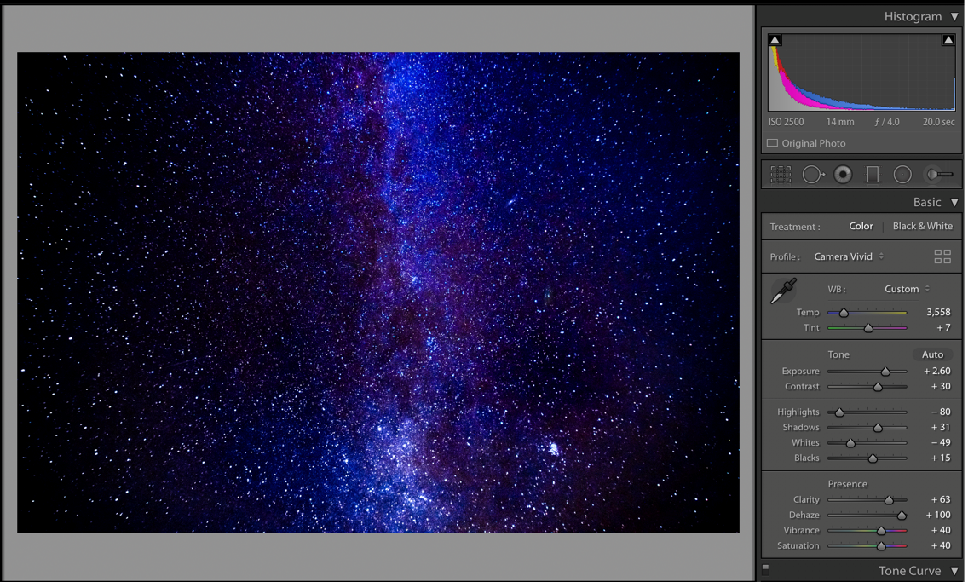
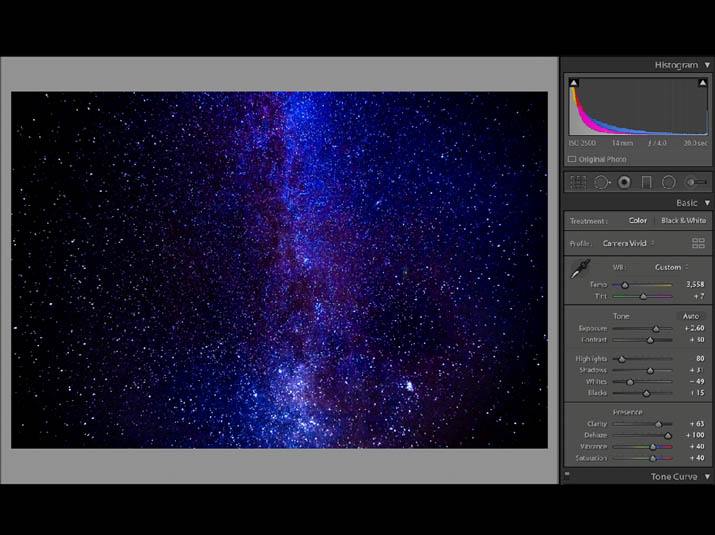
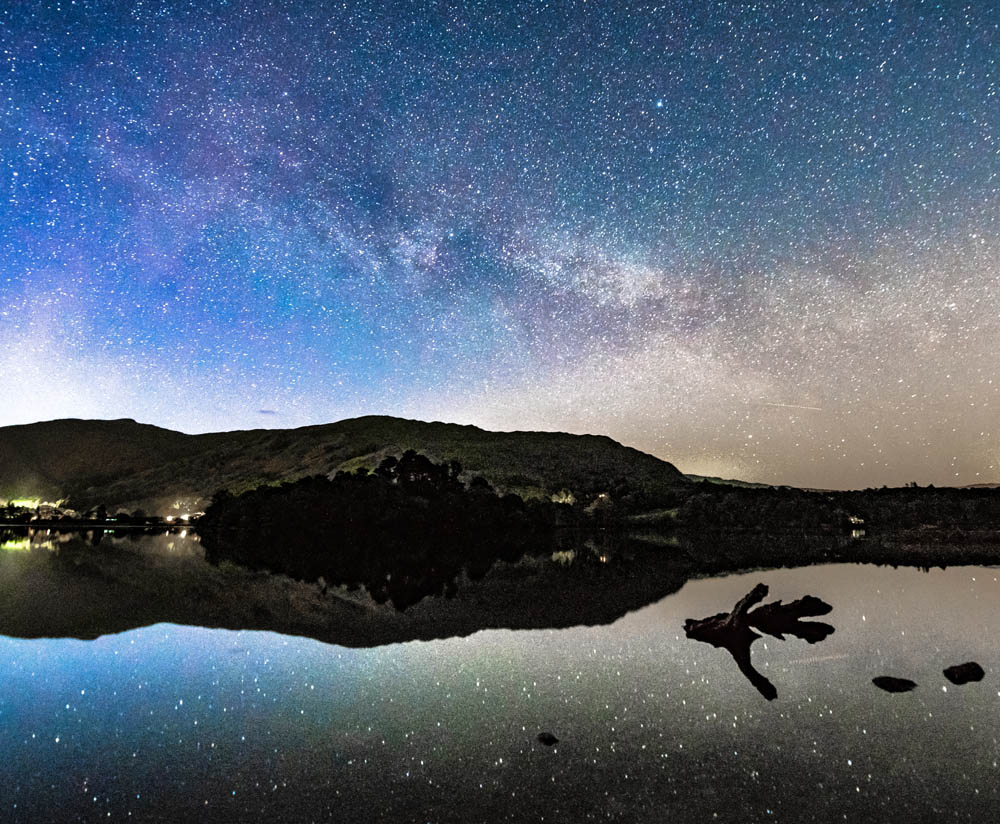
There is not necessarily a “correct” way to process Milky Way images. Not only is editing highly subjective but the Milky Way cannot easily be seen by the naked eye from Earth, so the baseline as to what constitutes a “correct” finished image is quite broad. This means you have plenty of latitude for experimenting and developing your own unique style, but if you’re a bit lost for how to get started, the following steps give me great results every time. While I’m using Lightroom here, the techniques are transferable across different image-editing software.

A few “core” sliders – white balance, noise reduction, contrast and exposure – have a big effect on how your final image looks.

As you can see above, only a few stars and faint area of the Milky Way are visible in the RAW image at this early stage. When I was shooting it, I didn’t want to increase the shutter speed to let in more light as this would have given me star trails rather than “spot” stars. I was also happy with the noise profile of the camera at ISO 2500; I could have used a higher ISO for a brighter image but the Z7’s amazing dynamic range ensured that the detail I required is in the RAW image, and as a rule of thumb it’s best to keep the ISO as low as possible which for Astro Photography means shooting around ISO 1600 - 3200 depending on the camera you have.

Tip: Lightroom now automatically brings in the Picture Control settings stored in the Z7 (I’ve used a custom vivid profile, hence why the contrast is already at +20).

Bringing out detail

Start by moving the vibrance and saturation sliders to +100 to bring out detail in the image. With the vibrance and saturation sliders at maximum, you can see where any light pollution will affect your image (the red and orange areas) and how much detail you actually have in the Milky Way and surrounding galaxies.

Here I’ve also moved the exposure slider to +2.55 stops and added a small amount of contrast. At this point it’s worth setting the clipping triangles in the upper corners of the histogram box to “on” by clicking on them, so they are outlined in white. The aim with the exposure is to ensure a good tonal range from the shadows and highlights. Make sure the histogram spreads all the way from the left-hand side to the right-hand side of its range; on it, any “blocked” shadows will show as blue and “blown” highlights as red.

Tip: You can also fine-tune the exposure in the highlight and shadow areas by using the highlight and shadows sliders, and the black and white exposure sliders.

Fine-tuning the colours

The next adjustment is with the white balance slider. I prefer a “dark sky, purple galaxy” look although many people favour a “cool sky, blue galaxy” effect. It’s a personal choice and the white balance you set will have the biggest imact on this. You may also want to move the tint slider to further fine-tune the colours.

It’s now time to move the vibrance and saturation sliders back to levels that bring out the Milky Way in your image; somewhere around 30-50 works well for the effect I am after. Other useful adjustments at this stage include dehaze and clarity: the dehaze slider will remove any clouds and haze and add further contrast to the image, while the clarity slider adds more contrast and punch.

Bringing out tonality

The next step is to bring out the tonality of the image by creating a shallow “S” tone curve using the highlight, shadow and black/white tone sliders. This effectively adds localised contrast across different areas of the image.

It’s now a good time to deal with and reduce the effect of light pollution in the bottom part of the image. Depending on where you take your shot, light pollution will manifest in a variety of different colours. In this particular image, you can see that it’s mainly across the red, orange and yellow colour channels. Your aim here is remove the brightness and saturation of the light pollution to make it less visible. To do this you need to use the hue, saturation and luminance (HSL) sliders across whichever colour channel the light pollution is affecting.

Using the grad filter

The final adjustments to ensure the Milky Way really stands out involve the grad filter. Grad filters enable you to selectively edit specific areas of the image. This image required two grad filters: one on the left side and one on the right. Let’s start with the one on the left (below), which aimed to further reduce the light pollution and undertake a small amount of star reduction – rendering some stars slightly less visible to make the Milky Way look more prominent. Select the grad filter and drag it across the image from the left. Hover your cursor over the dot to reveal the ‘masked’ area of the grad (the part of the image you will alter with your adjustments).

The grad filter has its own control panel on the right-hand side of the develop module. Any changes you make here to exposure, clarity, dehaze etc will only affect the area under the red mask.

If you want to use the grad filter on the other side of the image, as I have here, my preferred approach is to duplicate the grad filter from the left-hand side of the image: right click to duplicate, then rotate it and drag it to where you need it. Alternatively, you can instead select a new grad, drag it in from the right and then make the adjustments to clarity, dehaze, saturation etc as required.

The final touches

For the final touches, you may want to add a little noise reduction, a small amount of sharpening and tweaks to some of the slider settings across the main image or in the grad filter areas. For this particular image, I used the brush adjustment tool to brush a mask over the lower part of the Milky Way and then selectively changed the white balance in that area to ensure any remaining light pollution was removed. I then continued to adjust the white balance, contrast, dehaze and black sliders until I had an image I was happy with.

What’s in Neil’s kitbag

Camera - Nikon Z 7

Lens - FTZ Adaptor plus NIKKOR 14-24mm f/2.8

Tripod - Gittzo series 2

Software - Adobe Lightroom

If you're interested in finding out more about photographing the Milky Way, take a look at our Landscape and Astrophotography workshops on the Nikon School website.

Want to read offline?

You can now download a PDF version of this Hints & Tips article to read offline and print

DOWNLOAD

NIKKOR Lenses
NIKKOR Lenses