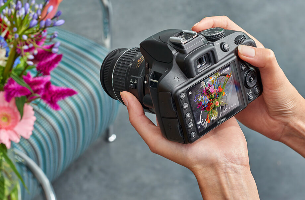
You need never be worried about taking a great shot with your Nikon camera – if you're a beginner it can do all the hard graft for you automatically, and then as you build your confidence and know-how you can start taking more control.
Learn how to use the different shooting modes on your DSLR so you can start taking more control...
You need never be worried about taking a great shot with your Nikon camera – if you're a beginner it can do all the hard graft for you automatically, and then as you build your confidence and know-how you can start taking more control.
This is the green button on your mode dial. Set this as your mode and the camera will do everything from selecting the optimum combination of shutter speed, aperture and ISO, to deciding when to pop the flash and choosing the white balance. This is great when you're starting out, as it frees you up to concentrate on spotting the photo opportunities and working on composition, but it won't necessarily give you the results you want. So, when you've built up your confidence and you want to go beyond point-and-shoot, it's time to take the next step, to Program…
When you set P on the mode dial, the camera selects the optimal aperture and shutter speed for the lighting conditions, but you control everything else, including ISO, white balance, exposure compensation and flash. In some DSLRs you can change the shutter speed/aperture combination yourself, via the rear command dial behind your shutter button – click it to the left for a narrower aperture or slower shutter speed, and to the right for a wider aperture or faster shutter speed. Program works well for most 'everyday' subjects, but when you're really getting into your photography, you'll want to take a bit more control to get particular effects, and that's where A and S modes come in…
If you want to control your depth of field, i.e. how much of your picture is acceptably sharp and in focus, then this is your mode. Set A on the mode dial and you get to choose the aperture (f-number) , and all the other settings, while the camera decides the appropriate shutter speed. Setting a large aperture like f/2.8 or f/4 creates a shallow depth of field, capturing your subject sharply and blurring anything in front or behind it. This is ideal for portraits, as it throws a distracting background out of focus. A small aperture like f/16 or f/22 gives you a wide depth of field, with everything sharp in frame – perfect for landscapes, where you want everything in focus. Note - you will still need to decide on the ISO setting unless you set your camera to Auto ISO mode.
If you want to catch the action, go for S on the mode dial. It gives you control over the shutter speed, leaving the camera to select the optimal aperture for the correct exposure (again, all the other settings are your choice). It's ideal for panning – when you want to create dynamic motion blur in an image to portray a feeling of speed. However, in this mode you do run the risk of underexposure with very fast shutter speeds, and overexposure with very slow shutter speed, because the shutter speed you've chosen may be beyond your lens's aperture range. To freeze movement with a really fast shutter speed, it might be better to use aperture priority to choose the largest aperture possible, leaving the camera to select the highest possible shutter speed for that aperture. For slow shutter speeds, shoot with the camera on a tripod to minimise the risk of camera shake causing blur. Again, unless you have the camera in Auto ISO, you will need to select the correct ISO setting.
When you really know your stuff, this is the best choice in tricky lighting situations, as it gives you total control over all aspects of the exposure – including shutter speed and aperture. Choose M on the mode dial, then choose your shutter speed and your aperture by holding down the relevant command dials on your camera. Be prepared to alter these settings to get the right exposure (you'll see the exposure indicator in the viewfinder and on the LCD screen). Manual is very useful when you're working with constant light, where you don't want the exposure to change between frames.
You can now download a PDF version of this Hints & Tips article to read offline and print